Continuous deployment to Azure from Azure DevOps
Hosting on Azure and building on Azure DevOps? You should utilize the (now) wonderful release management tool built into DevOps. I've written about continuous deployment in the past here: Configure and deploy Azure Functions with Kudu and Continuous Deployment of Azure Functions with Slots. Since writing those posts, we have switched entirely to DevOps release management. In this post, I'll show you how to set up the full pipeline, using one of our websites as an example.
I assume that you store your source code in some sort of source control system. Whether or not you are using Git or not, it doesn't really matter for this tutorial. We use Git and love it. To tell DevOps to pick up new commits to your repository and build/deploy it, go to DevOps | Build and release | Builds and click the + New button. This will show the creation wizard:
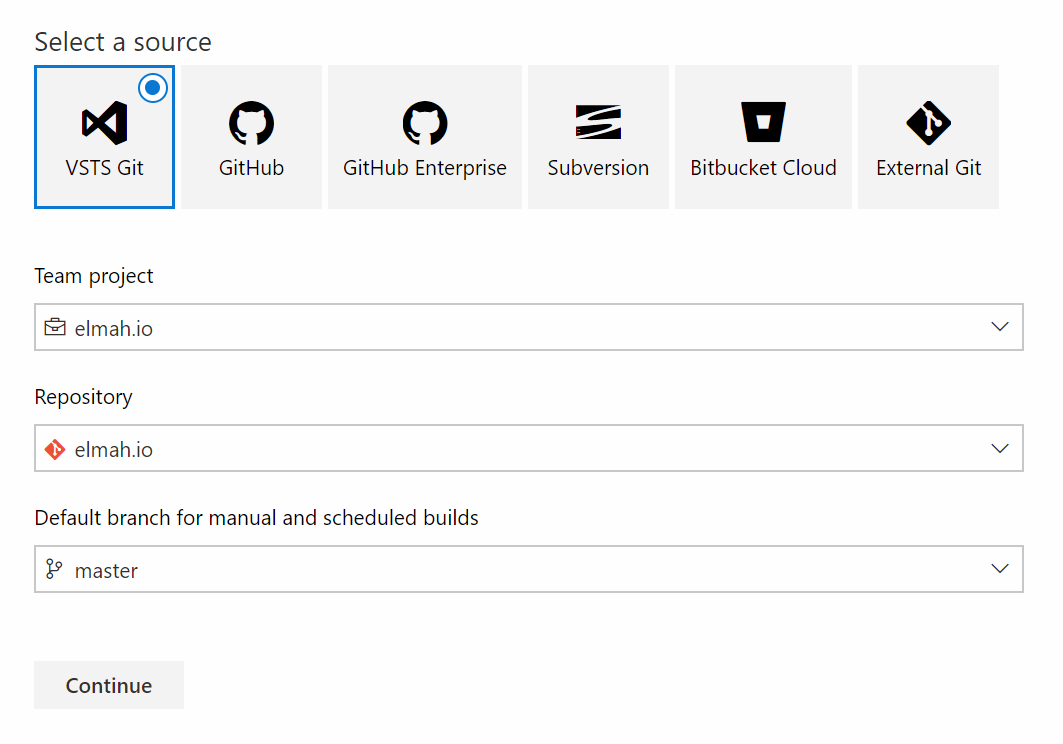
Select your repository using one of the sources in the top and hit Continue. Now select a template:
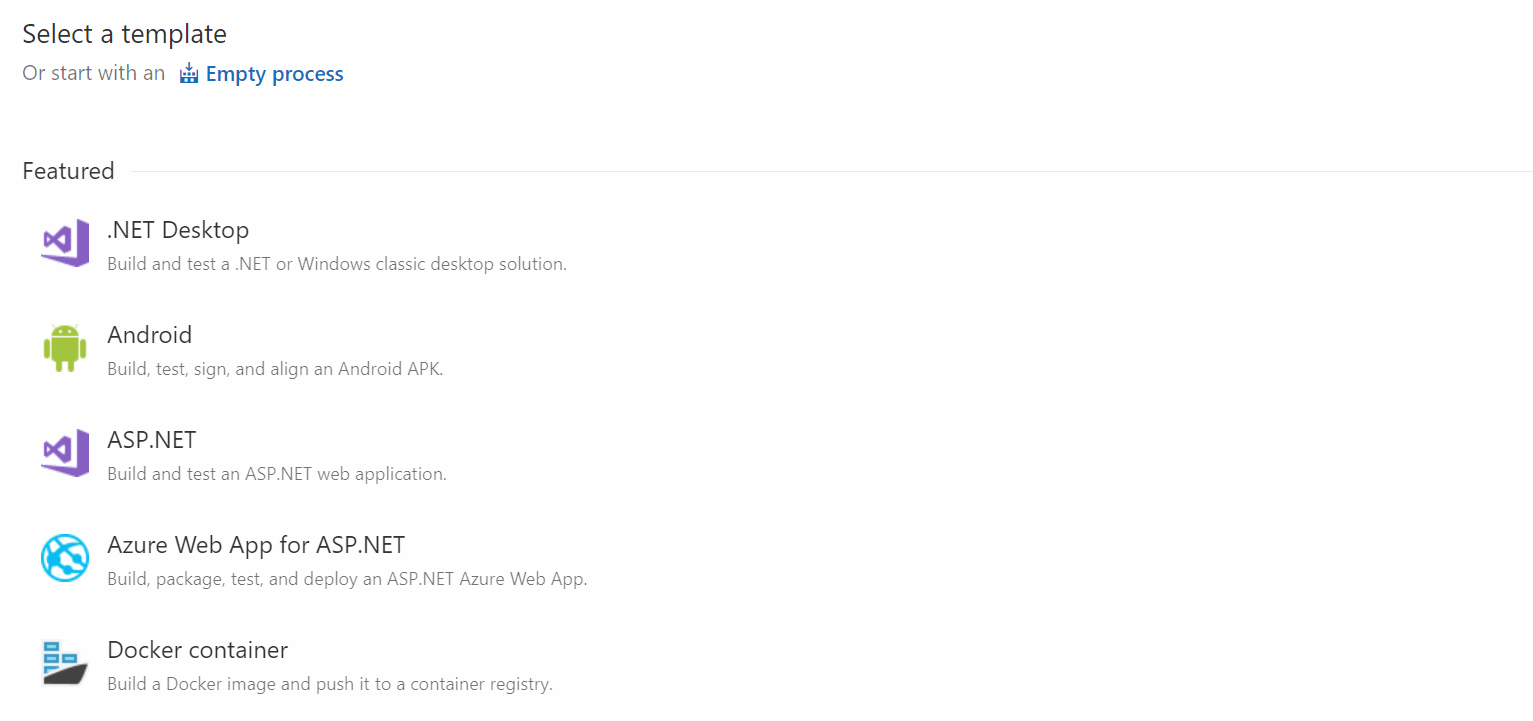
DevOps comes with a great set of default build configurations. For this tutorial, I'll select ASP.NET, since the website to build and deploy are built using ASP.NET Web API. Click Apply. A build configuration for your project is created:
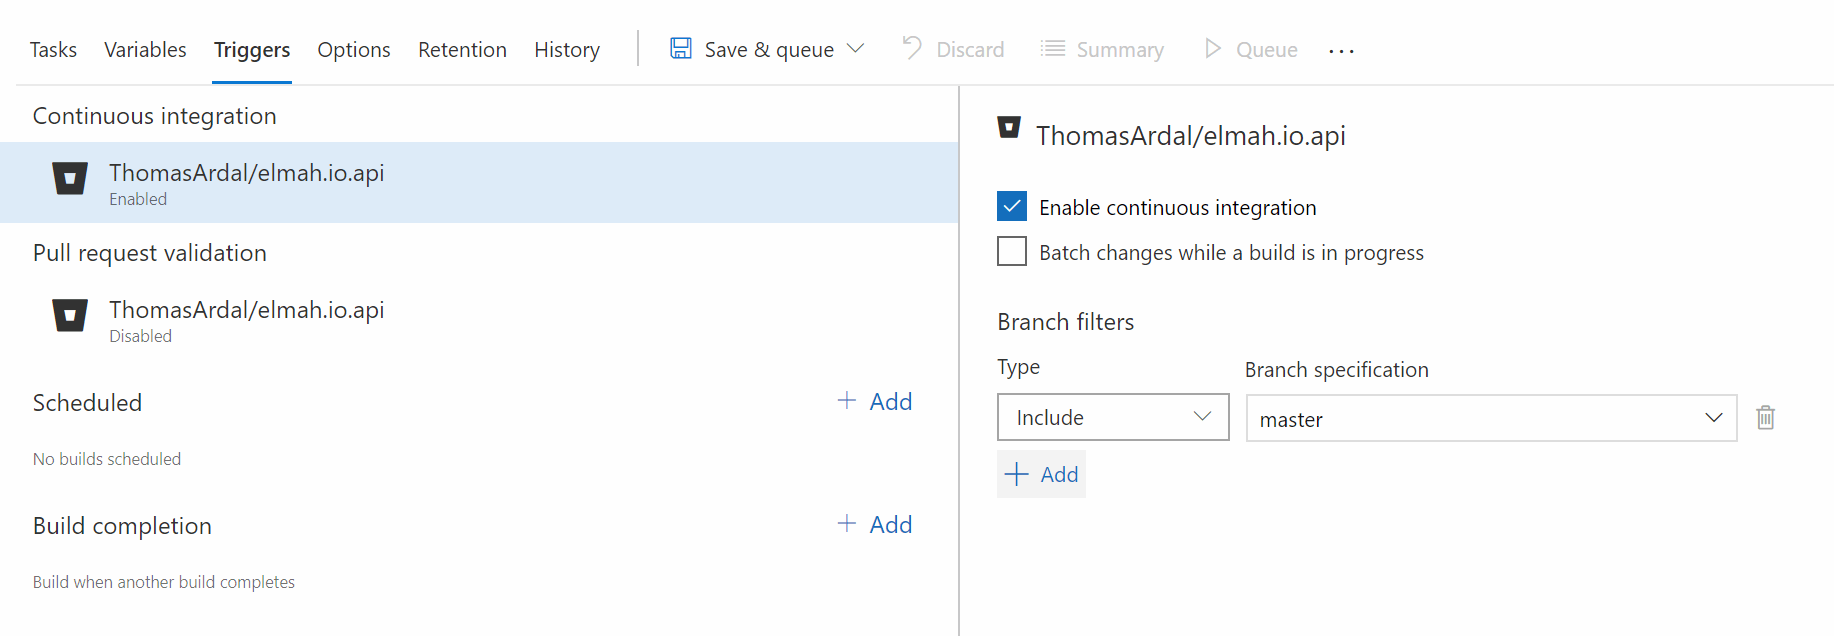
To make sure that DevOps picks up new commits and builds them, go to the Triggers tab and enable the Enable continuous integration checkbox:
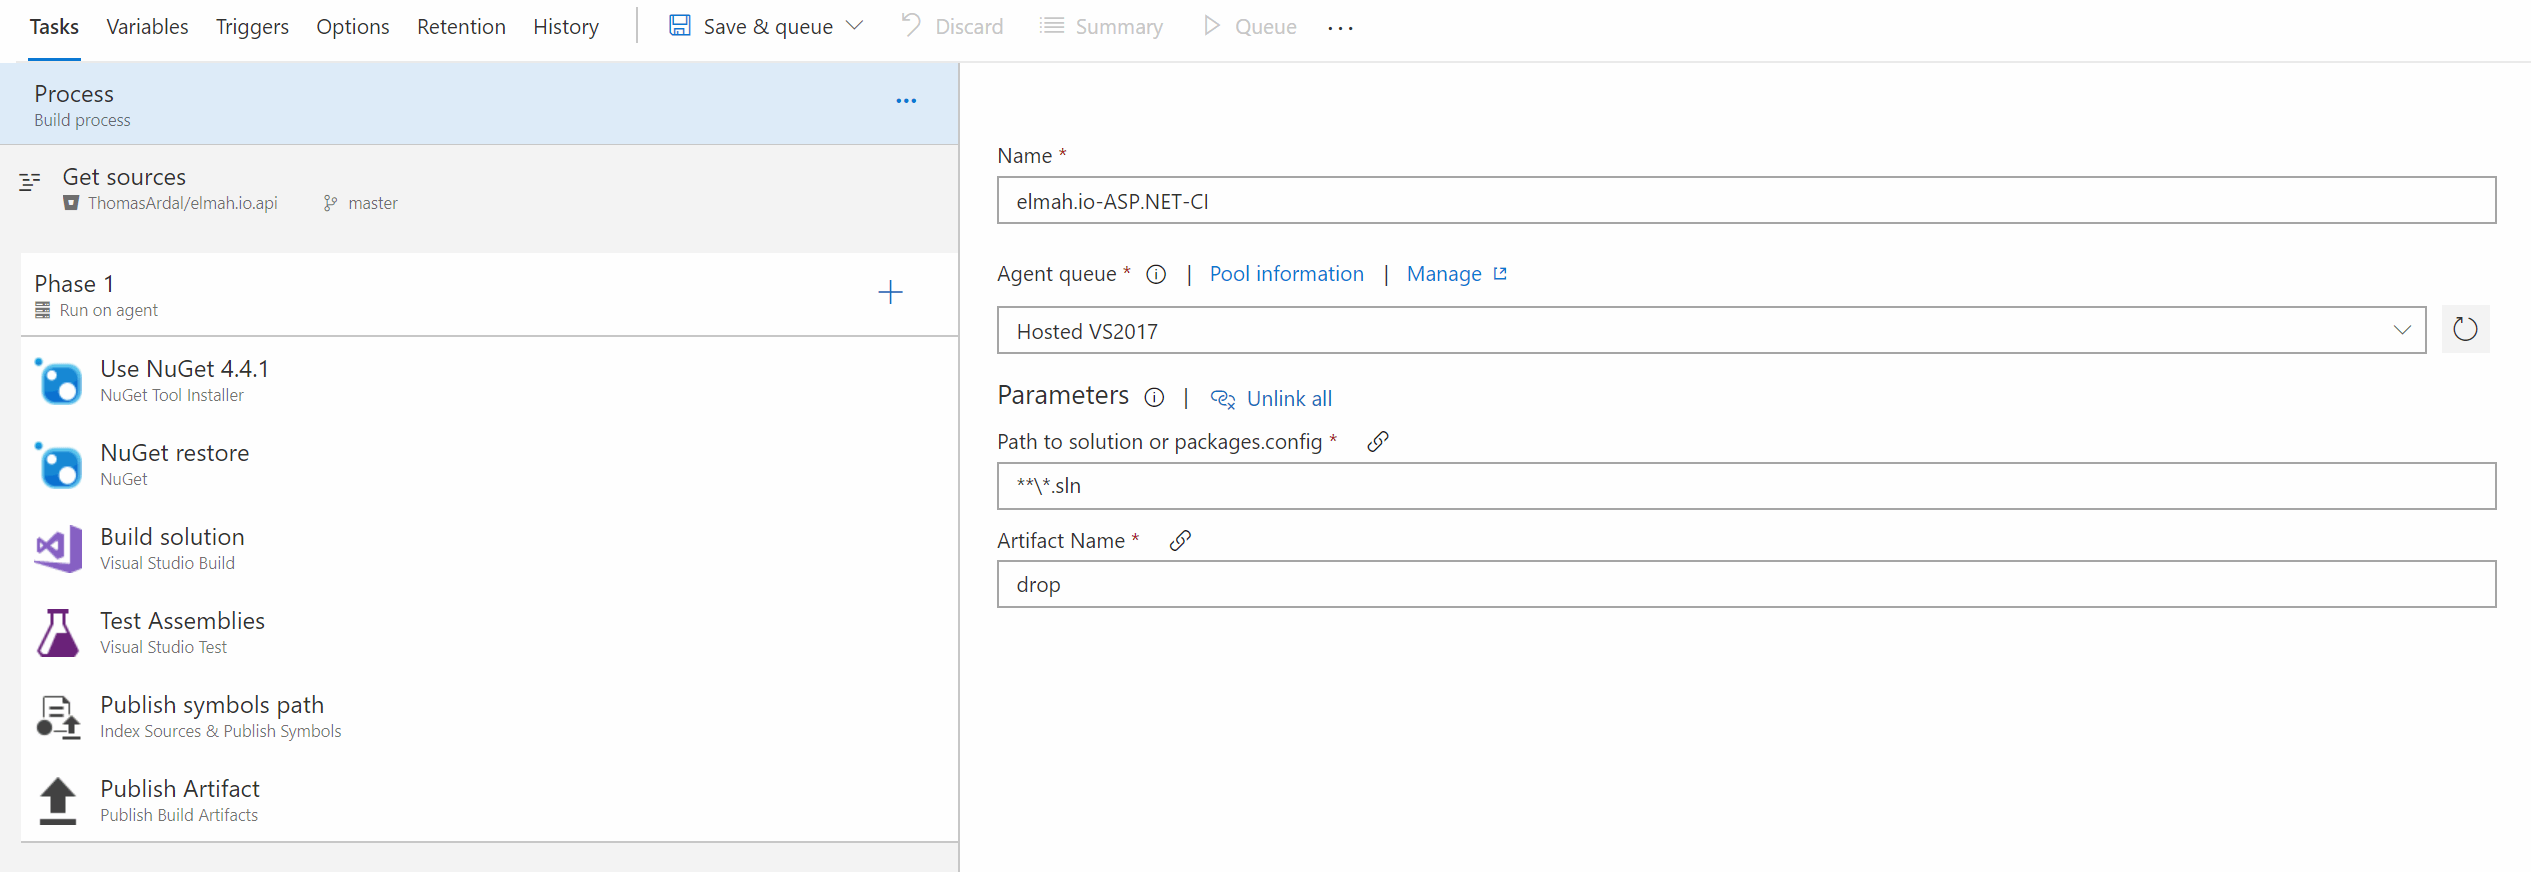
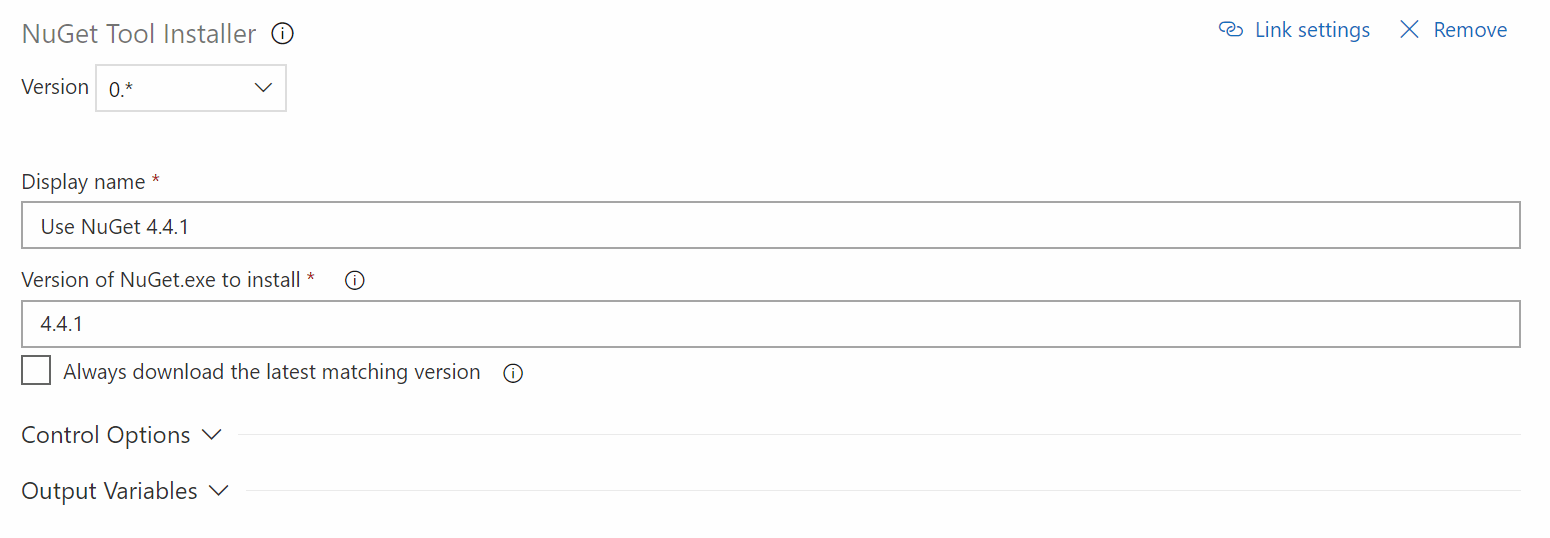
Let's quickly go through each build step. The first step tells DevOps to use a specific version of NuGet. You can click the Always download the latest matching version if you'd like:
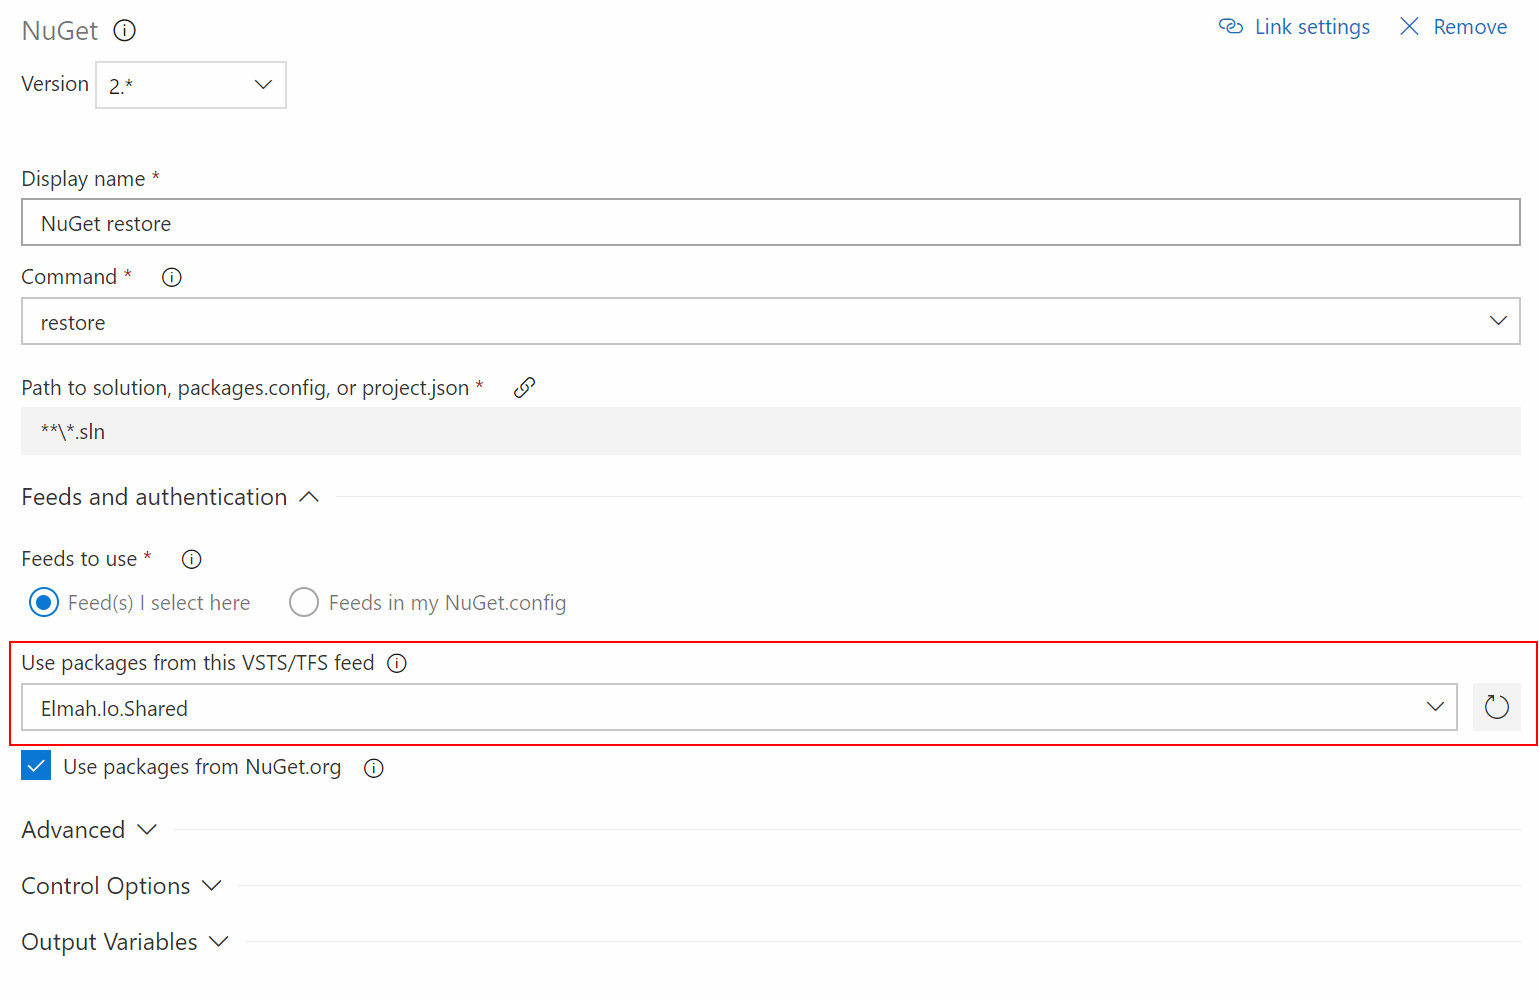
The NuGet restore step automatically scans for all solution files and restores NuGet dependencies. We use the internal NuGet server available in DevOps, which is why we tell DevOps to look for packages there as well as on nuget.org:
In the Build solution step, DevOps builds all solutions in your repository (you only have one, right?). As part of the build, MSBuild packages the website as a zip file:
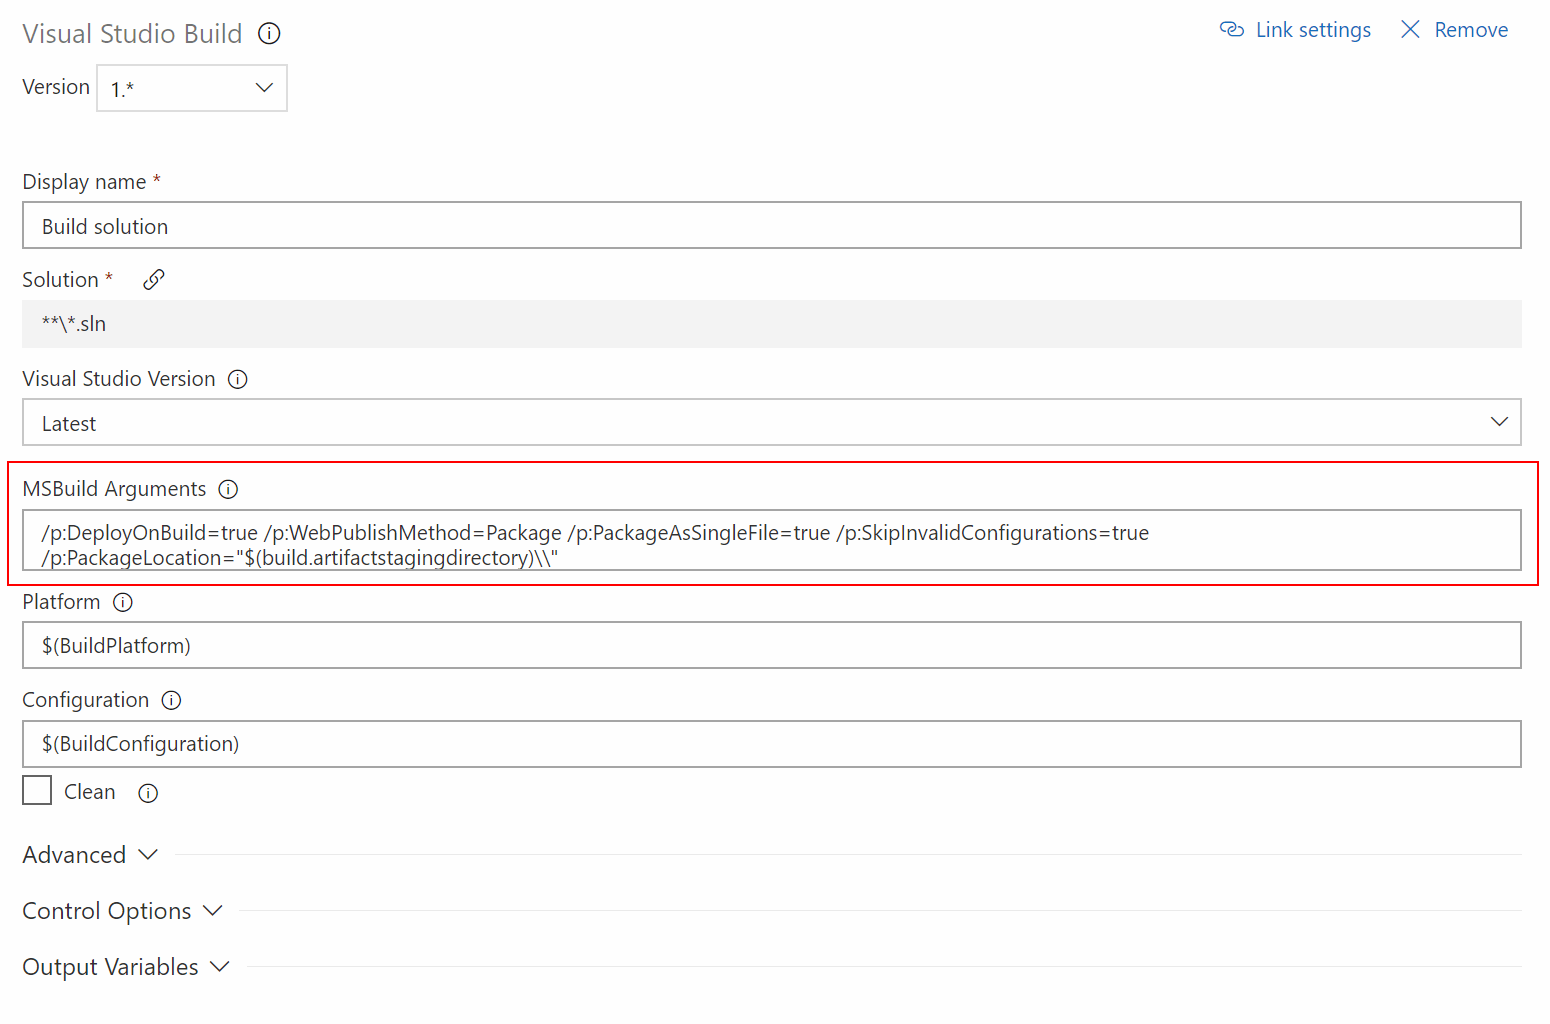
This step is important for the release management system to work, so remember to add the arguments if they are not already there.
We love writing unit tests, which is why we want to keep the Test Assemblies step just as it were. As long as you postfix the name of your test assembly/assemblies with test, you should be fine.
The Publish symbols path step lets you publish symbols to the built-in symbol server. If you want to debug a release built, you will need this step.
Finally, the Publish Artifact step copies the zip file, just built to a folder visible for other parts of DevOps (like release management).
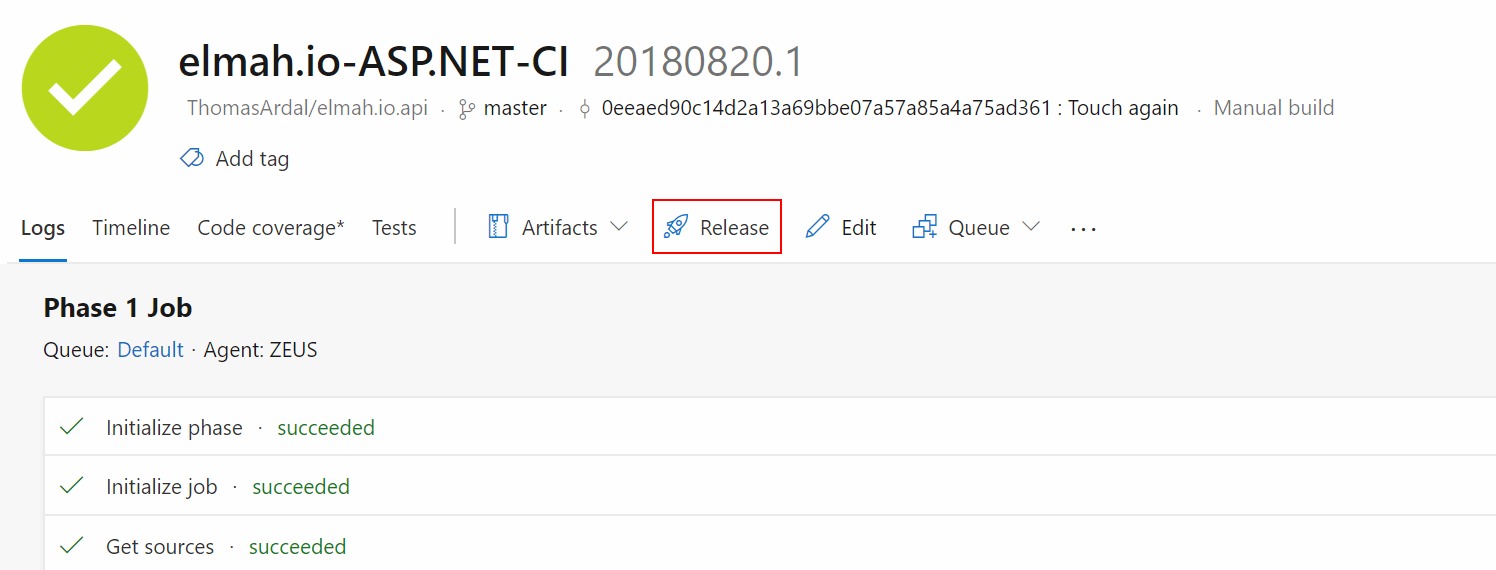
That's it. Clicking Save & queue, let's you test to see that everything is working as expected.
Now for the release part. On the recent successful release, click the Release button:
This will launch the release management template. As I want to release the newly build website to Azure, I select the Azure App Service deployment template and click Apply. Finally, I name the environment Staging, which results in the following pipeline:
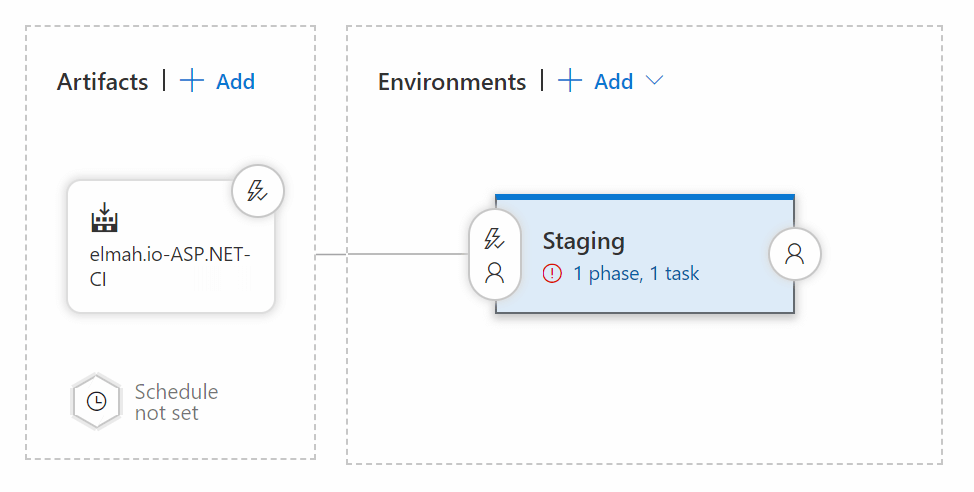
Notice how DevOps automatically picked up the output from the build. In order to tell DevOps where to deploy the code, click the 1 phase, 1 task link on the Staging environment:
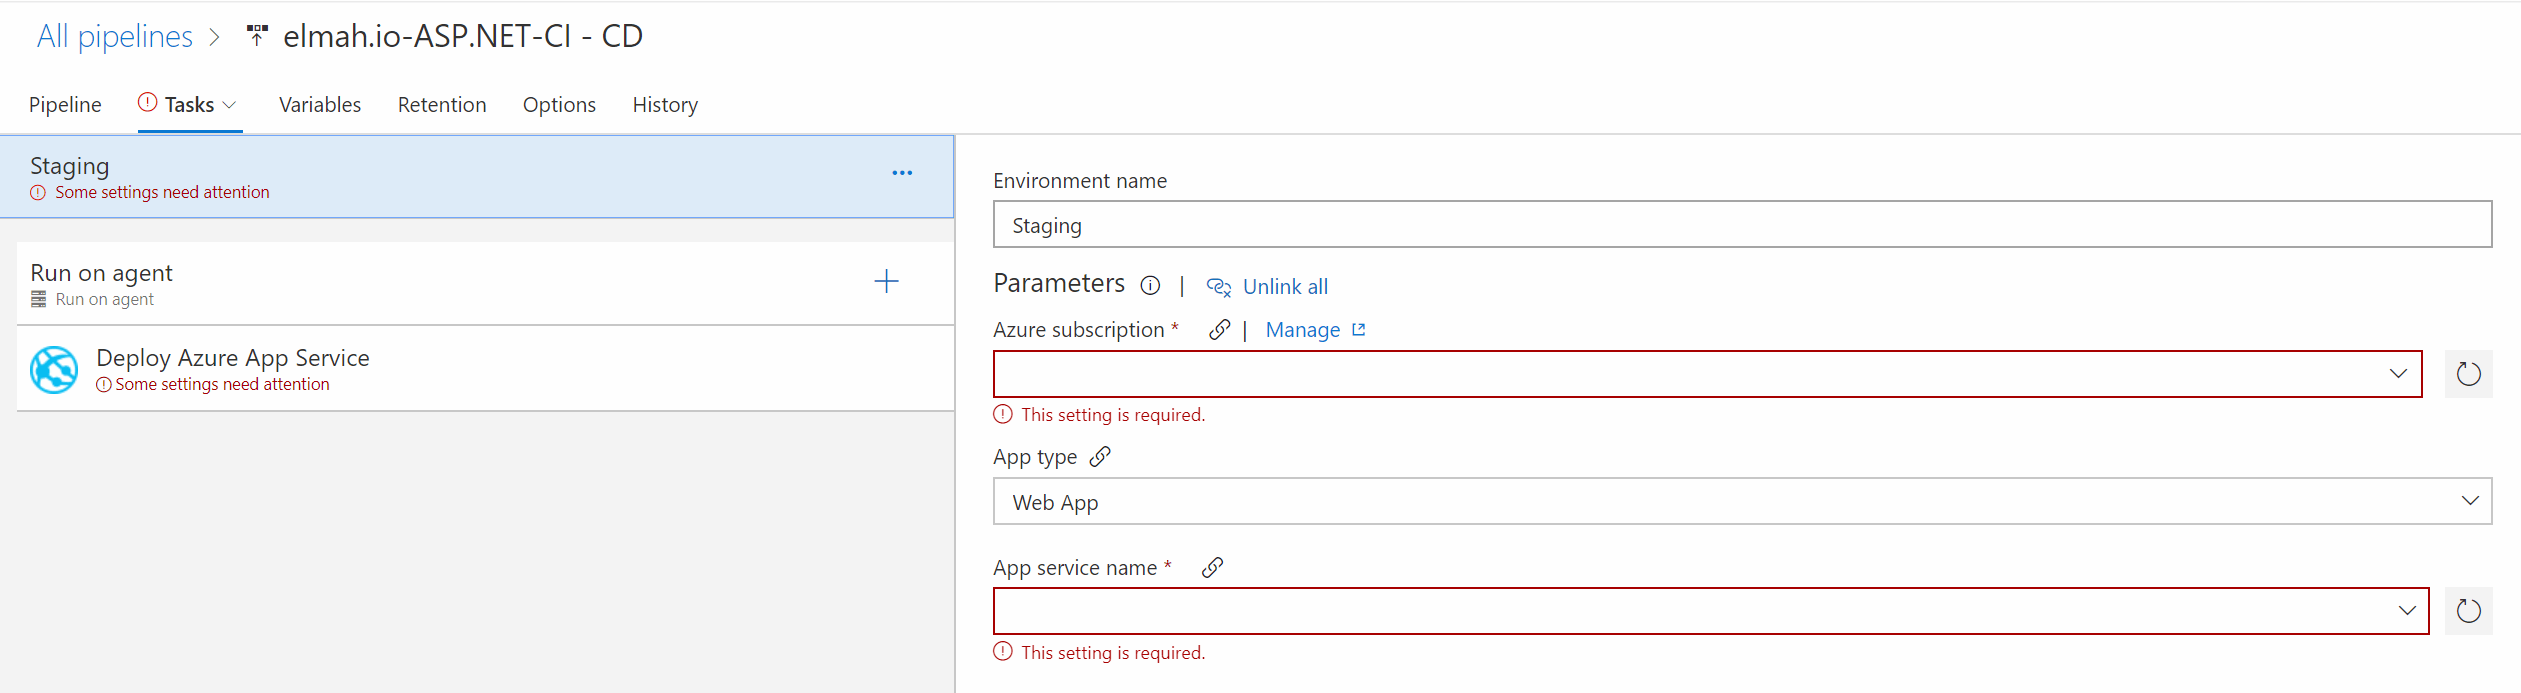
On this screen, you want to configure the Azure Web App to deploy to. In order to be able to show everything on a single screenshot, I've clicked the Unlink all link and set up all the choices on the Deploy Azure App Service release step:
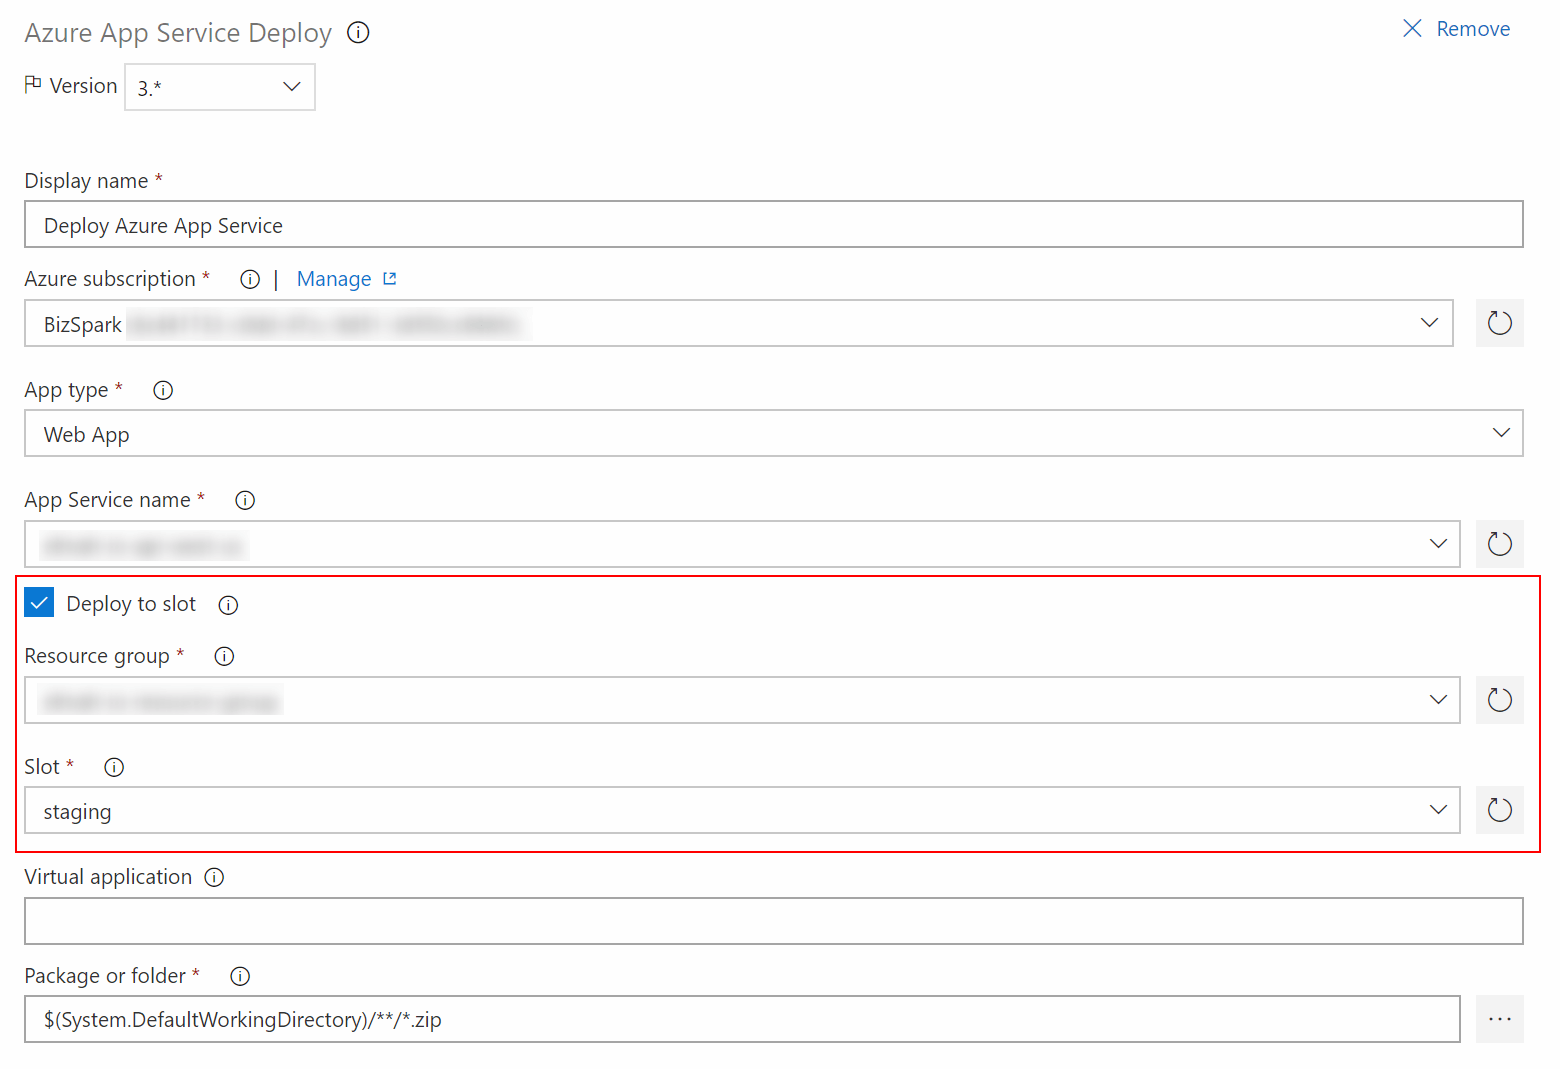
Notice how I've selected Deploy to slot and selected the staging slot on my Azure web app. We are using a deployment slot for all of our user-facing websites, in order for us to be able to do a final manual test before deploying to production. If you want to deploy directly to production, you should simply name the environment Production and uncheck the Deploy to slot checkbox.
After a manual test, I want DevOps to deploy the website to production. To do so, add an additional environment by going back to the pipeline and click the + Add button below the Staging environment. I'm going to select the Empty process template since I want to add the next release step manually. Finally, I name the new environment Production and the pipeline now looks like this:
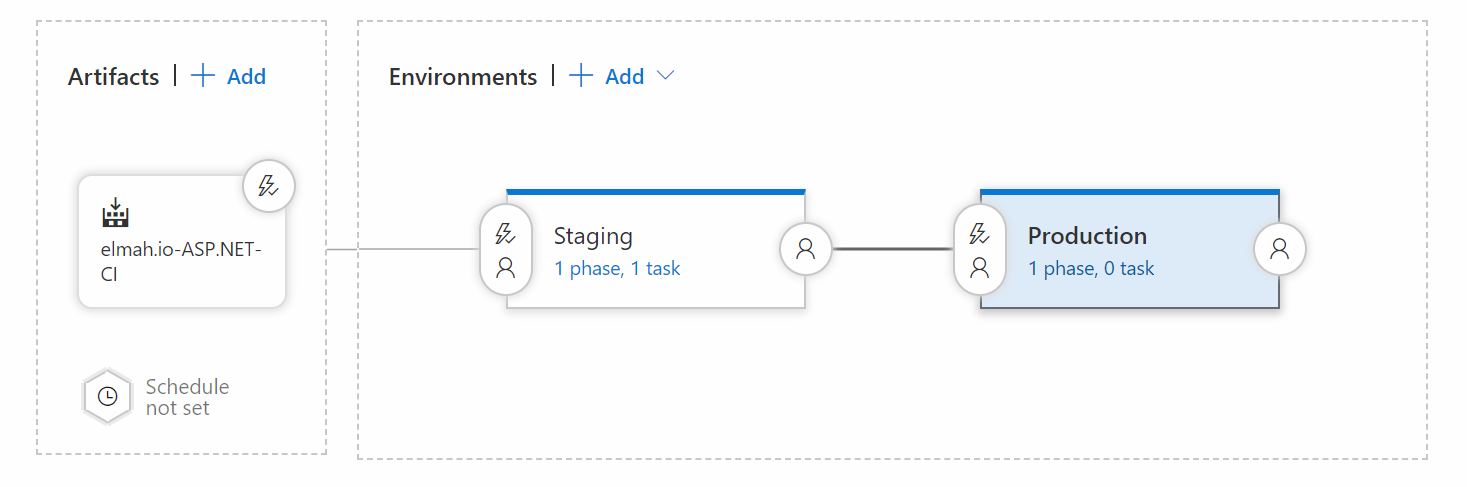
The reason I selected Empty process over Azure App Service deployment is, that I don't want DevOps to deploy the website again. Azure deployment slots already have swapping between staging and production built in. To swap, click the 1 phase, 0 task link on the Production environment and add the Azure App Service Manage task:
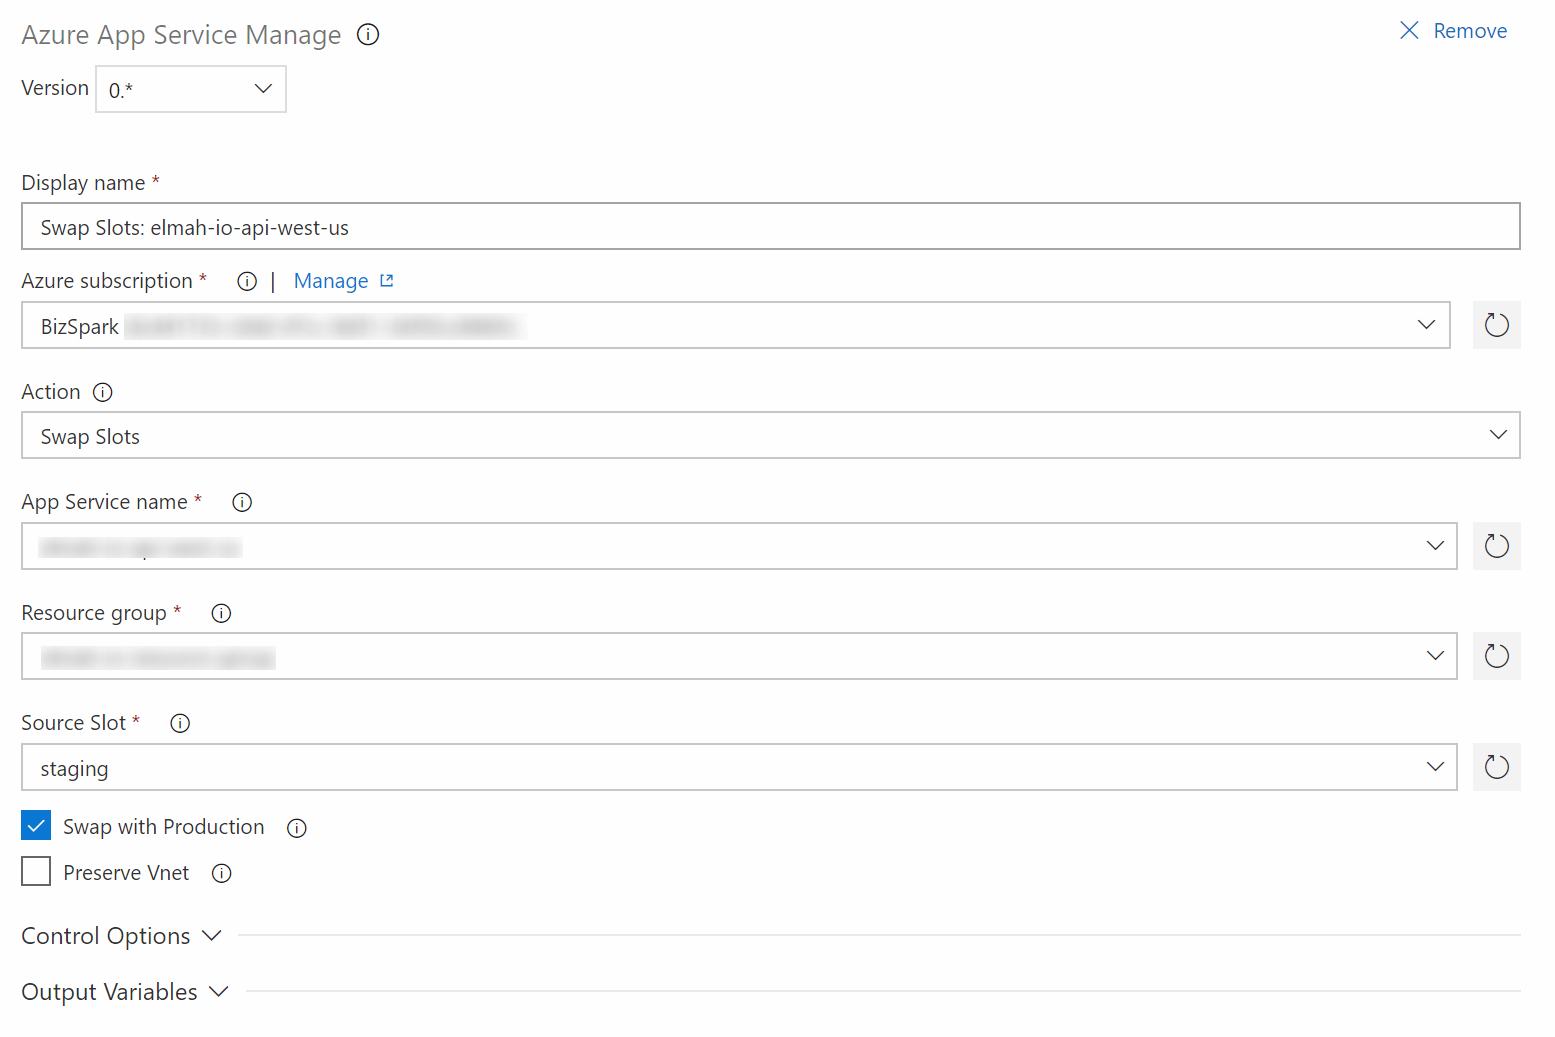
Like previously, I've filled in the nessecary Azure specific variables.
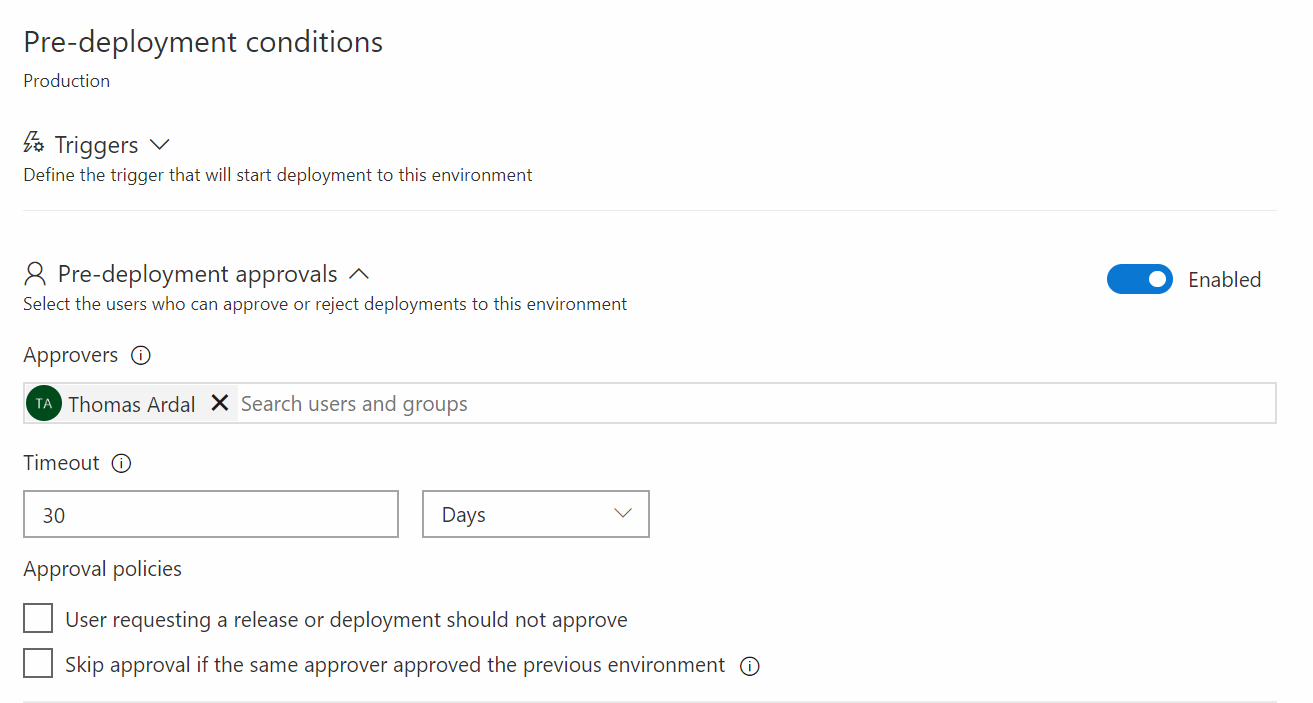
We're almost there. The only thing missing is to implement a gate between deploying to staging and production. With the current setup, all deployments to staging are automatically published to production. Since I want a manual test on staging, I'll add a Pre-deployment approval step on deployment to Production. Go back to the pipeline and click the small avatar icon on the left side of the production environment. This show the Pre-deployment conditions tab. Enable the Pre-deployment approvals toggle and input the user(s) that should be allowed to approve the deployment:
That's it folks! All commits are now automatically built and deployed to staging. After a manual test, you go to Release Management in DevOps and hit the Approve button next to the release and the Staging and Production sites on Azure are swapped. In case you are deploying to an Access Restricted website on Azure, read through Deploy Access Restricted Azure website from DevOps Pipelines.
elmah.io: Error logging and Uptime Monitoring for your web apps
This blog post is brought to you by elmah.io. elmah.io is error logging, uptime monitoring, deployment tracking, and service heartbeats for your .NET and JavaScript applications. Stop relying on your users to notify you when something is wrong or dig through hundreds of megabytes of log files spread across servers. With elmah.io, we store all of your log messages, notify you through popular channels like email, Slack, and Microsoft Teams, and help you fix errors fast.

See how we can help you monitor your website for crashes Monitor your website