
Modern authentication in ASP.NET Core with 2FA and passkey
As much as the web is evolving, cyber threats are also growing. Securing user details with a single password may not be enough to stop bad guys. Modern applications require stronger authentication. Two-factor authentication (2FA) and passkeys are two effective ways to apply efficient login. In today's post, I will walk you through how to implement 2FA and passkeys in an ASP.NET Core API. Well, that is going to be a long ride, so stay with me.
What is Two-Factor Authentication (2FA)?
Two-Factor Authentication is a security method that requires a user to provide two forms of identity verification. Unlike the traditional password login, 2FA requires users to confirm their identity using two distinct factors. Its 2-step authentication prevents unauthorized access even if the password is compromised.
What is Passkey?
A passkey is a highly secure, passwordless authentication method that provides a simple and secure way to sign in to applications. Instead of password authentication, it uses public-key cryptography. The private key stays securely on the user's device and is unlocked using biometrics (Face ID, fingerprint) or device PIN. Passkeys are based on the WebAuthn (Web Authentication API) standard and follow the FIDO2 specification.
Implementing 2FA and Passkey in ASP.NET Core .NET 10 API
I will go with the same project to implement both authentication methods. The following steps are shared between both types.
Step 1: Create a project
dotnet new web -n TwoFaNET10Step 2: Add Swagger
.NET 10 does not contain Swagger by default. However, I will use it for testing the API.
dotnet add package Swashbuckle.AspNetCore if (app.Environment.IsDevelopment())
{
app.MapOpenApi();
app.UseSwaggerUI(options =>
{
options.SwaggerEndpoint("/openapi/v1.json", "v1");
});
}Two-factor authentication in .NET 10
Step 1: Install required packages
dotnet add package Microsoft.AspNetCore.Identity.EntityFrameworkCore
dotnet add package Microsoft.AspNetCore.Identity.UI
dotnet add package Microsoft.EntityFrameworkCore
dotnet add package Microsoft.EntityFrameworkCore.Design
dotnet add package Npgsql.EntityFrameworkCore.PostgreSQL
Step 2: Create models
using Microsoft.AspNetCore.Identity;

namespace TwoFaNET10.Models;

public class ApplicationUser : IdentityUser
{
    public string? FirstName { get; set; }
    public string? LastName { get; set; }

    public DateTime CreatedAt { get; set; } = DateTime.UtcNow;

    public string FullName =>
        $"{FirstName} {LastName}".Trim();
}
IdentityUser is provided by AspNetCore's Identity namespace. Here I am creating the sub-class ApplicationUser with IdentityUser as its parent. It is a built-in user model containing necessary fields such as Email and UserName. With Microsoft's own user class, I don't have to implement password hashing, login, registration, or other authentication operations.
DTO for registering a user
public class RegisterDtoInp
{
    public string FirstName { get; set; } = string.Empty;
    public string LastName { get; set; } = string.Empty;
    public string Email { get; set; } = string.Empty;
    public string Password { get; set; } = string.Empty;
}
Login model
public class LoginDtoInp
{
    public string Email { get; set; } = string.Empty;
    public string Password { get; set; } = string.Empty;
    public bool RememberMe { get; set; }
}
TwoFactorLoginDtoInp
public class TwoFactorLoginDtoInp
{
    public string TwoFactorCode { get; set; } = string.Empty;
    public bool RememberMe { get; set; }
    public bool RememberMachine { get; set; }
}
Model for recovery of 2FA.
public class RecoveryCodeLoginDtoInp
{
    public string RecoveryCode { get; set; } = string.Empty;
}
Step 3: Create the Data context
using Microsoft.AspNetCore.Identity.EntityFrameworkCore;
using Microsoft.EntityFrameworkCore;
using TwoFaNET10.Models;

namespace TwoFaNET10.Data;

public class ApplicationDbContext: IdentityDbContext<ApplicationUser>
{
    public ApplicationDbContext(DbContextOptions<ApplicationDbContext> options)
        : base(options)
    {
    }

    protected override void OnModelCreating(ModelBuilder builder)
    {
        base.OnModelCreating(builder);
    }
}
By inheriting from IdentityDbContext<ApplicationUser>, I am leveraging the Identity namespace again to manage Identity tables using ApplicationUser.
Step 4: Add Database connection details
In appsettings.json add:
"ConnectionStrings": {
    "DefaultConnection": "Host=localhost;Port=5432;Database=TwoFaDb;Username=postgres;Password=pass"
},
In Program.cs:
builder.Services.AddDbContext<ApplicationDbContext>(options =>
    options.UseNpgsql(connectionString));
Step 5: Define Controller for the 2FA endpoints
We injected Identity's classes SignInManager and UserManager into the controller. As their names indicate, the former handles authentication operations, while the latter abstracts away users' methods.
[HttpPost("register")]
public async Task<IActionResult> Register([FromBody] RegisterDtoInp model)
{
    if (!ModelState.IsValid)
        return ValidationProblem(ModelState);

    var user = new ApplicationUser
    {
        UserName = model.Email,
        Email = model.Email,
        FirstName = model.FirstName,
        LastName = model.LastName,
        CreatedAt = DateTime.UtcNow
    };

    var result = await userManager.CreateAsync(user, model.Password);

    if (result.Succeeded)
    {
        logger.LogInformation("New user registered: {Email}", model.Email);

        return Ok(new
        {
            Success = true,
            Email = model.Email,
            Message = "User registered successfully."
        });
    }

    return BadRequest(result.Errors.Select(x => x.Description));
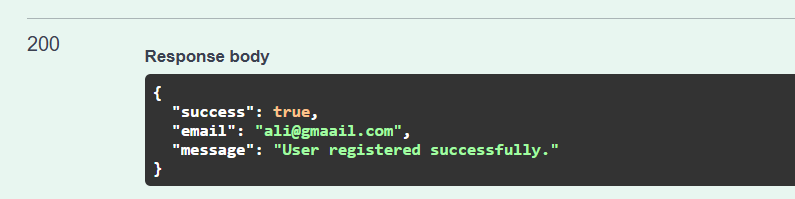
}userManager's CreateAsync method handles all the user creation abstraction itself. Registration includes validating and hashing the password and saving the user, all within a single method.
[HttpPost("login")]
public async Task<IActionResult> Login([FromBody] LoginDtoInp model)
{
    if (!ModelState.IsValid)
        return ValidationProblem(ModelState);

    var result = await signInManager.PasswordSignInAsync(
        model.Email,
        model.Password,
        model.RememberMe,
        lockoutOnFailure: true);

    if (result.Succeeded)
    {
        logger.LogInformation("User {Email} logged in.", model.Email);

        return Ok(new
        {
            Success = true,
            Message = "Login successful."
        });
    }

    if (result.RequiresTwoFactor)
    {
        return Ok(new
        {
            RequiresTwoFactor = true,
            RememberMe = model.RememberMe
        });
    }

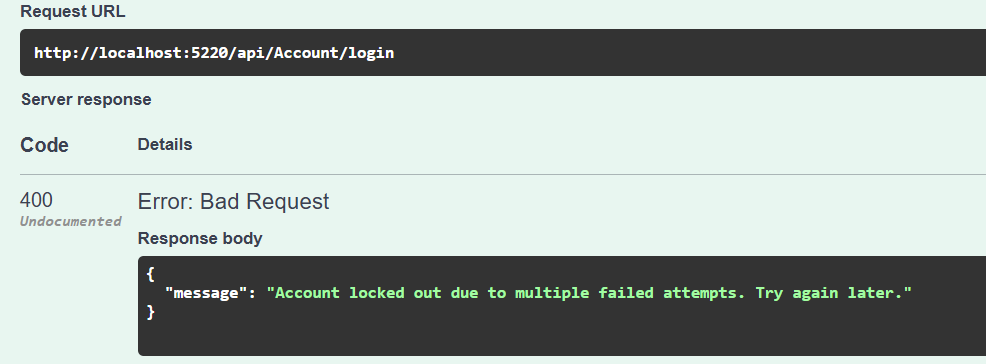
    if (result.IsLockedOut)
    {
        return BadRequest(new
        {
            Message = "Account locked out due to multiple failed attempts. Try again later."
        });
    }

    return Unauthorized(new
    {
        Message = "Invalid email or password."
    });
}
Again, we don't need to peek inside the PasswordSignInAsync. Surprisingly, it will handle login regardless of whether 2FA is enabled. If 5 login attempts go wrong, Identity will lock the account for 5 minutes.
[Authorize]
[HttpGet("2fa/setup-uri")]
public async Task<IActionResult> Get2FaUri()
{
    var user = await userManager.GetUserAsync(User);

    if (user == null)
        return Unauthorized();

    var key = await userManager.GetAuthenticatorKeyAsync(user);

    if (string.IsNullOrEmpty(key))
    {
        await userManager.ResetAuthenticatorKeyAsync(user);
        key = await userManager.GetAuthenticatorKeyAsync(user);
    }

    var email = user.Email;

    var uri = $"otpauth://totp/TwoFaNET10:{email}?secret={key}&issuer=TwoFaNET10&digits=6";

    return Ok(new
    {
        qrUri = uri,
        secret = key
    });
}
This endpoint generates the secret key and QR Code URI that the user scans in their authenticator app. The action is authorized, and the user must be logged in to use this endpoint. First, await userManager.GetUserAsync(User) gets the current user. Again, using userManager to get the user authenticator secret from GetAuthenticatorKeyAsync. If the user does not have one, then ResetAuthenticatorKeyAsync creates a new one. Next, you get a URI:
$"otpauth://totp/TwoFaNET10:{email}secret{key}&issuer=TwoFaNET10
&digits=6";
This qrUri can be used by a library or any other QR code generator to create a QR code.
[Authorize]
[HttpPost("2fa/enable")]
public async Task<IActionResult> Enable2FA([FromBody] string code)
{
    var user = await userManager.GetUserAsync(User);

    if (user == null)
        return Unauthorized();

    var result = await userManager.VerifyTwoFactorTokenAsync(
        user,
        TokenOptions.DefaultAuthenticatorProvider,
        code);

    if (!result)
        return BadRequest("Invalid code");

    await userManager.SetTwoFactorEnabledAsync(user, true);

    return Ok(new
    {
        Success = true,
        Message = "2FA enabled"
    });
}
The enable endpoint is responsible for verifying the QR code. After the user scans the QR code, it will take the 6-digit code you got from the authenticator app. VerifyTwoFactorTokenAsync will check that the code is valid, while the SetTwoFactorEnabledAsync method will enable it for the user. Hence, 2FA is now enabled, and on your next login, ASP.NET Core Identity will prompt you for the code.
[HttpPost("2fa/login")]
public async Task<IActionResult> TwoFactorLogin([FromBody] TwoFactorLoginDtoInp model)
{
    if (!ModelState.IsValid)
        return ValidationProblem(ModelState);

    var user = await signInManager.GetTwoFactorAuthenticationUserAsync();

    if (user is null)
        return Unauthorized(new
        {
            Message = "2FA session expired."
        });

    var code = model.TwoFactorCode
        .Replace(" ", "")
        .Replace("-", "");

    var result = await signInManager.TwoFactorAuthenticatorSignInAsync(
        code,
        model.RememberMe,
        model.RememberMachine);

    if (result.Succeeded)
    {
        logger.LogInformation("User {Id} logged in with 2FA.", user.Id);

        return Ok(new
        {
            Success = true,
            Message = "2FA login successful."
        });
    }

    if (result.IsLockedOut)
    {
        return BadRequest(new
        {
            Message = "Account locked out."
        });
    }

    return Unauthorized(new
    {
        Message = "Invalid authenticator code."
    });
}
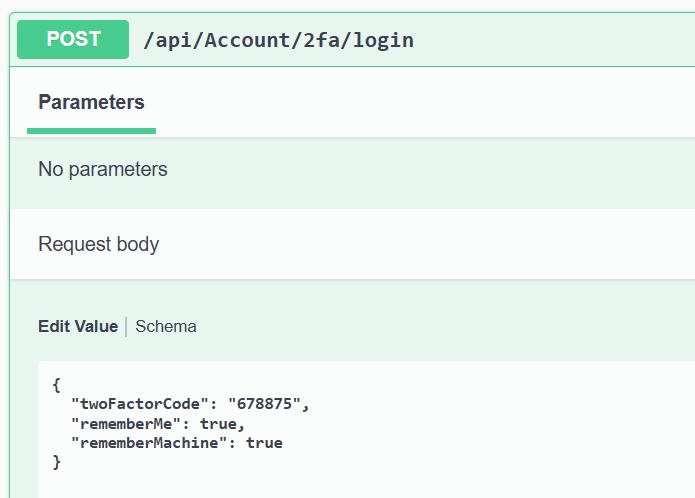
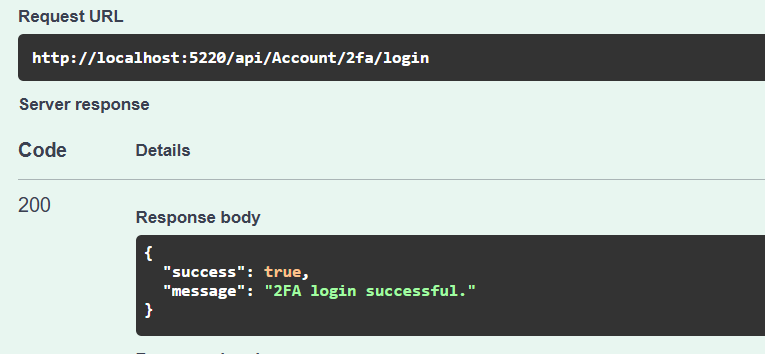
In the chronology, next is the login method. GetTwoFactorAuthenticationUserAsync will keep the user after verifying the password while waiting for the one-time password (OTP). I kept the OTP code flexible by allowing spaces or '-' before verifying it with TwoFactorAuthenticatorSignInAsync. Identity will verify the incoming code against the stored secret to authenticate the sign-in. The field RememberMe extends the login session, while RememberMachine prevents the need to enter an OTP on the same device next time.
[HttpPost("2fa/recovery-code")]
public async Task<IActionResult> LoginWithRecoveryCode(
    [FromBody] RecoveryCodeLoginDtoInp model)
{
    if (!ModelState.IsValid)
        return ValidationProblem(ModelState);

    var user = await signInManager.GetTwoFactorAuthenticationUserAsync();

    if (user is null)
        return Unauthorized(new
        {
            Message = "2FA session expired."
        });

    var recoveryCode = model.RecoveryCode.Replace(" ", "");

    var result =
        await signInManager.TwoFactorRecoveryCodeSignInAsync(recoveryCode);

    if (result.Succeeded)
    {
        logger.LogInformation(
            "User {Id} logged in with a recovery code.",
            user.Id);

        return Ok(new
        {
            Success = true,
            Message = "Recovery code login successful."
        });
    }

    if (result.IsLockedOut)
    {
        return BadRequest(new
        {
            Message = "Account locked out."
        });
    }

    return Unauthorized(new
    {
        Message = "Invalid recovery code."
    });
}
The final endpoint is an emergency button. It uses a recovery code generated earlier to set up 2FA again in case the authenticator app is unavailable, or the mobile is lost. TwoFactorRecoveryCodeSignInAsync checks whether the recovery code is unused, since it is a one-time recovery option.
Step 6: Inject Identity into the dependencies
In Program.cs add the following code:
builder.Services.AddIdentity<ApplicationUser, IdentityRole>()
    .AddEntityFrameworkStores<ApplicationDbContext>()
    .AddDefaultTokenProviders();
Step 7: Run migrations
dotnet ef migrations add InitialTo reflect the migration.
dotnet ef database updateStep 8: Run the project
dotnet runOur Swagger UI is ready.
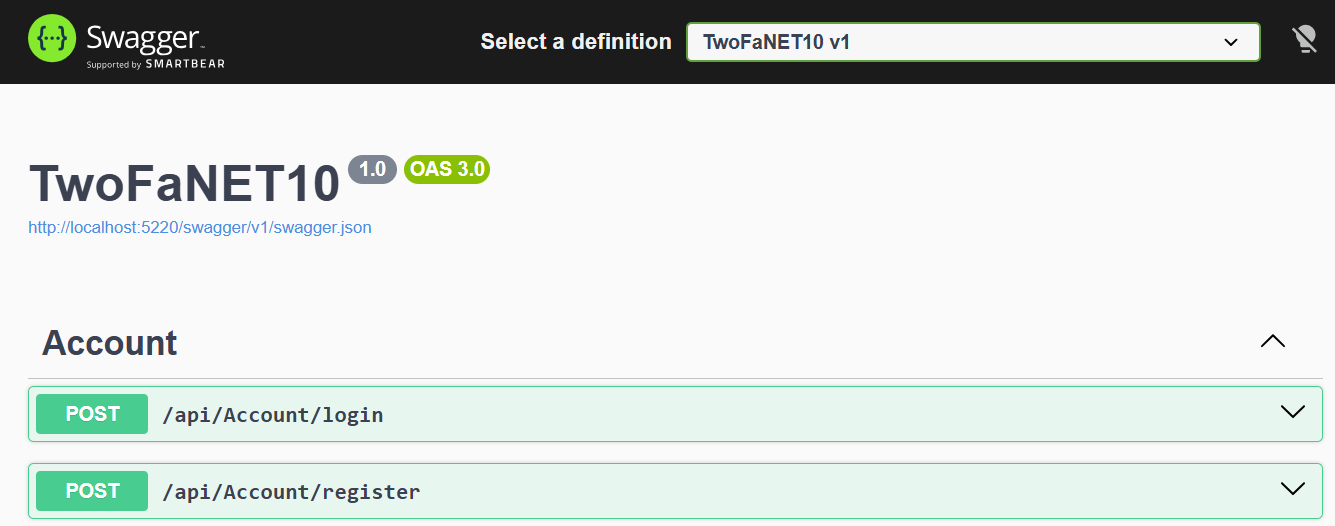
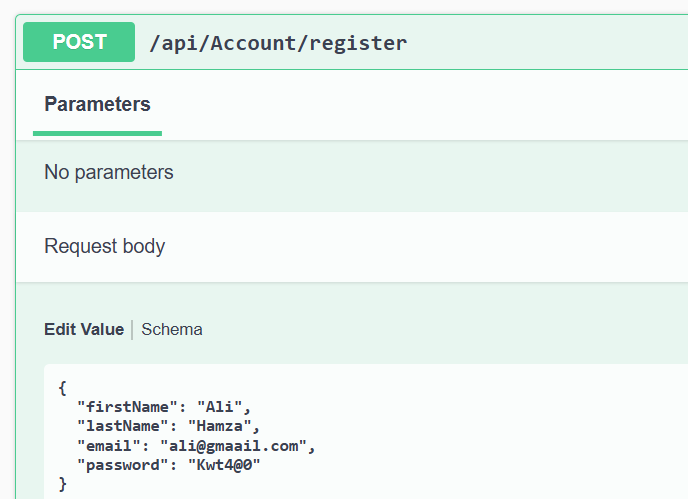
First, register a user.
Now log in.
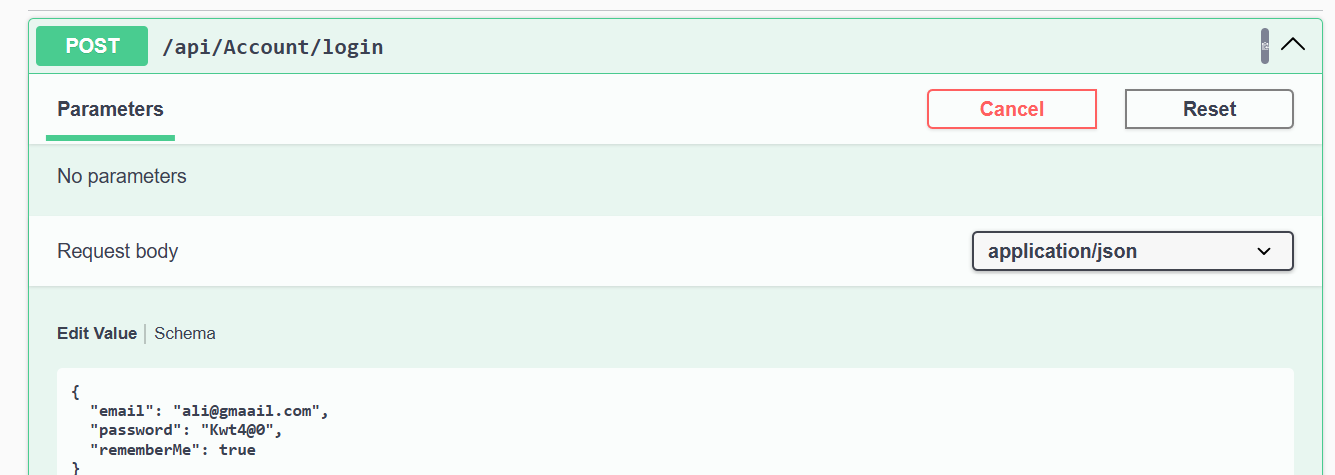
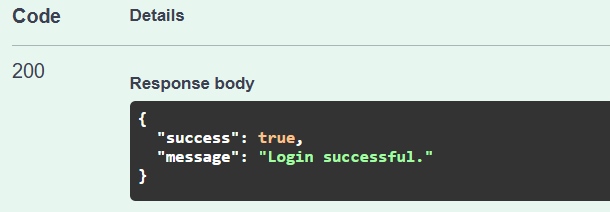
If the credentials are wrong.
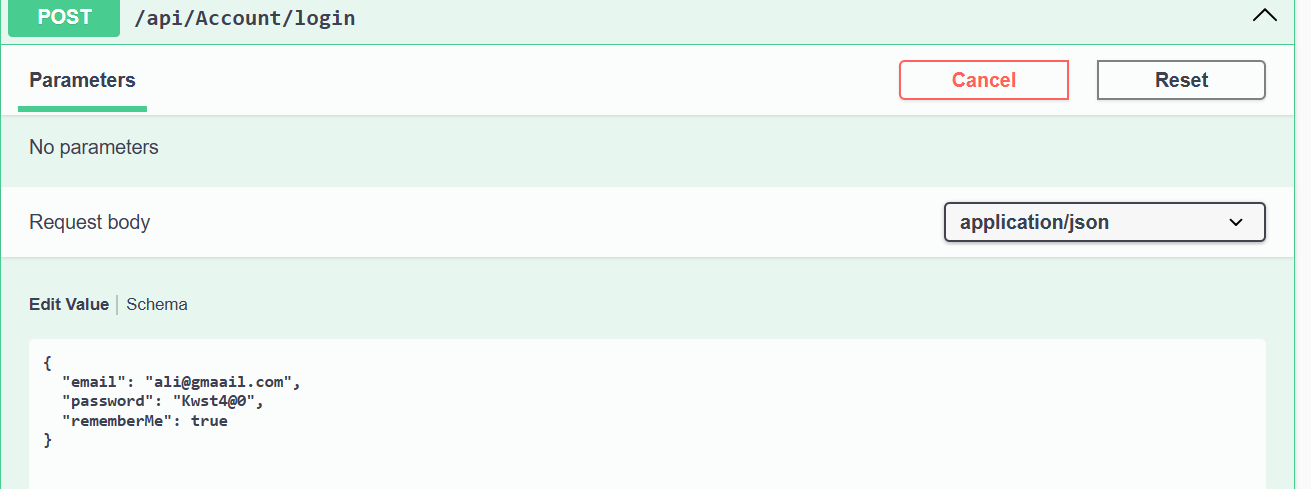
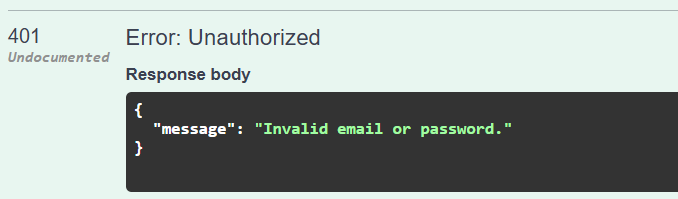
On multiple invalid attempts, we get.
Two-factor authentication URI.
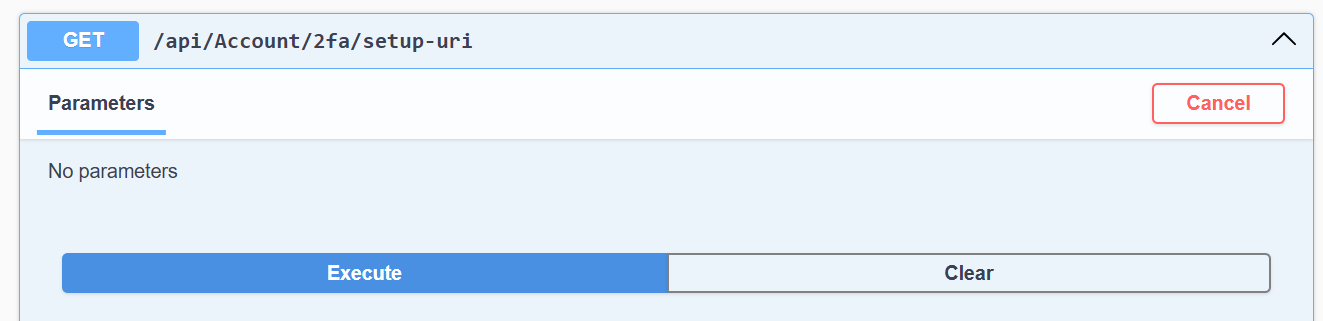
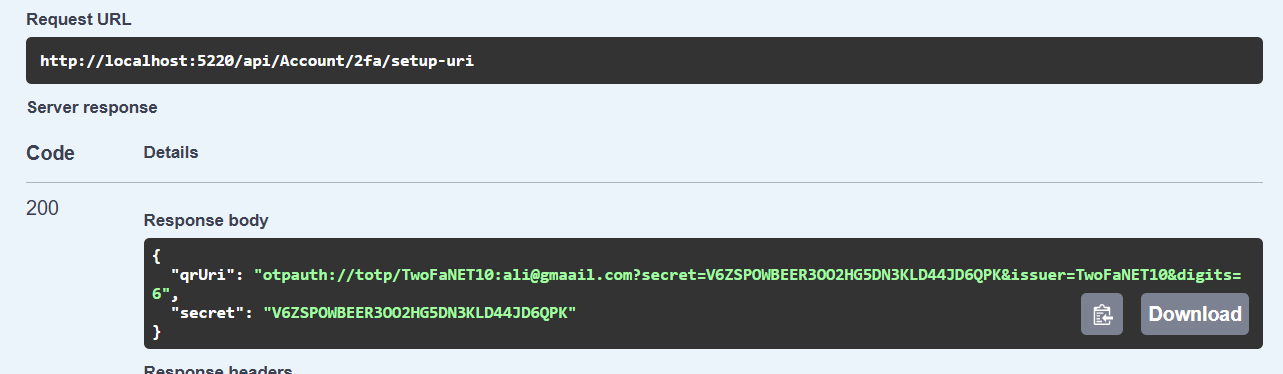
Still, my user is already logged in. The endpoint is decorated with [Authorize]. I am using an external website to generate the QR code. You can use the QRCoder package in .NET as well, but now let's keep things simple.
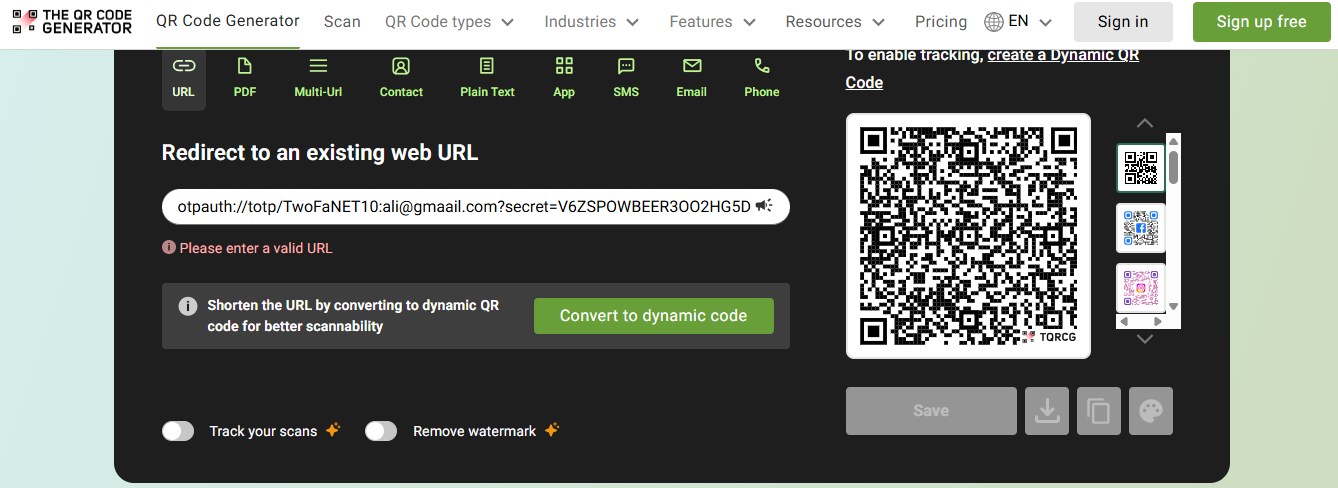
I scanned the code in my Microsoft Authenticator app, and the account was added. The one-time password code is visible to me, and I can enable 2FA through the API.
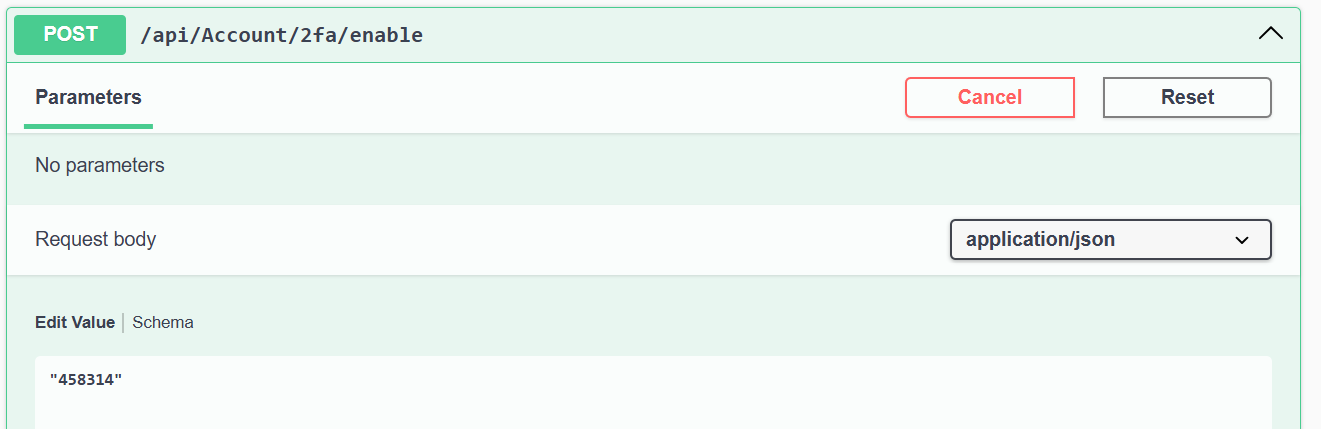
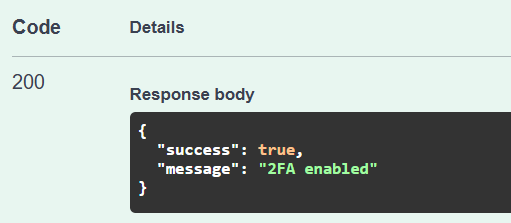
2FA is now enabled. Let's log in again.
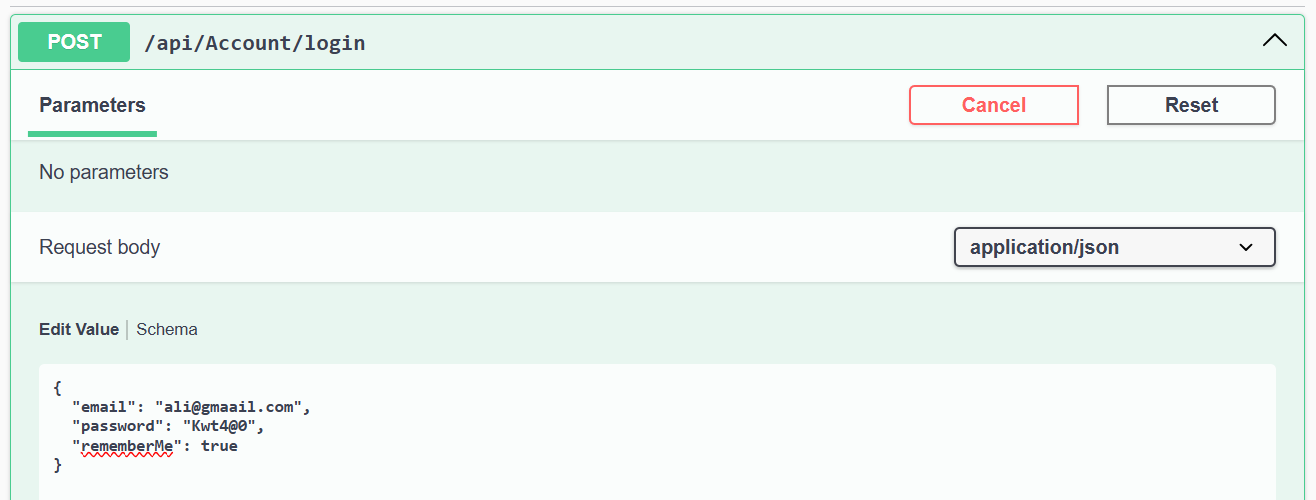
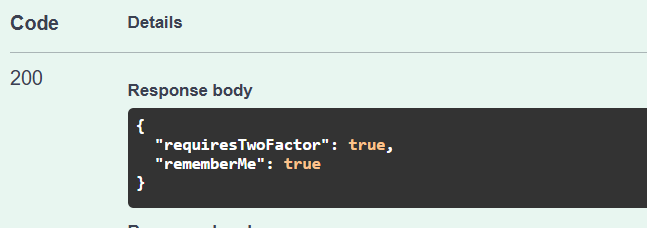
You can see the difference: earlier, login was direct without 2FA and immediately returned.
But now we have to use 2FA login.
Passkey authentication in .NET 10
.NET allows passkey implementation for WebAuthn/FIDO compliance. Let's go through it step by step.
Step 1: Install packages
dotnet add package Fido2
dotnet add package Microsoft.AspNetCore.Session
The Fido2 package handles passkey tasks of enabling passkey, Windows Hello, Face ID, and passwordless authentication. While AspNetCore.Session provides session storage for Fido2 challengers.
Step 2: Create models
StoredCredential
using System.ComponentModel.DataAnnotations;
using System.ComponentModel.DataAnnotations.Schema;

namespace TwoFaNET10.Models;

public class StoredCredential
{
    public int Id { get; set; }

    [Required]
    public string UserId { get; set; } = string.Empty;

    [Required]
    public byte[] CredentialId { get; set; } = Array.Empty<byte>();

    [Required]
    public byte[] PublicKey { get; set; } = Array.Empty<byte>();

    public uint SignatureCounter { get; set; }

    public string CredType { get; set; } = string.Empty;

    public DateTime RegDate { get; set; } = DateTime.UtcNow;

    public Guid AaGuid { get; set; }

    public byte[] UserHandle { get; set; } = Array.Empty<byte>();

    public string? FriendlyName { get; set; }

    [ForeignKey(nameof(UserId))]
    public ApplicationUser User { get; set; } = null!;
}
It stores a user's passkey information. CredentialId is a unique identifier of the passkey. When a user logs in, the server looks up the incoming credential ID. The Publickey is saved on the server that verifies using the private key saved on the user's device. CredentialType is another important field specifying the type of WebAuthn credential, in our case, it is PublicKey.
CompletePasskeyRegistrationDtoInp
using Fido2NetLib;

namespace TwoFaNET10.Models.Dtos;

public class CompletePasskeyRegistrationDtoInp
{
    public AuthenticatorAttestationRawResponse AttestationResponse { get; set; } = null!;
    public string? FriendlyName { get; set; }
}
PasskeyAssertionRequest
namespace TwoFaNET10.Models.Dtos;

public record PasskeyAssertionRequest(string? Username);
A simple value type was enough here, so I used a record.
Step 3: Add a new table to the context
public DbSet<StoredCredential> StoredCredentials => Set<StoredCredential>();Step 4: Add Fido2 configurations
Add the following object to appsettings.json.
"Fido2": {
  "ServerDomain": "localhost",
  "ServerName": "TwoFaNET10",
  "Origins": [
    "http://localhost:5220"
  ]
},
And, in Program.cs add the following code.
builder.Services.AddFido2(options =>
{
    options.ServerDomain = builder.Configuration["Fido2:ServerDomain"] ?? "localhost";
    options.ServerName = builder.Configuration["Fido2:ServerName"] ?? "TwoFactorAuth";
    options.Origins = builder.Configuration.GetSection("Fido2:Origins").Get<HashSet<string>>()
                      ?? [];
    options.TimestampDriftTolerance = builder.Configuration.GetValue<int>("Fido2:TimestampDriftTolerance", 300000);
});
Step 5: Add Distributed cache
Passkeys are set in the session cache, so injecting the cache in Program.cs. For production APIs, use an in-memory cache or Redis.
builder.Services.AddDistributedMemoryCache();
builder.Services.AddSession();
builder.Services.AddHttpContextAccessor();

app.UseSession();
The HTTP context is needed to fetch the logged-in user's session.
Step 6: Define Passkey service
Service interface
using Fido2NetLib;
using TwoFaNET10.Models;

namespace TwoFaNET10.Services;

public interface IPasskeyService
{
    Task<CredentialCreateOptions> GetAttestationOptionsAsync(ApplicationUser user);

    Task<(bool Success, string Error)> MakeCredentialAsync(
        AuthenticatorAttestationRawResponse attestationResponse,
        ApplicationUser user,
        string? friendlyName);

    Task<AssertionOptions> GetAssertionOptionsAsync(string? username);

    Task<(bool Success, string UserId, string Error)> MakeAssertionAsync(
        AuthenticatorAssertionRawResponse assertionResponse);
}
Implementation
using System.Text;
using Fido2NetLib;
using Fido2NetLib.Objects;
using Microsoft.EntityFrameworkCore;
using TwoFaNET10.Data;
using TwoFaNET10.Models;

namespace TwoFaNET10.Services;

public class PasskeyService(
    IFido2 fido2,
    ApplicationDbContext db,
    IHttpContextAccessor httpContextAccessor,
    ILogger<PasskeyService> logger) : IPasskeyService
{
    private const string AttestationKey = "fido2.attestationOptions";
    private const string AssertionKey = "fido2.assertionOptions";
    public async Task<CredentialCreateOptions> GetAttestationOptionsAsync(ApplicationUser user)
    {
        var existingCredentials = await db.StoredCredentials
            .Where(c => c.UserId == user.Id)
            .ToListAsync();

        var excludeCredentials = existingCredentials
            .Select(c => new PublicKeyCredentialDescriptor(c.CredentialId))
            .ToList();

        var fido2User = new Fido2User
        {
            Id = Encoding.UTF8.GetBytes(user.Id),
            Name = user.Email!,
            DisplayName = user.FullName
        };

        var authenticatorSelection = new AuthenticatorSelection
        {
            UserVerification = UserVerificationRequirement.Required,
            ResidentKey = ResidentKeyRequirement.Required,
            RequireResidentKey = true
        };

        var options = fido2.RequestNewCredential(new RequestNewCredentialParams
        {
            User = fido2User,
            AuthenticatorSelection = authenticatorSelection,
            ExcludeCredentials = excludeCredentials,
            AttestationPreference = AttestationConveyancePreference.None
        });

        // DO NOT rely on session in production (still ok for dev)
        Session.SetString(AttestationKey, options.ToJson());

        return options;
    }

    public async Task<(bool Success, string Error)> MakeCredentialAsync(
        AuthenticatorAttestationRawResponse attestationResponse,
        ApplicationUser user,
        string? friendlyName)
    {
        try
        {
            var json = Session.GetString(AttestationKey);
            if (string.IsNullOrEmpty(json))
                return (false, "Session expired. Please try again.");

            var options = CredentialCreateOptions.FromJson(json);

            var existingCredIds = await db.StoredCredentials
                .Select(x => x.CredentialId)
                .ToListAsync();

            var credential = await fido2.MakeNewCredentialAsync(new MakeNewCredentialParams
            {
                AttestationResponse = attestationResponse,
                OriginalOptions = options,

                IsCredentialIdUniqueToUserCallback = (args, ct) =>
                {
                    return Task.FromResult(
                        !existingCredIds.Any(id => id.SequenceEqual(args.CredentialId))
                    );
                }
            });

            db.StoredCredentials.Add(new StoredCredential
            {
                UserId = user.Id,
                CredentialId = credential.Id,
                PublicKey = credential.PublicKey,
                SignatureCounter = credential.SignCount,
                CredType = credential.Type.ToString(),
                RegDate = DateTime.UtcNow,
                AaGuid = credential.AaGuid,
                UserHandle = credential.User.Id,
                FriendlyName = string.IsNullOrWhiteSpace(friendlyName)
                    ? "My Passkey"
                    : friendlyName
            });

            await db.SaveChangesAsync();

            return (true, string.Empty);
        }
        catch (Exception ex)
        {
            logger.LogError(ex, "Error making credential for user {UserId}", user.Id);
            return (false, ex.Message);
        }
    }

    public async Task<AssertionOptions> GetAssertionOptionsAsync(string? username)
    {
        var allowedCredentials = new List<PublicKeyCredentialDescriptor>();

        if (!string.IsNullOrWhiteSpace(username))
        {
            var user = await db.Users.FirstOrDefaultAsync(u => u.Email == username);
            if (user is not null)
            {
                var userCredentials = await db.StoredCredentials
                    .Where(c => c.UserId == user.Id)
                    .ToListAsync();

                allowedCredentials = userCredentials
                    .Select(c => new PublicKeyCredentialDescriptor(c.CredentialId))
                    .ToList();
            }
        }
        var assertionOpt = new GetAssertionOptionsParams
        {
            AllowedCredentials = allowedCredentials,
            UserVerification = UserVerificationRequirement.Preferred
        };
        var options = fido2.GetAssertionOptions(assertionOpt);

        Session.SetString(AssertionKey, options.ToJson());
        return options;
    }

    public async Task<(bool Success, string UserId, string Error)> MakeAssertionAsync(
        AuthenticatorAssertionRawResponse assertionResponse)
    {
        try
        {
            var json = Session.GetString(AssertionKey);
            if (string.IsNullOrEmpty(json))
                return (false, string.Empty, "Session expired. Please try again.");

            var options = AssertionOptions.FromJson(json);

            var storedCred = await db.StoredCredentials
                .FirstOrDefaultAsync(c => c.CredentialId == assertionResponse.RawId);

            if (storedCred is null)
                return (false, string.Empty, "Passkey not found.");

            var result = await fido2.MakeAssertionAsync(new MakeAssertionParams
            {
                AssertionResponse = assertionResponse,
                OriginalOptions = options,
                StoredPublicKey = storedCred.PublicKey,
                StoredSignatureCounter = storedCred.SignatureCounter,

                IsUserHandleOwnerOfCredentialIdCallback = (args, ct) =>
                {
                    return Task.FromResult(
                        storedCred.UserHandle.SequenceEqual(args.UserHandle)
                    );
                }
            });

            storedCred.SignatureCounter = result.SignCount;
            await db.SaveChangesAsync();

            return (true, storedCred.UserId, string.Empty);
        }
        catch (Exception ex)
        {
            logger.LogError(ex, "Error verifying passkey assertion");
            return (false, string.Empty, ex.Message);
        }
    }

    private ISession Session =>
        httpContextAccessor.HttpContext?.Session
        ?? throw new InvalidOperationException("HttpContext session is not available.");
}
GetAttestationOptionsAsync generates the WebAuthn registration challenge for a logged-in user. The method converts their credential IDs into excludeCredentials after fetching the user's existing passkeys. Then it builds Fido2User from user ID, email, and display name into the format Fido2NetLib needs. Setting UserVerification and ResidentKey to Required will enforce a biometric PIN and enable passwordless login later. fido2.RequestNewCredential builds an CredentialCreateOptions object that is saved in the session and also returned to the API response. The response object contains the Fido user, challenge, timeout milliseconds, and other fields.
MakeCredentialAsync verifies and stores a newly created passkey. First, it gets CredentialCreateOptions from the session. Now it loads all the credential IDs from the database for a uniqueness check. fido2.MakeNewCredentialAsync validates challenges. origin matches, public key, and verifies CredentialId's uniqueness. IsCredentialIdUniqueToUserCallback ensures the credential isn't already registered, though it is very unlikely, Fido2NetLib requires its implementation. Upon success, passkey details such as credential ID, public key, initial sign counter, and AAGUID (which identifies the authenticator model) are saved in the database.
GetAssertionOptionsAsync starts the login process by generating a WebAuthn challenge. If a username is provided, we first retrieve the user's details and allowed credentials. Then the server sends the list of allowed credentials to the browser, which it uses for authentication. If there is no username, the list will be empty, and we will move towards passwordless login. With a username, the server tells the authenticator which credential(s) to use. Without a username, the authenticator lets the user choose a passkey for the website and signs the server's challenge. The server then verifies the signed response using the stored public key.
MakeAssertionAsync verifies the login attempt and identifies the user. It retrieves AssertionOptions from the session and looks up the StoredCredential row by matching CredentialId == assertionResponse.RawId. If no matching credential exists, login fails immediately. fido2.MakeAssertionAsync validates the challenge and origin, verifies the signature using the stored public key, and checks the sign counter for clone detection. IsUserHandleOwnerOfCredentialIdCallback verifies if the credentials belong to the correct user. Finally, after updating the SignatureCounter, I save the changes to the database.
A lambda expression is setting the session from the HTTP context.
Step 7: Add Controller methods
[Authorize]
[HttpPost("passkey/attestation-options")]
public async Task<IActionResult> GetPasskeyAttestationOptions()
{
    var user = await userManager.GetUserAsync(User);

    if (user is null)
        return Unauthorized(new { Success = false, Error = "User not found." });

    var options = await passkeyService.GetAttestationOptionsAsync(user);

    return Ok(options);
}

[Authorize]
[HttpPost("passkey/attestation-verify")]
public async Task<IActionResult> VerifyPasskeyAttestation(
    [FromBody] CompletePasskeyRegistrationDtoInp request)
{
    var user = await userManager.GetUserAsync(User);

    if (user is null)
        return Unauthorized(new { Success = false, Error = "User not found." });

    var (success, error) = await passkeyService.MakeCredentialAsync(
        request.AttestationResponse,
        user,
        request.FriendlyName);

    if (!success)
        return BadRequest(new { Success = false, Error = error });

    return Ok(new
    {
        Success = true,
        Message = "Passkey registered successfully."
    });
}

[HttpPost("passkey/assertion-options")]
public async Task<IActionResult> GetPasskeyAssertionOptions(
    [FromBody] PasskeyAssertionRequest request)
{
    var options = await passkeyService.GetAssertionOptionsAsync(request.Username);
    return Ok(options);
}

[HttpPost("passkey/assertion-verify")]
public async Task<IActionResult> PasskeyAssertionVerify(
    [FromBody] AuthenticatorAssertionRawResponse assertionResponse)
{
    var (success, userId, error) =
        await passkeyService.MakeAssertionAsync(assertionResponse);

    if (!success)
        return BadRequest(new { Success = false, Error = error });

    var user = await userManager.FindByIdAsync(userId);

    if (user is null)
        return NotFound(new { Success = false, Error = "User not found." });

    await signInManager.SignInAsync(user, false);

    return Ok(new { Success = true });
}
attestation-options starts passkey registration. It is an authenticated endpoint. Registering a passkey is an account management action, user must login before adding a new credential to that account. Calls GetAttestationOptionsAsync and returns the options JSON directly to the browser, which feeds it into navigator.credentials.create().
attestation-verify ties the new credential to the currently logged-in user. It calls MakeCredentialAsync with the browser's attestation response, the current user, and an optional friendly name (e.g. "My Phone"). Validates credentials with Fido2, saves it in the database, and returns success or failure. As a result, the passkey is now registered for the user and stored in the database. The device also stores the private key.
assertion-options is the actual passkey login endpoint. The user logs in here; hence, it is unauthenticated. It calls the underlying GetAssertionOptionsAsync method and returns the challenge options to the browser for navigator.credentials.get().
assertion-verify is the final step in the login process. It relies on the service's MakeAssertionAsync method to retrieve the userId and success. After confirming the success in the service layer, it fetches the user and signs them in.
Step 8: Run migrations
dotnet ef migrations add PasskeyInitialTo reflect the migration.
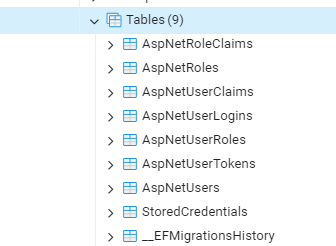
dotnet ef database updateA glance at the database schema.
Step 9: Run the project
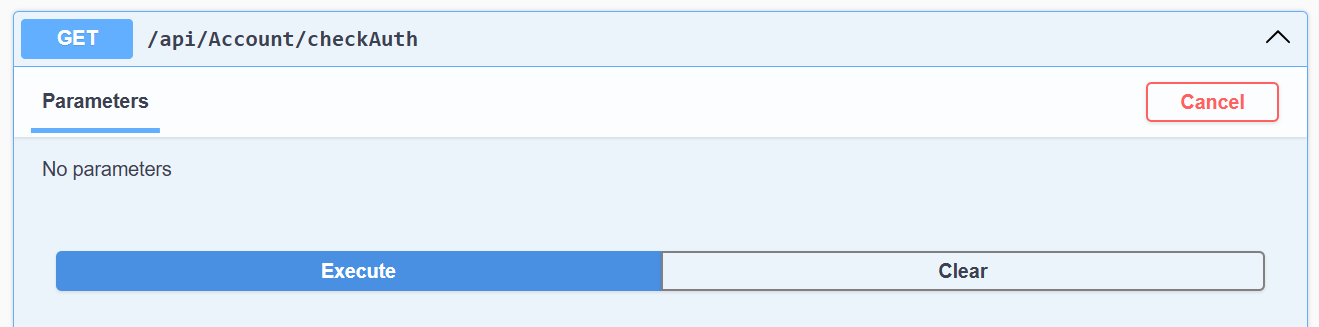
dotnet runLet's run the project again and be unauthorized.
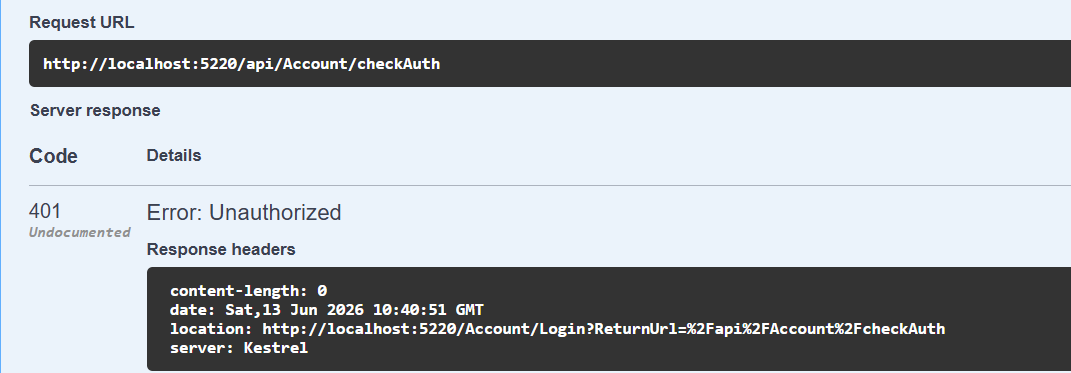
Now the passkey.
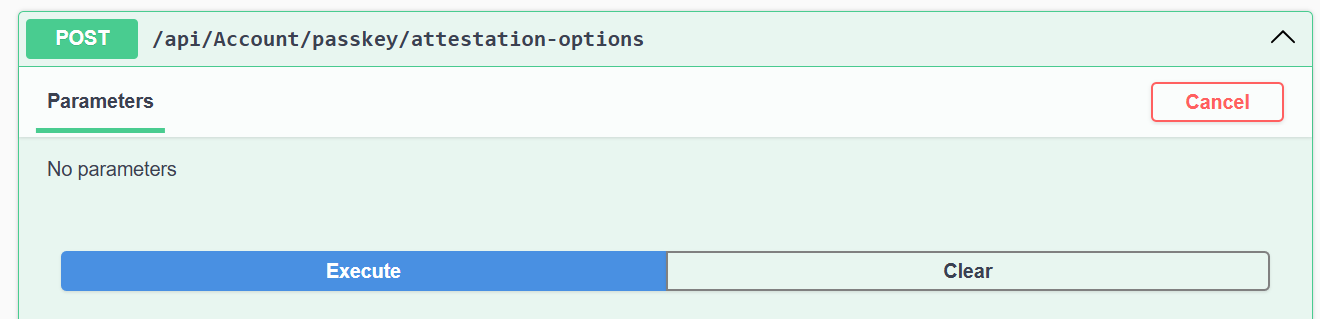
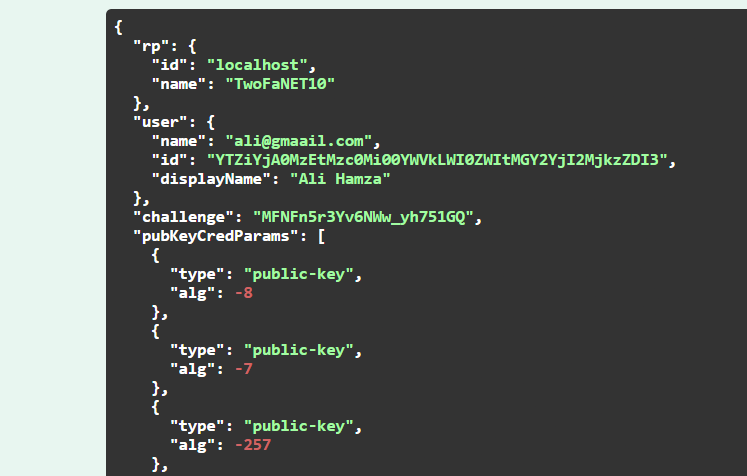
navigator.credentials.create() and navigator.credentials.get() are browser WebAuthn APIs, not HTTP calls. Swagger can hit your attestation-options/assertion-options endpoints fine as they're just JSON, but the actual "talk to the authenticator/fingerprint/phone/security key" step only exists in a browser's JS engine, and you cannot trigger that from Swagger's UI or curl.
Run the following in the browser console.
function base64UrlToBase64(input) {
  input = input.replace(/-/g, '+').replace(/_/g, '/');
  const pad = input.length % 4;
  if (pad) input += '='.repeat(4 - pad);
  return input;
}

function bufferToBase64url(buffer) {
  const bytes = new Uint8Array(buffer);
  let str = '';
  for (const b of bytes) str += String.fromCharCode(b);
  return btoa(str).replace(/\+/g, '-').replace(/\//g, '_').replace(/=+$/, '');
}

// 1. Get attestation options (must be logged in via session/cookie)
const options = await fetch("/api/Account/passkey/attestation-options", {
  method: "POST",
  headers: { "Content-Type": "application/json" }
}).then(r => r.json());

// 2. Convert challenge and user.id to ArrayBuffer
options.challenge = Uint8Array.from(
  atob(base64UrlToBase64(options.challenge)),
  c => c.charCodeAt(0)
);
options.user.id = Uint8Array.from(
  atob(base64UrlToBase64(options.user.id)),
  c => c.charCodeAt(0)
);

if (options.excludeCredentials) {
  options.excludeCredentials = options.excludeCredentials.map(c => ({
    ...c,
    id: Uint8Array.from(atob(base64UrlToBase64(c.id)), c => c.charCodeAt(0))
  }));
}

// 3. Create credential - THIS is what triggers the "create a passkey" prompt
const credential = await navigator.credentials.create({ publicKey: options });

// 4. Build payload and send to attestation-verify
const attestationResponse = {
  id: credential.id,
  rawId: bufferToBase64url(credential.rawId),
  type: credential.type,
  clientExtensionResults: credential.getClientExtensionResults(),
  response: {
    clientDataJSON: bufferToBase64url(credential.response.clientDataJSON),
    attestationObject: bufferToBase64url(credential.response.attestationObject),
    transports: credential.response.getTransports ? credential.response.getTransports() : []
  }
};

const verifyResult = await fetch("/api/Account/passkey/attestation-verify", {
  method: "POST",
  headers: { "Content-Type": "application/json" },
  body: JSON.stringify({
    attestationResponse: attestationResponse,
    friendlyName: "My Phone"
  })
}).then(r => r.json());

console.log(verifyResult);
The script first calls attestation-options with the logged-in user and gets the user details and challenge. The server has stored the challenge and sent it to the browser. For further use, convert the received Base64Url strings to Uint8Array, as WebAuthn APIs expect ArrayBuffer. navigator.credentials.create() cannot work with strings, so we had to go the extra mile. In the said function, the browser inputs the options containing challenge, user, and RP information. The browser calls Windows Hello or Face ID (Windows Hello in our case) to prompt for a passkey. It stores the private key safely and returns a credential object to the browser. Then I created attestationResponse by converting the binary credential data into JSON using bufferToBase64url before sending it to attestation-verify. The server will validate the challenge and return a success or failure message. The user's passkey is registered now.
A Window Hello appeared where I added my passkey.
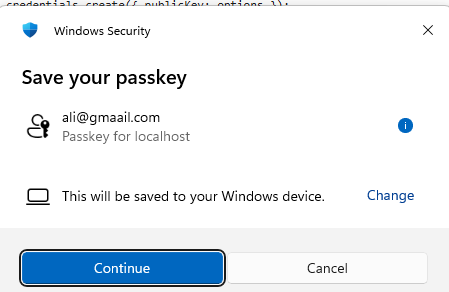
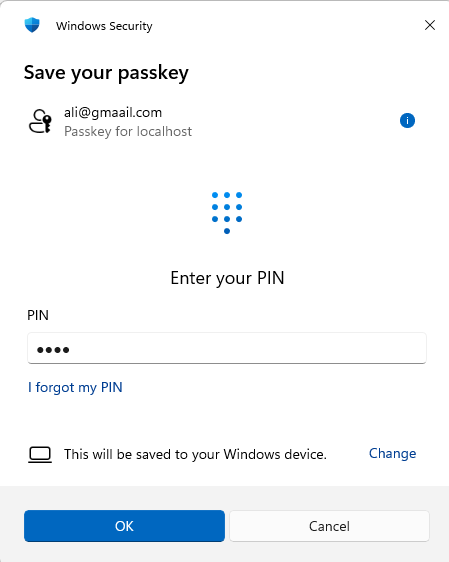
Now the passkey is saved, and the browser console shows.

Now assertion.
const options = await fetch("/api/Account/passkey/assertion-options", {
  method: "POST",
  headers: { "Content-Type": "application/json" },
  body: JSON.stringify({ username: "ali@gmaail.com" })
}).then(r => r.json());

options.challenge = Uint8Array.from(atob(base64UrlToBase64(options.challenge)), c => c.charCodeAt(0));
options.allowCredentials = options.allowCredentials.map(c => ({
  ...c,
  id: Uint8Array.from(atob(base64UrlToBase64(c.id)), c => c.charCodeAt(0))
}));

const assertion = await navigator.credentials.get({ publicKey: options });

const assertionResponse = {
  id: assertion.id,
  rawId: bufferToBase64url(assertion.rawId),
  type: assertion.type,
  clientExtensionResults: assertion.getClientExtensionResults(),
  response: {
    clientDataJSON: bufferToBase64url(assertion.response.clientDataJSON),
    authenticatorData: bufferToBase64url(assertion.response.authenticatorData),
    signature: bufferToBase64url(assertion.response.signature),
    userHandle: assertion.response.userHandle ? bufferToBase64url(assertion.response.userHandle) : null
  }
};

const verifyResult = await fetch("/api/Account/passkey/assertion-verify", {
  method: "POST",
  headers: { "Content-Type": "application/json" },
  body: JSON.stringify(assertionResponse)
}).then(r => r.json());

console.log(verifyResult);
assertion-options will do its job of loading the user's passkeys from StoredCredentials and stores a newly generated challenge in the session. The browser gets an object containing the challenge and allowed credentials. Similar to the earlier script, convert the received data into binary in the input of navigator.credentials.get that is responsible for getting PIN, passkey, or touch finger sensor from user prompt. Windows Hello finds the credential specified in allowCredentials verifies user input, retrieves the private key, and signs the challenge. Note that the private key never leaves Windows Hello and is used to sign the challenge. assertionResponse is prepared and passed as a parameter in assertion-verify by which the server verifies the signature using the public key and user data. Finally, it creates an authentication cookie, and the user is now logged in.
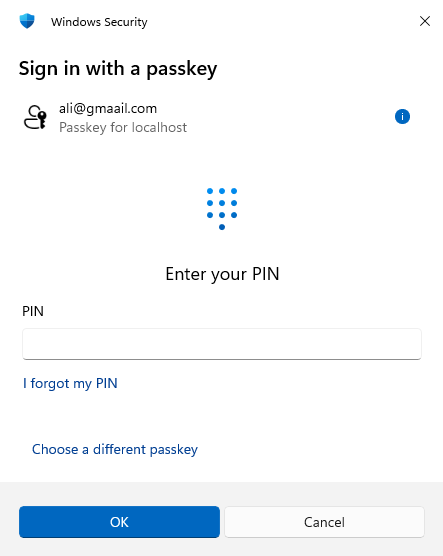
Once the passkey was inserted, the follow appeared in the console.

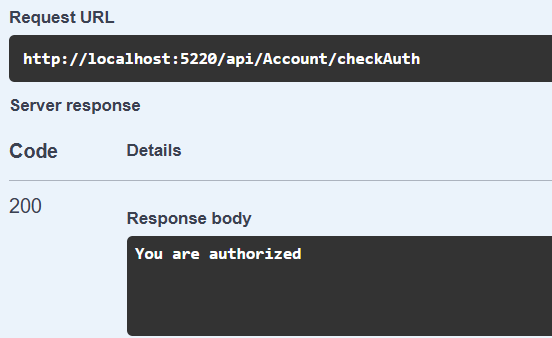
Now our authorized endpoint will reply with a success.
Conclusion
The advent of 2FA and passkeys significantly improves both security and user experience. Both play a brilliant role in reducing password vulnerabilities in modern applications. .NET provides extensive support for integrating these security measures into projects. In this post, I discussed 2FA and passkeys, followed by a step-by-step implementation in an ASP.NET Core API.
Code: https://github.com/elmahio-blog/TwoFaNET10
elmah.io: Error logging and Uptime Monitoring for your web apps
This blog post is brought to you by elmah.io. elmah.io is error logging, uptime monitoring, deployment tracking, and service heartbeats for your .NET and JavaScript applications. Stop relying on your users to notify you when something is wrong or dig through hundreds of megabytes of log files spread across servers. With elmah.io, we store all of your log messages, notify you through popular channels like email, Slack, and Microsoft Teams, and help you fix errors fast.

See how we can help you monitor your website for crashes Monitor your website