
How to upload files in an ASP.NET Core Web API
Files are an integrated part of an application. From a social app to an ERP, some form of media exists in the ecosystem. .NET Core APIs provide built-in support for uploading and fetching documents. In today's post, I will show you how to cleanly and efficiently use .NET Core's file system classes to receive file uploads.

Uploading files in ASP.NET Core API
I am creating an API with .NET 10 to accomplish our goal.
Step 1: Create a project
dotnet new webapi -n fileUploadDemo
cd fileUploadDemo
Step 2: Create a controller
using Microsoft.AspNetCore.Mvc;
namespace fileUploadDemo.Controllers;
[ApiController]
[Route("api/[controller]")]
public class FileController: ControllerBase
{
[HttpPost("upload")]
public async Task<IActionResult> Upload(IFormFile file)
{
if (file == null || file.Length == 0)
return BadRequest("No file uploaded.");
var uploadsFolder = Path.Combine(Directory.GetCurrentDirectory(), "Uploads");
if (!Directory.Exists(uploadsFolder))
Directory.CreateDirectory(uploadsFolder);
var filePath = Path.Combine(uploadsFolder, file.FileName);
using (var stream = new FileStream(filePath, FileMode.Create))
{
await file.CopyToAsync(stream);
}
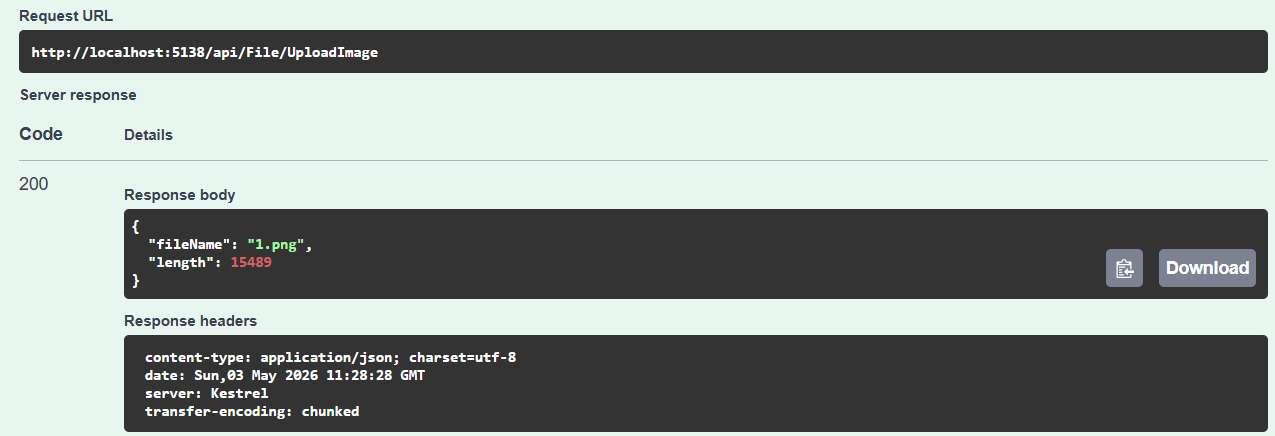
return Ok(new { file.FileName, file.Length });
}
}The endpoint upload will save the file to the "Uploads" directory and return the filename and length.
Step 3: Configure Program.cs
var builder = WebApplication.CreateBuilder(args);
builder.Services.AddControllers();

var app = builder.Build();

app.UseStaticFiles();
app.MapControllers();

app.UseHttpsRedirection();

app.Run();
app.UseStaticFiles(); enables the app to serve static files directly over HTTP
Make sure your Uploads folder is accessible.
Step 4: Run and test
dotnet run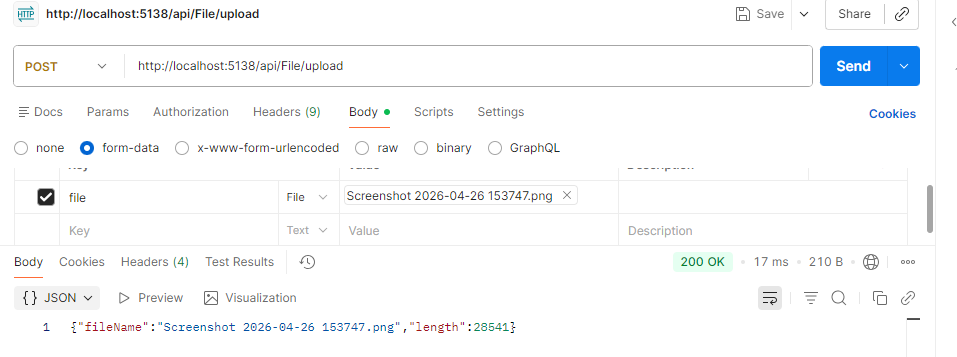
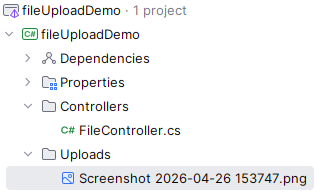
Hence, our file is saved:
So far, we have seen a naive, minimal approach to saving a file in an ASP.NET Core API. However, in real applications, you may split it up into layers, services, or however you prefer to structure applications.
Adding OpenApi/Swagger documentation
.NET 10 does not create OpenAPI (formerly Swagger) documentation like previous versions. So we have to add them. First, install the NuGet package:
dotnet add package Swashbuckle.AspNetCoreNext, change Program.cs:
using Microsoft.AspNetCore.Http.Features;

var builder = WebApplication.CreateBuilder(args);

builder.Services.AddOpenApi();
builder.Services.AddControllers();
builder.Services.AddEndpointsApiExplorer();
builder.Services.AddSwaggerGen();

var app = builder.Build();

app.UseSwagger();
app.UseSwaggerUI(c =>
{
    c.SwaggerEndpoint("/swagger/v1/swagger.json", "Upload V1");
});

if (app.Environment.IsDevelopment())
{
    app.MapOpenApi();
}

app.UseStaticFiles();
app.MapControllers();
app.UseHttpsRedirection();

app.Run();
The AddOpenApi() method registers with the OpenAPI document generation services. Then AddEndpointsApiExplorer() adds an API explorer service that discovers endpoints and provides metadata about routes, parameters, and return types. Without this, Swagger would show no APIs. AddSwaggerGen() configures Swashbuckle (Swagger for .NET) and generates a Swagger document. Besides, it adds schema generation for your DTOs. UseSwagger() registers middleware to serve the Swagger JSON document. You must register middleware before using SwaggerUI. The UseSwaggerUI configures the Swagger UI web interface and navigates the UI to the JSON document. It basically adds UI elements, such as the page and Try out buttons.
Result

Restrict the file size limit
It is recommended to set a maximum file size limit for uploaded files:
var builder = WebApplication.CreateBuilder(args);

builder.Services.Configure<FormOptions>(options =>
{
    options.MultipartBodyLengthLimit = 104857600;
});
With the property MultipartBodyLengthLimit, I set the maximum size of the multipart body to 100 MBs.
Allowing formats for different file types
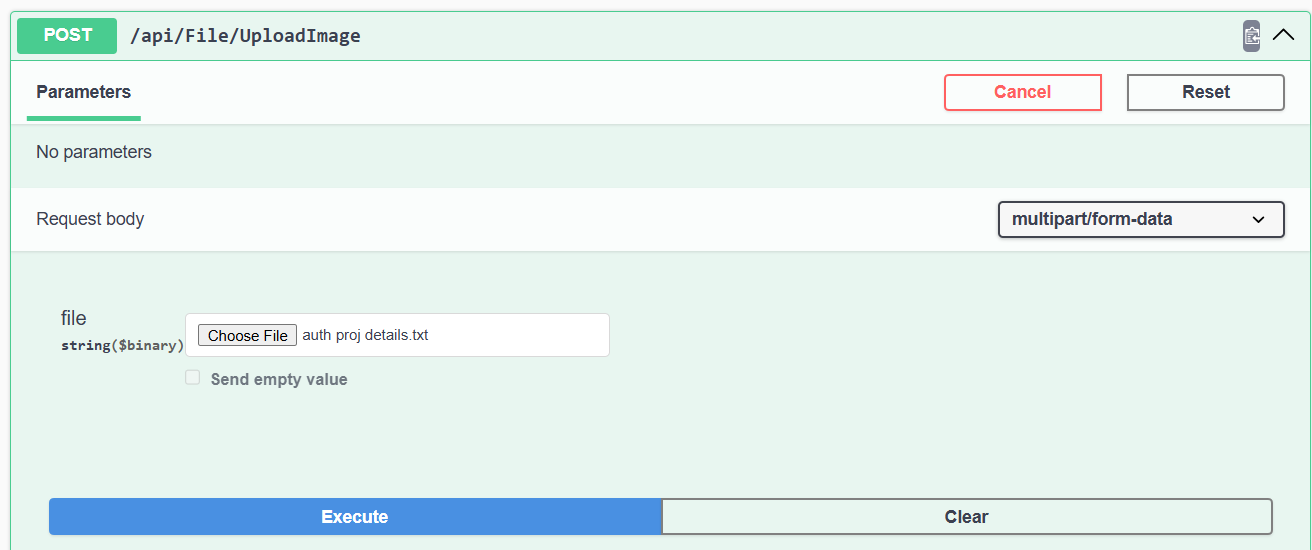
Each document type has a set of extensions: images are usually in JPG or PNG, and documents are usually in PDF or docx. For different purposes, we should validate the input. Like for a profile picture, users may not upload a docx or a PDF, while for a report, they should avoid JPG. To enforce it in our API, I will separate the image and document endpoints.
UploadImage specified for uploading image files:
[HttpPost("UploadImage")]
public async Task<IActionResult> UploadImageAsync(IFormFile file)
{
if (file == null || file.Length == 0)
return BadRequest("No file uploaded.");
var allowedExtensions = new[] { ".jpg", ".png" };
var extension = Path.GetExtension(file.FileName);
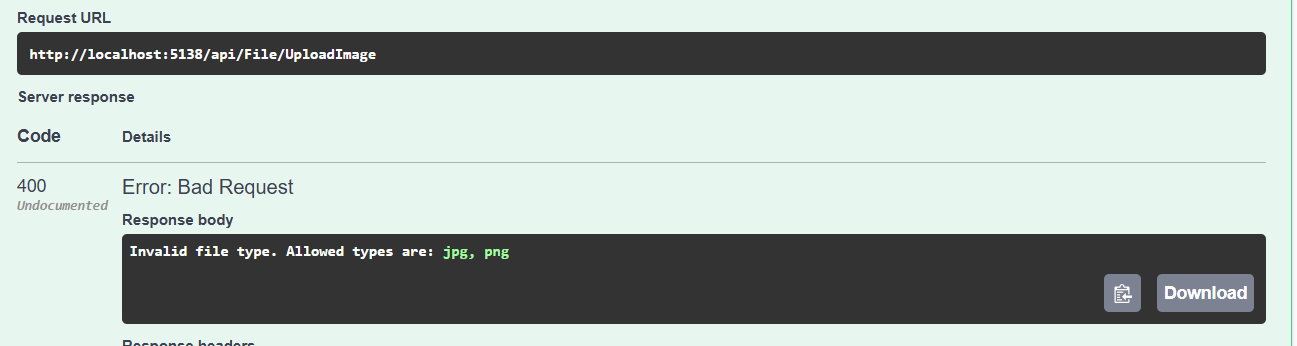
if (!allowedExtensions.Contains(extension))
{
var extensionsWithoutDots = allowedExtensions.Select(ext => ext.TrimStart('.'));
return BadRequest($"Invalid file type. Allowed types are: {string.Join(", ", extensionsWithoutDots)}");
}
var uploadsFolder = Path.Combine(Directory.GetCurrentDirectory(), "Uploads");
if (!Directory.Exists(uploadsFolder))
Directory.CreateDirectory(uploadsFolder);
var filePath = Path.Combine(uploadsFolder, file.FileName);
using (var stream = new FileStream(filePath, FileMode.Create))
{
await file.CopyToAsync(stream);
}
return Ok(new { file.FileName, file.Length });
}UploadDocument method for uploading document files:
[HttpPost("UploadDocument")]
public async Task<IActionResult> UploadDocumentAsync(IFormFile file)
{
if (file == null || file.Length == 0)
return BadRequest("No file uploaded.");
var allowedExtensions = new[] { ".pdf", ".txt" };
var extension = Path.GetExtension(file.FileName);
if (!allowedExtensions.Contains(extension))
{
var extensionsWithoutDots = allowedExtensions.Select(ext => ext.TrimStart('.'));
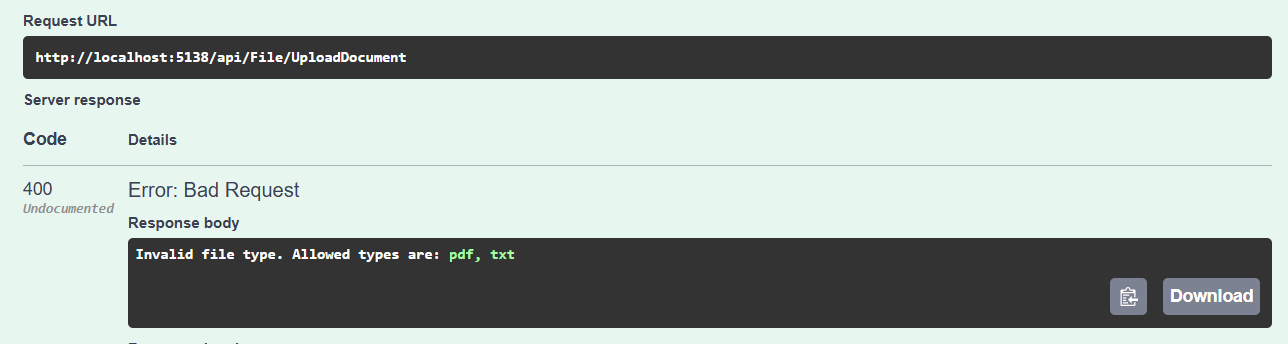
return BadRequest($"Invalid file type. Allowed types are: {string.Join(", ", extensionsWithoutDots)}");
}
var uploadsFolder = Path.Combine(Directory.GetCurrentDirectory(), "Uploads");
if (!Directory.Exists(uploadsFolder))
Directory.CreateDirectory(uploadsFolder);
var filePath = Path.Combine(uploadsFolder, file.FileName);
using (var stream = new FileStream(filePath, FileMode.Create))
{
await file.CopyToAsync(stream);
}
return Ok(new { file.FileName, file.Length });
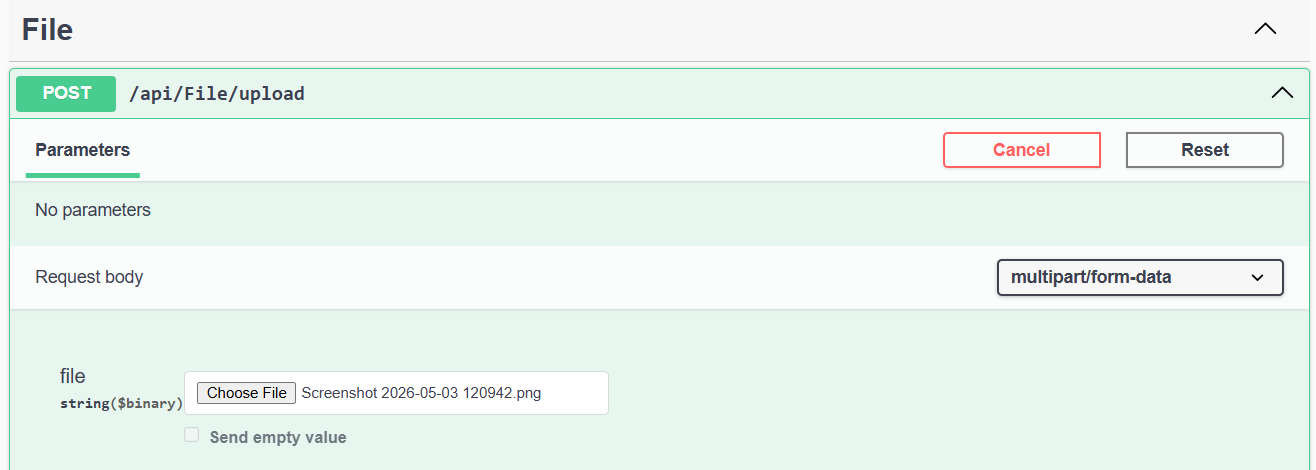
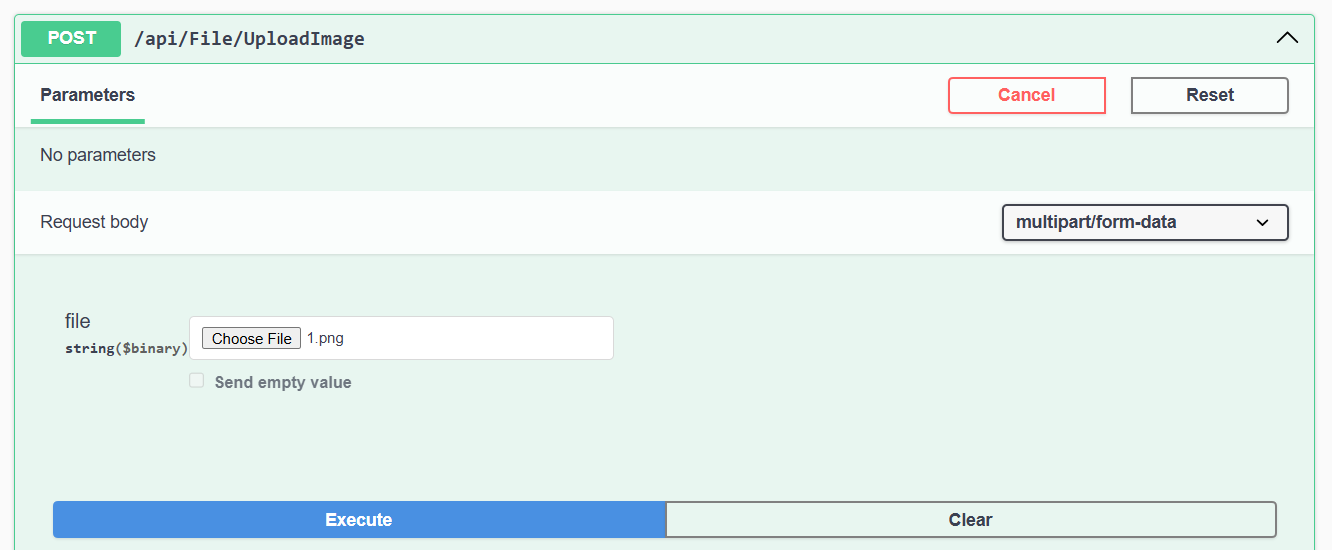
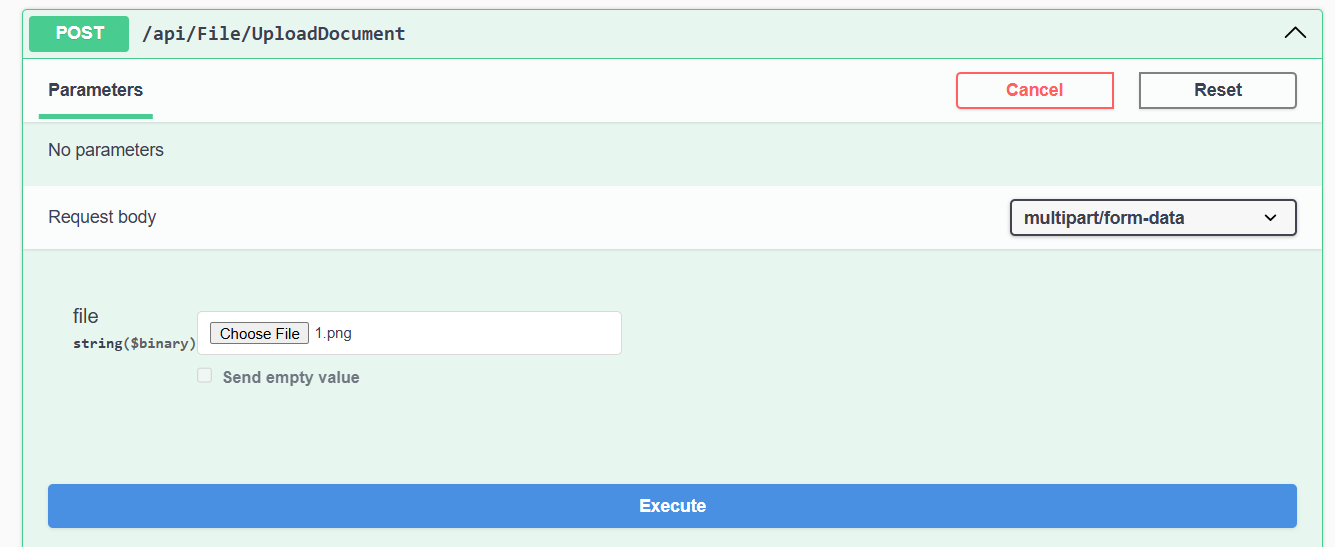
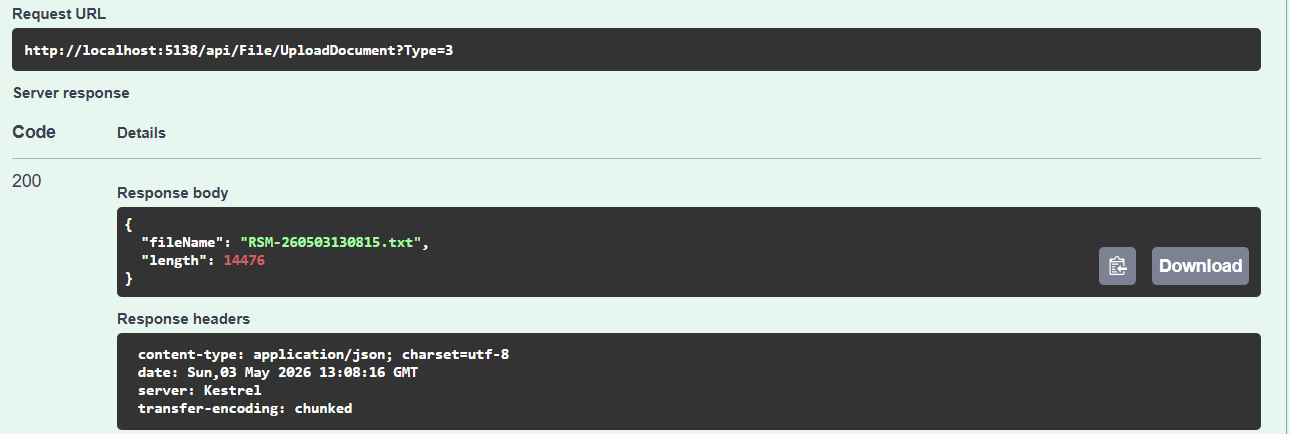
}The prior method only supports JPG and PNG, while the latter supports PDF and TXT. Lets test it from SwaggerUI:
On a correct input:
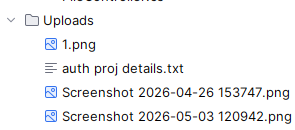
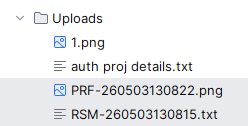
If we inspect the Uploads folder, we can see the uploaded file:

While the other method:
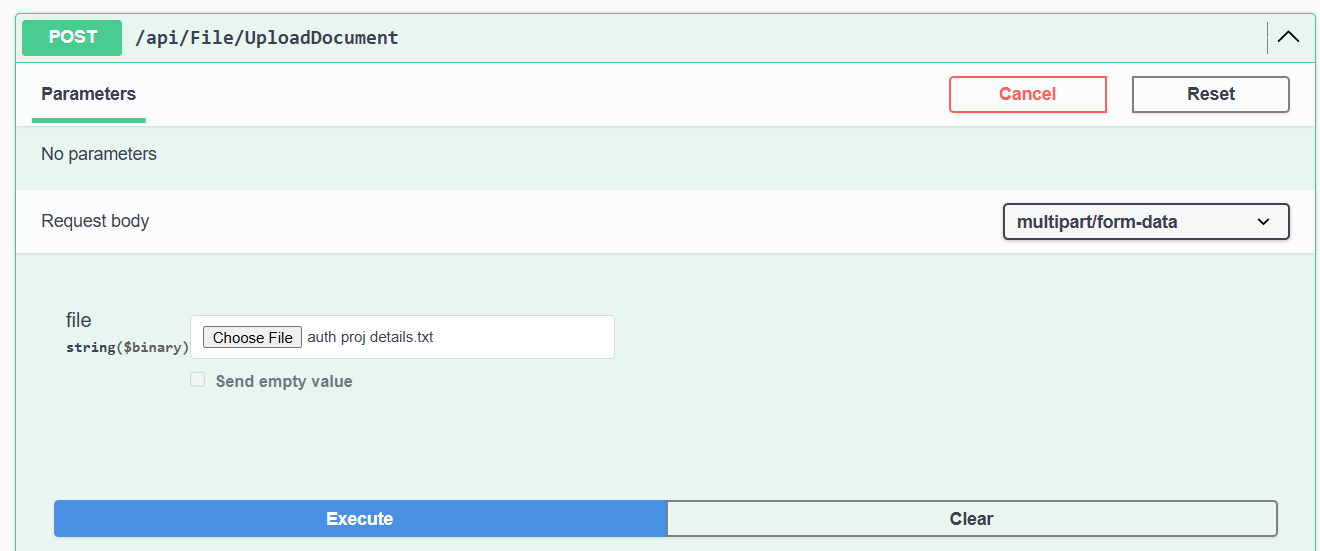
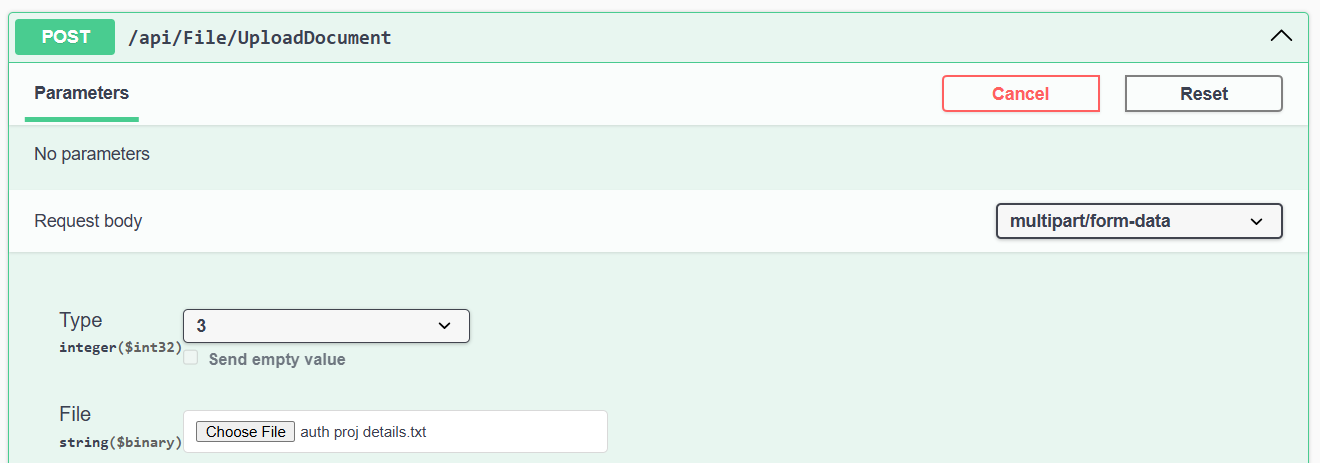
And for the allowed document:
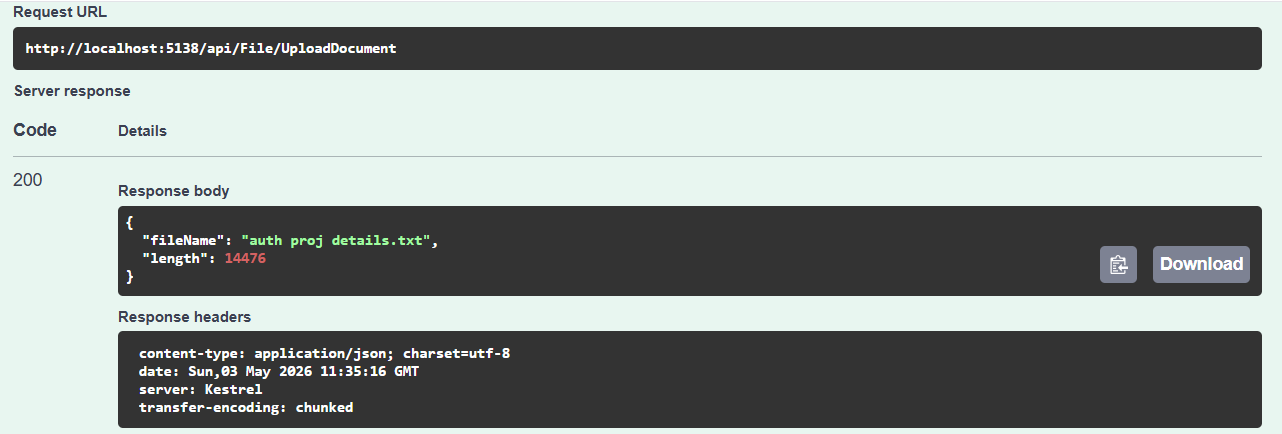

Renaming the file to standard naming
We have now successfully uploaded files. However, there is a problem: you may notice that file names are arbitrary and random.
For real applications, we often want to control the names of the files to avoid someone uploading a Snapchat image of themselves with a weird-looking filename. Let's fix that.
Step 1: Add model
First, introduce a model to input images. It will contain a type specifying what the file is for.
Add File type enum:
namespace fileUploadDemo.Models.Enums;

public enum FileTypeEnum
{
    ProfilePicture = 1,
    PostImage = 2,
    Resume = 3
}
File input:
using fileUploadDemo.Models.Enums;

namespace fileUploadDemo.Models.Dtos;

public class FileDtoInp
{
    public FileTypeEnum Type { get; set; }
    public IFormFile File { get; set; }
}
To return, we will use a model instead of an anonymous object:
namespace fileUploadDemo.Models.Dtos;

public class FileDto
{
    public string FileName { get; set; } = string.Empty;
    public long Length { get; set; }
}
Step 2: Add service layer
So far, I have added everything to the controller, which is a bad practice. I'll add a service layer, but this can be implemented in whatever way you prefer.
Add a IFileService interface:
using fileUploadDemo.Models.Dtos;

namespace fileUploadDemo.Services.IServices;

public interface IFileService
{
    Task<FileDto> UploadImageAsync(FileDtoInp input);
    Task<FileDto> UploadDocumentAsync(FileDtoInp input);
}
And a FileService implementation:
using fileUploadDemo.Models.Dtos;
using fileUploadDemo.Models.Enums;
using fileUploadDemo.Services.IServices;

namespace fileUploadDemo.Services;

public class FileService: IFileService
{
    private readonly string _uploadsFolder;

    public FileService(IWebHostEnvironment env)
    {
        _uploadsFolder = Path.Combine(env.ContentRootPath, "Uploads");
    }
    public async Task<FileDto> UploadImageAsync(FileDtoInp input)
    {
        if (input.File == null || input.File.Length == 0)
            throw new Exception("No file uploaded.");

        var allowedExtensions = new[] { ".jpg", ".png" };
        var extension = Path.GetExtension(input.File.FileName);

        if (!allowedExtensions.Contains(extension))
        {
            var extensionsWithoutDots = allowedExtensions.Select(ext => ext.TrimStart('.'));
            throw new Exception($"Invalid file type. Allowed types are: {string.Join(", ", extensionsWithoutDots)}");
        }

        if (!Directory.Exists(_uploadsFolder))
            Directory.CreateDirectory(_uploadsFolder);

        var fileName = $"{ GetFileName(input.Type) }{extension}";

        var filePath = Path.Combine(_uploadsFolder, fileName);

        using (var stream = new FileStream(filePath, FileMode.Create))
        {
            await input.File.CopyToAsync(stream);
        }

        return new
            FileDto()
            {
                FileName = fileName,
                Length = input.File.Length
            };
    }

    public async Task<FileDto> UploadDocumentAsync(FileDtoInp input)
    {
        if (input.File == null || input.File.Length == 0)
            throw new Exception("No file uploaded.");

        var allowedExtensions = new[] { ".pdf", ".txt" };
        var extension = Path.GetExtension(input.File.FileName);

        if (!allowedExtensions.Contains(extension))
        {
            var extensionsWithoutDots = allowedExtensions.Select(ext => ext.TrimStart('.'));
            throw new Exception($"Invalid file type. Allowed types are: {string.Join(", ", extensionsWithoutDots)}");
        }

        if (!Directory.Exists(_uploadsFolder))
            Directory.CreateDirectory(_uploadsFolder);

        var fileName = $"{ GetFileName(input.Type) }{extension}";
        var filePath = Path.Combine(_uploadsFolder, fileName);

        using (var stream = new FileStream(filePath, FileMode.Create))
        {
            await input.File.CopyToAsync(stream);
        }

        return new
            FileDto()
            {
                FileName = fileName,
                Length = input.File.Length
            };
    }

    private string GetFileName(FileTypeEnum input)
        => input switch
        {
            FileTypeEnum.ProfilePicture => $"PRF-{DateTime.UtcNow:yyMMddHHmmss}",
            FileTypeEnum.PostImage => $"PST-{DateTime.UtcNow:yyMMddHHmmss}",
            FileTypeEnum.Resume => $"RSM-{DateTime.UtcNow:yyMMddHHmmss}",
            _ => throw new ArgumentOutOfRangeException(nameof(input), input, null)
        };
}
Let's understand what is happening here. We have methods for uploading images and documents, which first validate the file types. They actually abstracted the logic from the earlier upgrade of our application from controllers to services, which is always recommended. The main update here is the GetFileName method that returns a standardized name for each type. To make it collision-proof, I concatenated the current datetime into the name. Besides, the upload directory address is initialized in the constructor and used throughout the service. An even better way is to use it in appsettings.json and use the option pattern. Lets keep it simple for now. At last, I returned the FileDto model as output. You may also want to switch to not using exceptions for input validation, but I will leave that part up to you.
Step 3: Register the new service
builder.Services.AddScoped<IFileService, FileService>();In Program.csI have registered the service dependency.
Step 4: Update controller
Now, the controller will inject and use the IFileService we just created:
using fileUploadDemo.Models.Dtos;
using fileUploadDemo.Services.IServices;
using Microsoft.AspNetCore.Mvc;

namespace fileUploadDemo.Controllers;

[ApiController]
[Route("api/[controller]")]
public class FileController: ControllerBase
{
    private readonly IFileService _fileService;

    public FileController(IFileService fileService)
    {
        _fileService = fileService;
    }

    [HttpPost("UploadImage")]
    public async Task<IActionResult> UploadImageAsync([FromForm] FileDtoInp input)
    {
        var result = await _fileService.UploadImageAsync(input);
        return Ok(result);
    }

    [HttpPost("UploadDocument")]
    public async Task<IActionResult> UploadDocumentAsync([FromForm] FileDtoInp input)
    {
        var result = await _fileService.UploadDocumentAsync(input);
        return Ok(result);
    }
}
[FromForm] specifies the input as form-data, not a JSON body, ensuring the endpoint receives files.
Step 4: Run and test
dotnet run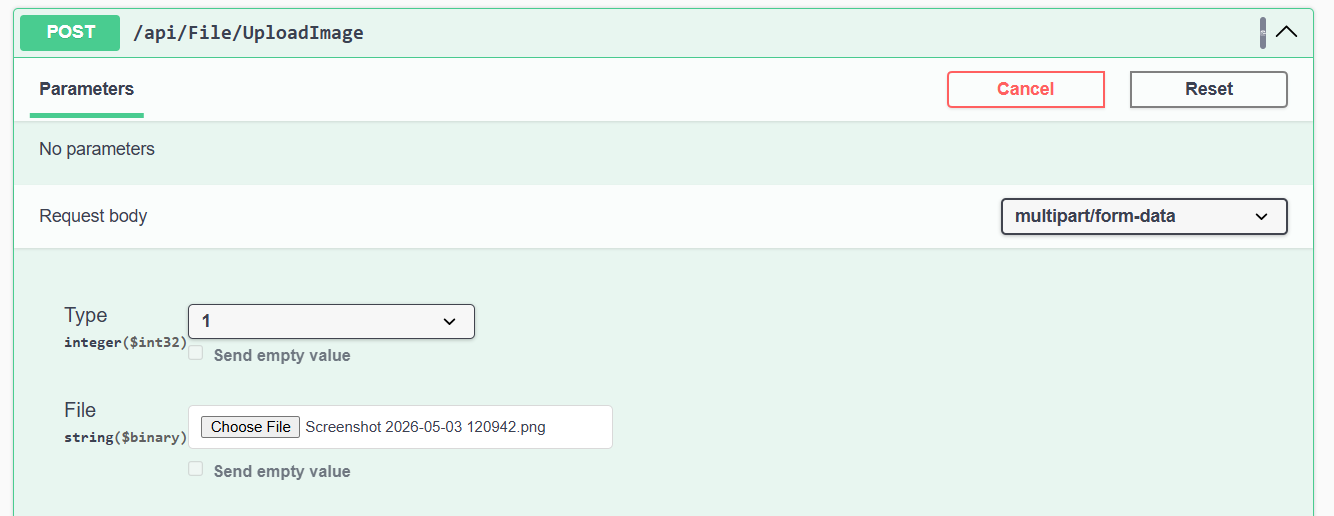
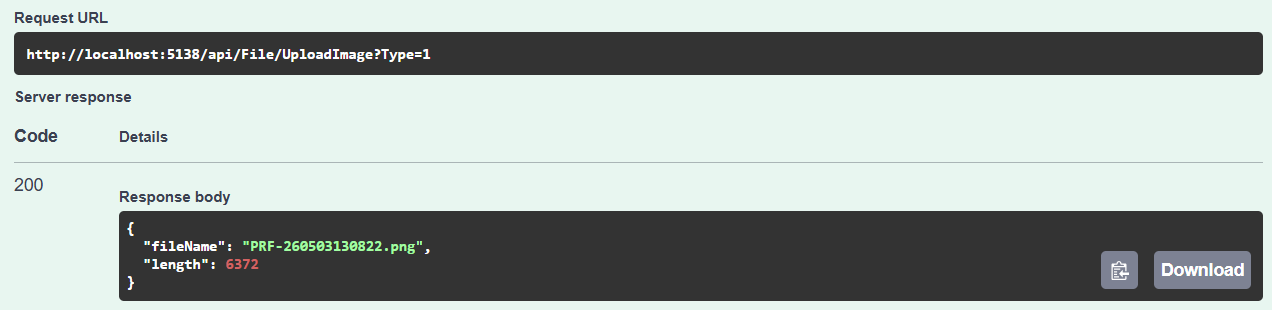
Ensure the file is named according to our standard, regardless of its original name.
The same happens with the documents:
Apart from naming files with date and time, using a unique GUID or the username is also a common practice. Consider the following ways:
var fileName = $"{ Guid.NewGuid().ToString() }{extension}";or:
var fileName = $"{ _userContext.Username }{extension}";Creating a GET endpoint to fetch a file
We have covered several ways to upload a file in an ASP.NET Core API. Next requirement naturally arises: how to fetch the saved file? Let's design an endpoint for it.
A new model to return the file from the service to the controller could be implemented like this:
namespace fileUploadDemo.Models.Dtos;

public class FileResultDto
{
    public byte[] Content { get; set; } = default!;
    public string ContentType { get; set; } = string.Empty;
    public string FileName { get; set; } = string.Empty;
}
Our service implementation should include a new method for fetching a file:
public async Task<FileResultDto?> GetFileAsync(string key)
{
    if (string.IsNullOrWhiteSpace(key) || key.Contains(".."))
        return null;

    var filePath = Path.Combine(_uploadsFolder, key);

    if (!System.IO.File.Exists(filePath))
        return null;

    var extension = Path.GetExtension(filePath).ToLower();

    var contentType = extension switch
    {
        ".jpg" or ".jpeg" => "image/jpeg",
        ".png" => "image/png",
        ".pdf" => "application/pdf",
        _ => "application/octet-stream"
    };

    var bytes = await System.IO.File.ReadAllBytesAsync(filePath);

    return new FileResultDto
    {
        Content = bytes,
        ContentType = contentType,
        FileName = key
    };
}
After some initial string checks and combining the filename with the directory, we check whether the file exists. In the latter part, we convert the file into a MIME type based on the extension. var bytes = await System.IO.File.ReadAllBytesAsync(filePath); loads the entire file into memory and returns byte[]. If large files are uploaded, consider streaming instead. Finally, it packs the content and metadata into the response model and returns it.
Use it in the controller:
[HttpGet("GetFile")]
public async Task<IActionResult> GetFileAsync([FromQuery] string key)
{
    var result = await _fileService.GetFileAsync(key);

    if (result == null)
        return NotFound("File not found");

    return File(result.Content, result.ContentType, result.FileName);
}
[FromQuery] will prompt for the filename as a key param and pass it to the service. Once the data is received, the endpoint will return the actual file.
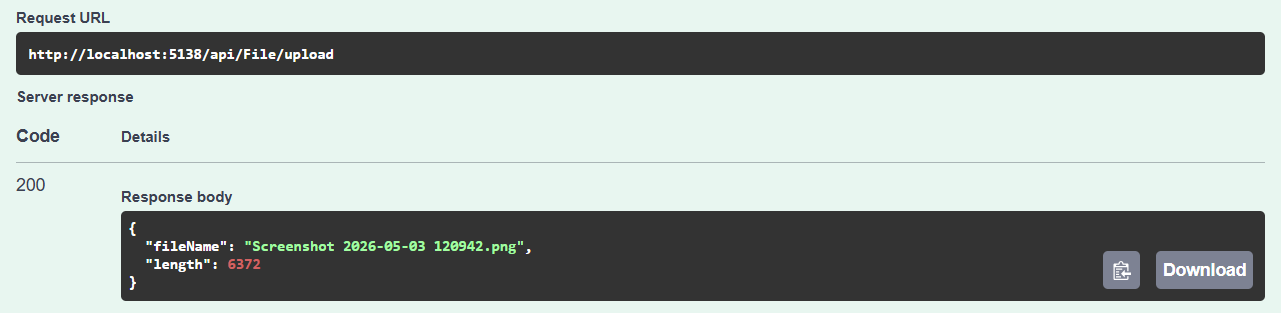
Test
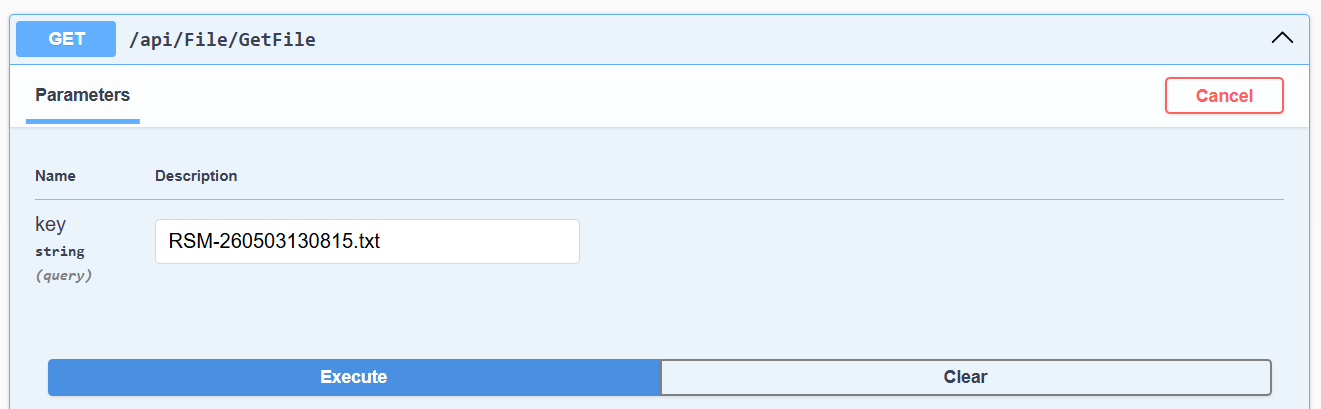
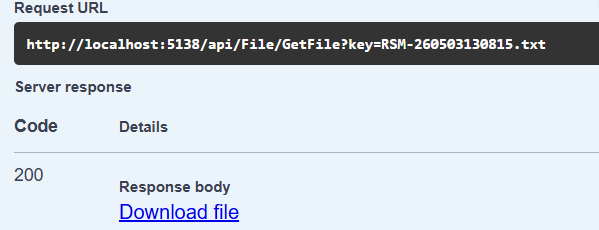
Simply, the user can download the file.
Tips for using file uploading in ASP.NET Core
For production environments and scalable systems, consider the following aspects.
- For the production environment, use a cloud service such as Azure Blob or AWS S3 to save files for better reliability and speed.
- Use the path in appsettings for security and good design.
- Organize upload paths into separate directories for document- and module-wise uploads. Even separating directories for users is also a common practice, such as "images/Profile", "images/Posts", "documents/Resumes" or "images/john/".
- Store metadata in a database for referencing and persistence. Creating an image-and-document table with a Type key is a great way to reference files to corresponding entities, such as User and Building, via ImageId and DocumentId. The tables can store other important information, such as file size, creation date, uploader user, file name, etc.
- If your system requires a very large file upload, use chunk uploading.
- Use file streaming for large file instead of buffer that can result in high RAM usage.
- Enable progress tracking via SignalR.
Conclusion
The long story comes to an end, and we learned how to handle files in ASP.NET Core APIs. We started with minimal code and applied best practices when using images and documents. By following these tips, you can design a file structure securely and efficiently in a production-grade system.
elmah.io: Error logging and Uptime Monitoring for your web apps
This blog post is brought to you by elmah.io. elmah.io is error logging, uptime monitoring, deployment tracking, and service heartbeats for your .NET and JavaScript applications. Stop relying on your users to notify you when something is wrong or dig through hundreds of megabytes of log files spread across servers. With elmah.io, we store all of your log messages, notify you through popular channels like email, Slack, and Microsoft Teams, and help you fix errors fast.

See how we can help you monitor your website for crashes Monitor your website