
Creating custom debug visualizers for Visual Studio 2022
Developing extensions for Visual Studio has been somewhat hard previously, but it seems like the VS team is really trying to improve and simplify things. I've recently experimented with creating a custom debug visualizer for showing exceptions and in this post, I'll share some of the experiences I have gained.
Let's start by talking about what a debug visualizer is. When running applications, you already hovered variables in both the editor and the Locals window to inspect string values, etc. For this post, I'll develop a custom visualizer showing the content of a MailAddress object. I have chosen this type because a visualizer does not already exist and because it's a simple object to visualize. To test this, here's a small console application with just a few lines in the Program.cs file:
using System.Net.Mail;

var displayName = "Thomas Ardal";
var email = "thomas@elmah.io";
var mailAddress = new MailAddress(email, displayName);
When launching this console application in debug mode, you'll notice that both strings have a visualizer available while the MailAddress object doesn't:
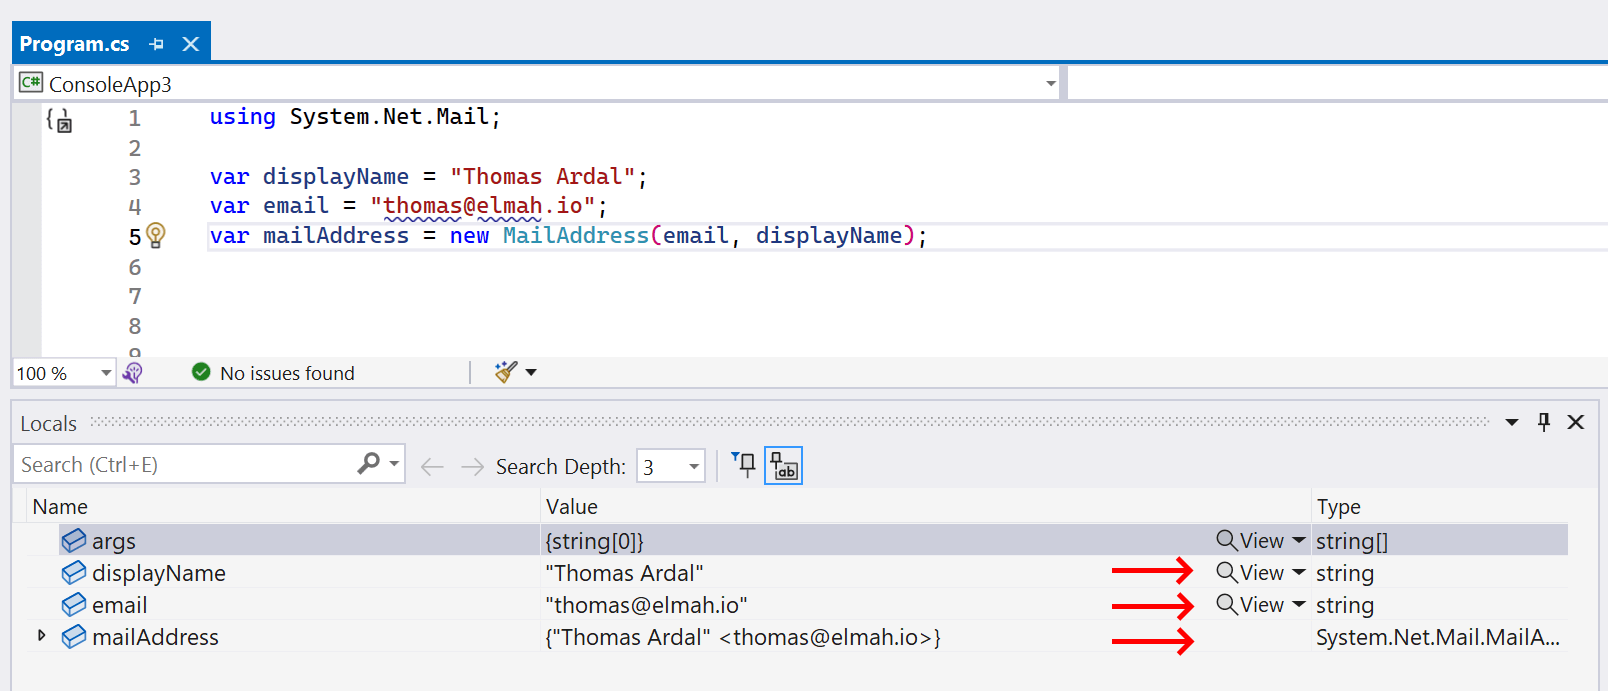
When clicking one of the View buttons you will see the normal debug visualizer of a String object. Let's spend the rest of this post adding a similar visualizer of the MailAddress object.
Start by creating a new class library in Visual Studio 2022. As of writing this post, you will need a 17.8 preview version but this will of course change in time. I'll name my project MailAddressVisualizer.
Before we start adding code, open the MailAddressVisualizer.csproj file. We need a few adjustments and NuGet packages. Include the following code and I'll go through each line after:
<Project Sdk="Microsoft.NET.Sdk">
  <PropertyGroup>
    <TargetFramework>net6.0-windows</TargetFramework>
    <ImplicitUsings>enable</ImplicitUsings>
    <Nullable>enable</Nullable>
    <CopyLocalLockFileAssemblies>true</CopyLocalLockFileAssemblies>
    <RestoreAdditionalProjectSources>https://pkgs.dev.azure.com/azure-public/vside/_packaging/msft_consumption/nuget/v3/index.json;$(RestoreAdditionalProjectSources)</RestoreAdditionalProjectSources>
  </PropertyGroup>

  <ItemGroup>
    <PackageReference Include="Microsoft.VisualStudio.Extensibility.Sdk" Version="17.8.13-preview-1" />
    <PackageReference Include="Microsoft.VisualStudio.Extensibility.Build" Version="17.8.13-preview-1" />
  </ItemGroup>
</Project>
As for the target framework, this extension will be running in Visual Studio only available on Windows why net6.0-windows is used. The CopyLocalLockFileAssemblies element is set to true to include referenced libraries from the NuGet packages to the output directory. Finally, I added a custom NuGet source since the new versions of the Microsoft.VisualStudio.Extensibility.* NuGet packages are not yet on the official NuGet. The needed NuGet packages are included at the bottom.
All debug visualizer extensions need an entry point, so go ahead and rename the Class1.cs file to ExtensionEntrypoint.cs and include the following content:
using Microsoft.VisualStudio.Extensibility;

namespace MailAddressVisualizer
{
    [VisualStudioContribution]
    public class ExtensionEntrypoint : Extension
    {
        public override ExtensionConfiguration ExtensionConfiguration => new()
        {
            Metadata = new(
                id: "MailAddressVisualizer",
                version: this.ExtensionAssemblyVersion,
                publisherName: "elmah.io",
                displayName: "MailAddress Debugger Visualizer Extension"),
        };
    }
}
This is just metadata, but notice the VisualStudioContribution attribute at the top. This is part of the new extensibility model from Microsoft and tells Visual Studio that this class should be loaded.
Next, we'll start providing the code for the MailAddress visualizer. The way to do that is through a contribution class extending the DebuggerVisualizerProvider class. Start by creating a new file named MailAddressDebuggerVisualizerProvider.cs and include the following content:
[VisualStudioContribution]
internal class MailAddressDebuggerVisualizerProvider : DebuggerVisualizerProvider
{
    public override DebuggerVisualizerProviderConfiguration DebuggerVisualizerProviderConfiguration
        => new("Mail Address Visualizer", typeof(MailAddress));

    public override Task<IRemoteUserControl> CreateVisualizerAsync(
        VisualizerTarget visualizerTarget, CancellationToken cancellationToken)
    {
    }
}
Two things need to be implemented here. A configuration property, as well as a method providing Visual Studio with the UI to show. The DebuggerVisualizerProviderConfiguration property is implemented with the name of the visualizer (can be anything you prefer) as well as the object type to show the visualizer. In this case, it is the MailAddress class from the System.Net.Mail namespace. As for the view, Visual Studio needs a class implementing the IRemoveUserControl interface. But before implementing this, we need to talk about models and serialization.
When creating a visualizer like this, Visual Studio splits up the process of retrieving and showing the visualizer in two parts. The project currently created is the visualizer part, but we also need a project for retrieving the value from the debugged process. These two projects will use JSON at runtime to communicate the object from the debugger to the visualizer. Luckily, mapping and serializing is straightforward. Create a new class library in the same solution and name it MailAddressVisualizerSource. Open the project file and include the following markup:
<Project Sdk="Microsoft.NET.Sdk">
  <PropertyGroup>
    <TargetFramework>netstandard2.0</TargetFramework>
  </PropertyGroup>

  <ItemGroup>
    <PackageReference Include="Microsoft.VisualStudio.DebuggerVisualizers" Version="17.6.1032901" />
  </ItemGroup>
</Project>
You only need a few dependencies in this project and all of them are available in older versions of the Microsoft.VisualStudio.* packages why I'm just installing a stable one.
Next, we need to define a model that is used to serialize JSON across projects. Create a new class named MailAddressModel:
[DataContract]
public class MailAddressModel
{
    [DataMember]
    public string DisplayName { get; set; }

    [DataMember]
    public string Email { get; set; }
}
For this example, I want to show the display name and email only but feel free to include more properties. Remember to add the attributes to make it serializable by the code in the following sample.
Finally, we need to provide the code mapping a MailAddress to MailAddressModel. Add a new class named MailAddressObjectSource:
public class MailAddressObjectSource : VisualizerObjectSource
{
    public override void GetData(object target, Stream outgoingData)
    {
        if (target is MailAddress mail)
        {
            var result = new MailAddressModel
            {
                DisplayName = mail.DisplayName,
                Email = mail.Address,
            };
            SerializeAsJson(outgoingData, result);
        }
    }
}
By extending VisualizerObjectSource we get to override a method named GetData. This will map between the source and destination object and call the SerializeAsJson method. The only thing missing now is adding a project reference from the MailAddressVisualizer project to the MailAddressVisualizerSource project.
Remember the MailAddressDebuggerVisualizerProvider class we implemented? With the new MailAddressModel type in place, we can now start implementing the CreateVisualizerAsync method:
public override async Task<IRemoteUserControl> CreateVisualizerAsync(
    VisualizerTarget visualizerTarget, CancellationToken cancellationToken)
{
    MailAddressModel? model = await visualizerTarget
        .ObjectSource
        .RequestDataAsync<MailAddressModel?>(jsonSerializer: null, CancellationToken.None);

    return await Task.FromResult<IRemoteUserControl>(
        new MailAddressVisualizerUserControl(model));
}
Visual Studio will call this method when a user clicks the View button next to a variable of type MailAddress. We use the RequestDataAsync method to get the model object that we mapped in the source project. Finally, we return the view and provide it with the model (the Data Context).
Create the missing MailAddressVisualizerUserControl class:
internal class MailAddressVisualizerUserControl : RemoteUserControl
{
    public MailAddressVisualizerUserControl(MailAddressModel model) : base(model)
    {
    }
}
And add a new XAML view named MailAddressVisualizerUserControl.xaml:
<DataTemplate xmlns="http://schemas.microsoft.com/winfx/2006/xaml/presentation">
  <Grid>
    <Grid.ColumnDefinitions>
      <ColumnDefinition Width="100"></ColumnDefinition>
      <ColumnDefinition Width="*"></ColumnDefinition>
    </Grid.ColumnDefinitions>
    <Grid.RowDefinitions>
      <RowDefinition Height="20"></RowDefinition>
      <RowDefinition Height="20"></RowDefinition>
    </Grid.RowDefinitions>
    <TextBlock Text="Display Name" Grid.Column="0" Grid.Row="0" />
    <TextBlock Text="{Binding DisplayName}" Grid.Column="1" Grid.Row="0" />
    <TextBlock Text="Email" Grid.Column="0" Grid.Row="1" />
    <TextBlock Text="{Binding Email}" Grid.Column="1" Grid.Row="1" />
  </Grid>
</DataTemplate>
I won't go into a lot of detail about the XAML code. There are many excellent tutorials on the subject online. The only important thing to explain here is the shared name between the user control class and the view. For anyone used to writing WPF applications, the MailAddressVisualizerUserControl class is not a code-behind file where you can access visual elements. The only way to show values and interact with the model is through the data context. Notice how I bind the DisplayName and Email properties from the EmailAddressModel class in the XAML code.
To make this work, the XAML code needs to be embedded in the class library. You can either right-click the XAML file, click Properties, and select Embedded resource in Build Action. Or you can include the following code in the project file:
<ItemGroup>
  <Page Remove="MailAddressVisualizerUserControl.xaml" />
  <EmbeddedResource Include="MailAddressVisualizerUserControl.xaml" LogicalName="$(RootNamespace).MailAddressVisualizerUserControl.xaml" />
</ItemGroup>
Like we added the CopyLocalLockFileAssemblies element to copy libraries from NuGet packages in the output directory, we also need a copy of the built MailAddressVisualizerSource project. This is done by adding the following to the project file as well:
<Content Include="..\MailAddressVisualizerSource\bin\$(Configuration)\netstandard2.0\MailAddressVisualizerSource.dll" Link="netstandard2.0\MailAddressVisualizerSource.dll">
  <CopyToOutputDirectory>PreserveNewest</CopyToOutputDirectory>
</Content>
TBH, I'm not sure why this is needed since the visualizer project already references the source project.
Still follow? Good thing, since we should be ready to test the project. Set the MailAddressVisualizer project as startup and hit F5. This will start a new instance of Visual Studio running in experimental mode. Open the console application that I showed you in the beginning and hit F5 again. I totally understand why you would be getting a bit of an Inception vibe right now. We are debugging a project inside a project that we are debugging. But check it out, there's a View button next to the mailAddress variable:

When clicking the View button our beautiful XAML view is shown:
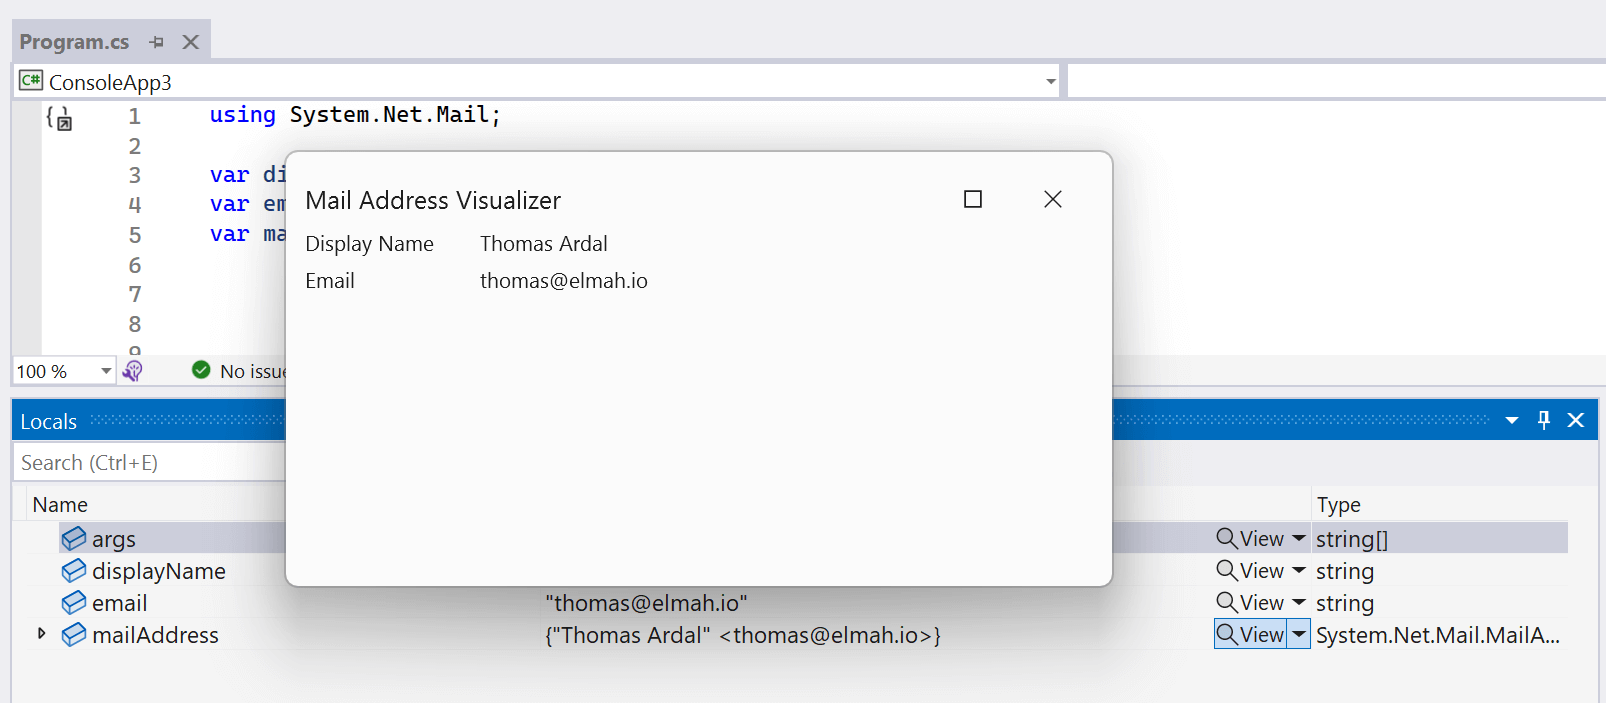
Great success! Since this post already grew way more in length than originally planned and because this is as far as I've reached myself, I'll save the final parts for another post.
elmah.io: Error logging and Uptime Monitoring for your web apps
This blog post is brought to you by elmah.io. elmah.io is error logging, uptime monitoring, deployment tracking, and service heartbeats for your .NET and JavaScript applications. Stop relying on your users to notify you when something is wrong or dig through hundreds of megabytes of log files spread across servers. With elmah.io, we store all of your log messages, notify you through popular channels like email, Slack, and Microsoft Teams, and help you fix errors fast.

See how we can help you monitor your website for crashes Monitor your website