Wrapping JavaScript libraries in Blazor WebAssembly/WASM
Blazor WebAssembly is one of the newest front-end frameworks on the block. It enables you to write frontend in C# and makes it possible to use many of the .NET libraries that you already know. Most websites use some JavaScript libraries that make it easier to make complex animations, self-aligning components, or other dynamic interactions. People are already working on making libraries that make it easy to add complex features to your website using Blazor as well. But for now, you might still be missing a way to do that one thing that some JavaScript library does when working with Blazor. You could reimplement that feature in Blazor WebAssembly from the ground up, but that might be a lot of work. In this article, we will show how you can wrap a JavaScript library in Blazor and thereby getting that one feature into Blazor WebAssembly.

Let's pick a JavaScript library
We have picked Popper as the library that we will wrap. It is used many places and is among other things a dependency of the well-known framework Bootstrap. It makes it possible to place HTML elements relative to each other using a lot of different rules and parameters.
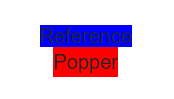
The simplest example of the library is the following code snippet which can be inserted anywhere in a HTML body
<span id="reference" style="background-color:blue;">Reference</span>
<span id="popper" style="background-color:red;">Popper</span>

<script src="https://unpkg.com/@popperjs/core@2"></script>
<script>
    const reference = document.querySelector('#reference');
    const popper = document.querySelector('#popper');

    Popper.createPopper(reference, popper);
</script>
It starts by referencing the popper js files. Then it selects the two elements that we want to place somewhere in relation to each other, which is done with the line Popper.createPopper(reference, popper);
Wrapping the constructor
To get started, we first need to create a new Blazor WebAssembly project. To create this you need .NET Core 3.1.300 or newer installed on your machine. You can make the start template for a Blazor WebAssembly project using the command line and then writing out dotnet new blazorwasm or by using Visual Studio's GUI for making a new Blazor App and the selecting Blazor WebAssembly App.
We then add the JavaScript library to the project as previously by inserting <script src="https://unpkg.com/@popperjs/core@2"></script> in the header of your index.html file which can be found in the wwwroot. Then we need to create a new class that mimics the same interface that Popper has.
public class Popper
{
    private readonly IJSRuntime jSRuntime;

    public Popper(IJSRuntime jSRuntime)
    {
        this.jSRuntime = jSRuntime;
    }

    public async Task CreatePopperAsync(ElementReference reference, ElementReference popper)
    {
        await jSRuntime.InvokeVoidAsync("PopperWrapper.createPopper", reference, popper);
    }
}
We first make a constructor for the class where we inject the jSRuntime and save it in a readonly field. The jSRuntime can be used to call JavaScript functions. It is used in the method called CreatePopperAsync. We appended the word Async to the method name since this is a standard used in many libraries which makes it easy to remember that it is asynchronous. The method takes two ElementReference's which is how HTML elements are referenced in Blazor. It then parses elements as arguments to the InvokeVoidAsyncmethod which can take any number of arguments which it will parse to the JavaScript method written in the first argument. We have already written "PopperWrapper.createPopper". Now we will need to make this function in JavaScript. We create this method in a new js file which we will call PopperWrapper.js. We also add a reference to this file in index.htmls header.
window.PopperWrapper = {
    createPopper: function (reference, popper) {
        Popper.createPopper(reference, popper);
    }
}
We simply call the method of the same name from the Popper library with the same arguments as we have seen before. We make this wrapper because we want to ignore what the method returns for now and because we will extend this method later.
Now we go to our program.js file where we will dependency inject an instance of our Popper class.
public static async Task Main(string[] args)
{
    var builder = WebAssemblyHostBuilder.CreateDefault(args);
    builder.RootComponents.Add<App>("app");

    // Other services that are dependency injected like `HttpClient`

    builder.Services.AddTransient(sp => new Popper(sp.GetService<IJSRuntime>()));

    await builder.Build().RunAsync();
}
We defined that the Popper constructor took an IJSRuntime. We fetch this from the serviceProvider (shorted to sp) with the GetService method and parses that to the constructor. Now an instance of the Popper class can be requested in any of our Blazor pages. We now inject it in the index.razor file that was created from the project template. It can be found in the Pages folder.
@page "/"
@inject Popper popper

<span id="reference" @ref=reference style="background-color:blue;">Reference</span>
<span id="popper" @ref=popper style="background-color:red;">Popper</span>

@code {
    protected ElementReference reference;

    protected ElementReference popper;

    protected override async Task OnAfterRenderAsync(bool firstRender)
    {
        if (firstRender) {
            await popper.CreatePopperAsync(reference, popper);
        }
    }
}
We first inject the instance of the Popper class with the alias Popper. We then add the two span's as we had in the previous example. We have added the @ref attributes to the span's which makes them referencable in our code block. In the code block, we define two ElementReference's corresponding to the two span's. We override the OnAfterRenderAsync method which is one of the last methods that gets called in the Blazor Lifecycle. We override this method because we need the ElementReference's to be initialized before we can call the Popper method. When calling the CreatePopperAsync method we forward the two ElementReference's. Now we have the simplest use of the popper library completely wrapped for us to use in Blazor. It simply places the popper below the reference by default.
Adding parameters to the constructor
The library has more parameters that can be added which will make it even more useful. We can add a third element to the constructor of the type Options.
type Options = {|
  placement: Placement, // default "bottom"
  modifiers: Array<$Shape<Modifier<any>>>, // default []
  strategy: PositioningStrategy, // default "absolute"
  onFirstUpdate?: ($Shape<State>) => void, // default undefined
|};
let's first add this parameter as a anonymous object and see it work. We first add the extra parameter in our JavaScript wrapper.
window.PopperWrapper = {
    createPopper: function (reference, popper, options) {
        if (options != null) {
            Popper.createPopper(reference, popper, options);
        } else {
            Popper.createPopper(reference, popper);
        }
    }
}
We simply check if the option parsed is null or not and calls the corresponding constructor. We then add the parameter to the Popper class.
public async Task CreatePopperAsync(ElementReference reference, ElementReference popper, object options = null)
{
    await jSRuntime.InvokeVoidAsync("PopperWrapper.createPopper", reference, popper, options);
}
We have added the options parameter as an optional parameter that defaults to null. Now we can add an argument when we call it from Blazor.
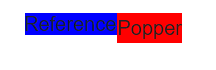
await Popper.CreatePopperAsync(reference, popper, new { placement = "right-start"});
Now we see that the popper is aligned to the start of the right side of the reference span.
Typed parameter
We have seen that we can pass the Options parameter to the constructor as a anonymous object, but we would really like to use a typed object to gain the pros of typesafe programming. We first construct a new class for the Options type starting with only defining the placement field.
public class Options
{
    [JsonPropertyName("placement")]
    public Placement Placement { get; set; }
}

public enum Placement
{
    [Description("auto")] Auto,
    [Description("auto-start")] AutoStart,
    [Description("auto-end")] AutoEnd,
    [Description("top")] Top,
    [Description("top-start")] TopStart,
    [Description("top-end")] TopEnd,
    [Description("bottom")] Bottom,
    [Description("bottom-start")] BottomStart,
    [Description("bottom-end")] BottomEnd,
    [Description("right")] Right,
    [Description("right-start")] RightStart,
    [Description("right-end")] RightEnd,
    [Description("left")] Left,
    [Description("left-start")] LeftStart,
    [Description("left-end")] LeftEnd
}
We have added a lot of attributes to the class and to the enum defining all the possible options for the placement. The JsonPropertyName tells the System.Text.Json library that the Placement property name should be serialized as placement. We have added the Description attributes because this is the place closest to the implementation where we can define the JSON counterpart for the different names. The reason we have to define these different JSON counterparts is that you cannot have dashes in the options of an enum e.g. "top-start". We could have chosen just to use a string instead of an enum, but using an enum limits the possibility for error. System.Text.Json does not use the Description attributes out of the box, but we can define a custom Converter that can fetch the attributes when serializing to JSON. While we are making it let's try to think generics into it so that it can use any enum with Description attributes. We define this JSON Converter in a new class called EnumDescriptionConverter.
class EnumDescriptionConverter<T> : JsonConverter<T> where T : IComparable, IFormattable, IConvertible
{
    public override T Read(ref Utf8JsonReader reader, Type typeToConvert, JsonSerializerOptions options)
    {
        throw new NotImplementedException();
    }

    public override void Write(Utf8JsonWriter writer, T value, JsonSerializerOptions options)
    {
        FieldInfo fi = value.GetType().GetField(value.ToString());

        var description = (DescriptionAttribute)fi.GetCustomAttribute(typeof(DescriptionAttribute), false);

        writer.WriteStringValue(description.Description);
    }
}
We define that we can work with any type T in this class as long as it implements IComparable, IFormattable, and IConvertible. This pretty much narrows it down to being an enum. Throughout the class, this T is used as a placeholder for the given type. We also state that the class implements the interface JsonConverter which we pass the type T. JsonConverter specifies that we need to implement both a Read and a Write method. We will not use the Read method, so we let it throw an exception. In the Write method we have the goal of writing a string using the writer as stated in the last line. In order to get all attributes that could be added to any option of the enum we use Reflection to get a FieldInfo which contains all the attributes. We then retrieve from fi a DescriptionAttribute and cast it to a DescriptionAttribute. This could potentially cause problems if we forgot to add a Description attribute for one of the options in the enum but it should work for now.
We then have to tell our Options class that it should use this converter when serializing/deserializing the Placement field.
public class Options
{
    [JsonConverter(typeof(EnumDescriptionConverter<Placement>))]
    [JsonPropertyName("placement")]
    public Placement Placement { get; set; }
}
This is done by adding another attribute to the Placement field. It defines that it should use a JsonConverter of the type EnumDescriptionConverter. We defined that it takes any enum, which is Placement in this case. Now we can go to the Popper class and change it to use the Options class.
public async Task CreatePopperAsync(ElementReference reference, ElementReference popper, Options options = null)
{
    await jSRuntime.InvokeVoidAsync("PopperWrapper.createPopper", reference, popper, options);
}
It's a subtle but important change. Now when we go to our Index page we will see that we can't parse in an anonymous object. We instead need to make an Options object and parse that.
var options = new Options() { Placement = Placement.RightStart };
await Popper.CreatePopperAsync(reference, popper, options);
We now have the same result as previously, but we can easily change the placement using the enum and in doing so not risk misspelling the placement.
Conclusion
We made a simple wrapper for a sample JavaScript library with typed parameters and handling of HTML element references. There are more things that could be covered for making wrappers of JavaScript libraries in Blazor. Among these are handling of JS-to-C# function calls, typed responses from method calls, and handling of JavaScript object instances. These scenarios will possibly be covered in a future article. If you have any questions or comments about the article, then feel free to reach out and share.
elmah.io: Error logging and Uptime Monitoring for your web apps
This blog post is brought to you by elmah.io. elmah.io is error logging, uptime monitoring, deployment tracking, and service heartbeats for your .NET and JavaScript applications. Stop relying on your users to notify you when something is wrong or dig through hundreds of megabytes of log files spread across servers. With elmah.io, we store all of your log messages, notify you through popular channels like email, Slack, and Microsoft Teams, and help you fix errors fast.

See how we can help you monitor your website for crashes Monitor your website