
New in .NET 10 and C# 14: Multi-Tenant Rate Limiting
.NET 10 is officially out, along with C# 14. Microsoft has released .NET 10 as Long-Term Support (LTS) as a successor to .NET 8. Like every version, it is not just an update but brings something new to the table. In this series, we will explore which aspects of software can be upgraded with the latest release. Today, we will explore a multi-tenant rate limiter with .NET 10.
APIs power your business. The statement is mostly true for all of your applications. The user accesses the information via mobile or web, and you provide it to them via an API. For SaaS, the access and information have more to manage from client to client. A premium client pays more and needs more throughput. Similarly, others will use the system according to their plan and user base. One factor of fair use among clients or tenants is rate limiting, that is, how many requests users of a client can hit the server. .NET 10 offers improvements in rate-limiting with its throttling middleware.
Designing a multi-tenant rate limiter
To understand the multi-tenant rate limiter, we will create a simple web API. I will provide step-by-step instructions to break this down with .NET 10.
Step 1: Create a .NET API project
dotnet new webapi -n Net10RateLimiter -f net10.0
cd Net10RateLimiter
Step 2: Create Models
I organized models in the Models folder and created the following class:
namespace Net10RateLimiter.Models;

public class TenantRateLimit
{
    public string TenantId { get; set; } = string.Empty;
    public int RequestsPerMinute { get; set; }
}
The class TenantRateLimit will define a tenant-specific rate using OOP. For a database-based application, we can save it as well.
Step 3: Create a Limit resolver service
For that logic, I created a folder named Services, and the resolver class look like this:
namespace Net10RateLimiter.Services;

public sealed class TenantResolver
{
    private readonly IHttpContextAccessor _httpContextAccessor;

    public TenantResolver(IHttpContextAccessor httpContextAccessor)
    {
        _httpContextAccessor = httpContextAccessor;
    }

    public string ResolveTenant()
    {
        var context = _httpContextAccessor.HttpContext;

        if (context is null)
            return "default";

        if (context.Request.Headers.TryGetValue("X-Tenant-ID", out var tenantId))
            return tenantId.ToString();

        return "default";
    }
}
The resolver works as request-scoped logic to invalidate limits on each request. It extracts the tenant identity from the incoming request and returns.
Step 4: Register Required Services
Inject the required dependencies in Program.cs
builder.Services.AddControllers();

// Required for HttpContext access
builder.Services.AddHttpContextAccessor();

// Tenant resolver must be scoped
builder.Services.AddScoped<TenantResolver>();
Step 5: Add rate limiting logic
Just after the dependency injections, add the following code:
builder.Services.AddRateLimiter(options =>
{
    options.OnRejected = async (context, token) =>
    {
        context.HttpContext.Response.StatusCode = 429;
        await context.HttpContext.Response.WriteAsync("Too Many Requests");
    };

    options.AddPolicy("TenantPolicy", context =>
    {
        var tenantResolver =
            context.RequestServices.GetRequiredService<TenantResolver>();

        var tenantId = tenantResolver.ResolveTenant();
        var limit = GetTenantLimit(tenantId);

        return RateLimitPartition.GetTokenBucketLimiter(
            tenantId,
            _ => new TokenBucketRateLimiterOptions
            {
                TokenLimit = limit,
                TokensPerPeriod = limit,
                ReplenishmentPeriod = TimeSpan.FromMinutes(1),
                AutoReplenishment = true
            });
    });
});
RateLimitPartition.GetTokenBucketLimiter(...) is the throttling engine using fully native ASP.NET Core 10.
While at the top, add the GetTenantLimit method:
static int GetTenantLimit(string tenantId)
{
    return tenantId switch
    {
        "tenantA" => 10, // Premium tenant
        "tenantB" => 5,  // Standard tenant
        _ => 2           // Default / anonymous
    };
}
We are defining the maximum request per minute for each client by extracting tenantId from the header of a request. GetTenantLimit is kept hard-coded to simplify our implementation. In real scenarios, you will use a Redis cache or database for that.
Step 6: Add controller
Our controller is as follows:
using Microsoft.AspNetCore.Mvc;
using Microsoft.AspNetCore.RateLimiting;

namespace Net10RateLimiter.Controllers;

[EnableRateLimiting("TenantPolicy")]
[ApiController]
[Route("[controller]")]
public class WeatherForecastController : ControllerBase
{
    [HttpGet]
    public IEnumerable<string> Get()
        => ["Sunny", "Windy", "Breezy"];
}
The attribute [EnableRateLimiting("TenantPolicy")] associates our tenant policy with the controller.
Step 7: Enable the Middleware
Insert rate limiter middleware:
var app = builder.Build();

app.UseRateLimiter();

app.MapControllers();

app.Run();
Make sure to add this just before controllers, so it blocks the request before hitting the controller if the rate limit exceeds.
Our final Program.cs looks like this:
using System.Threading.RateLimiting;
using Net10RateLimiter.Services;
static int GetTenantLimit(string tenantId)
{
return tenantId switch
{
"tenantA" => 10, // Premium tenant
"tenantB" => 5, // Standard tenant
_ => 2 // Default / anonymous
};
}
var builder = WebApplication.CreateBuilder(args);
// Add services to the container.
// Learn more about configuring OpenAPI at https://aka.ms/aspnet/openapi
builder.Services.AddOpenApi();
builder.Services.AddControllers();
// Required for HttpContext access
builder.Services.AddHttpContextAccessor();
// Tenant resolver must be scoped
builder.Services.AddScoped<TenantResolver>();
builder.Services.AddRateLimiter(options =>
{
options.OnRejected = async (context, token) =>
{
context.HttpContext.Response.StatusCode = 429;
await context.HttpContext.Response.WriteAsync("Too Many Requests");
};
options.AddPolicy("TenantPolicy", context =>
{
var tenantResolver =
context.RequestServices.GetRequiredService<TenantResolver>();
var tenantId = tenantResolver.ResolveTenant();
var limit = GetTenantLimit(tenantId);
return RateLimitPartition.GetTokenBucketLimiter(
tenantId,
_ => new TokenBucketRateLimiterOptions
{
TokenLimit = limit,
TokensPerPeriod = limit,
ReplenishmentPeriod = TimeSpan.FromMinutes(1),
AutoReplenishment = true
});
});
});
var app = builder.Build();
// Configure the HTTP request pipeline.
if (app.Environment.IsDevelopment())
{
app.MapOpenApi();
}
app.UseHttpsRedirection();
app.UseRateLimiter();
app.MapControllers();
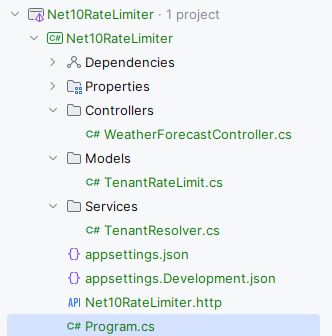
app.Run();And the file structure looks like this:
Step 8: Run and test
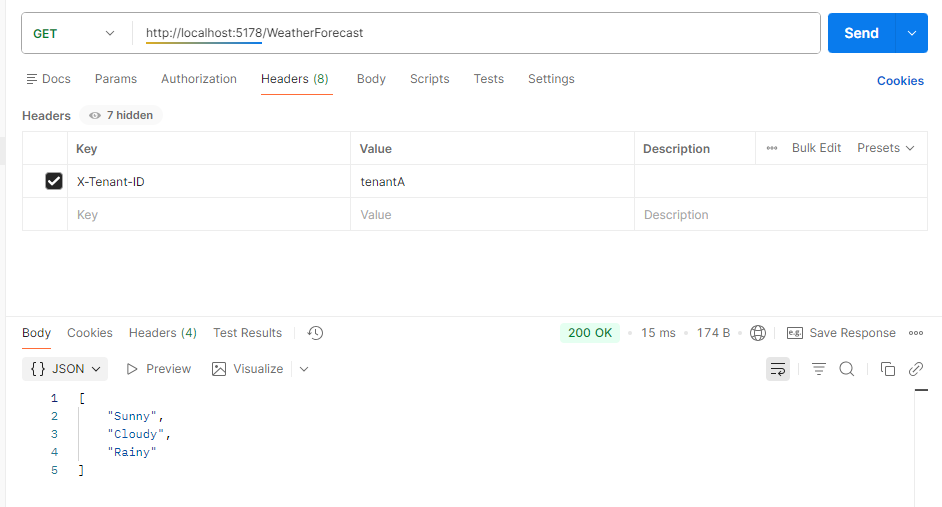
dotnet runLet us test this in Postman. Tenant A can call the endpoint:
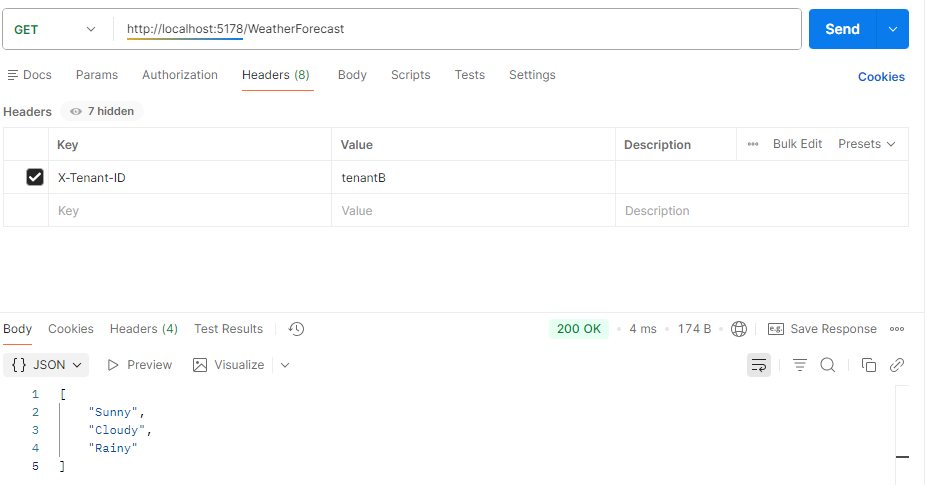
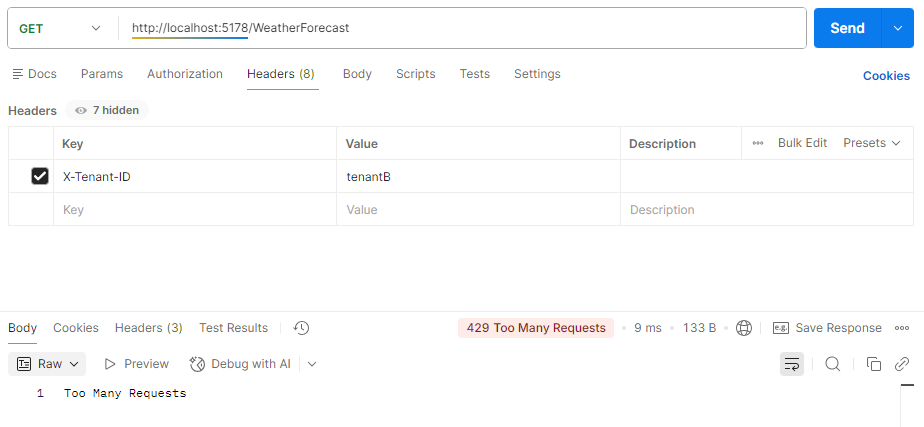
So can Tenant B:
Once Tenant A reached the limit
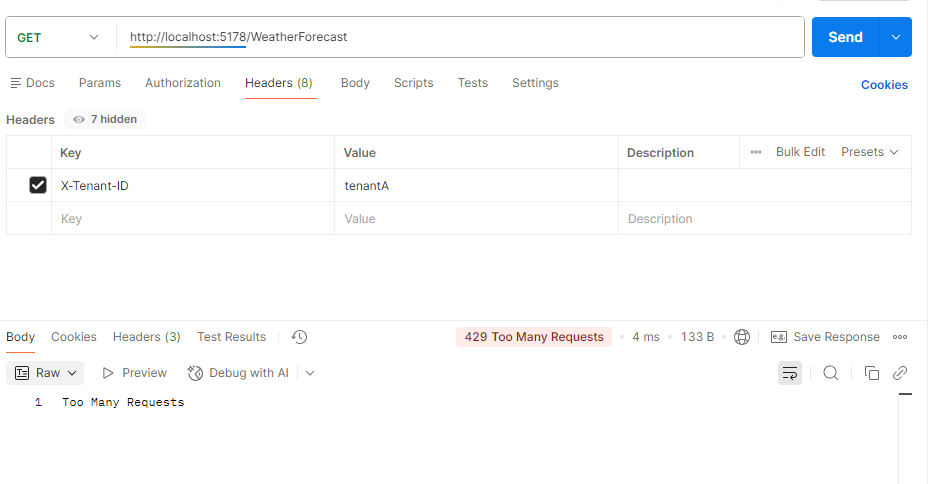
Once tenant B reached the limit, you will see the endpoint returning a status code of 429, meaning too many requests:
What has .NET 10 improved in the rate limiter?
.NET 10 has changed the game of rate limiter in many ways, such as:
- While .NET 8 introduced native rate-limiting, .NET 10 improved throttling middleware, eliminating verbose and third-party reliance. You can simply use
AddRateLimiterand addUseRateLimiterto the pipeline now. - Earlier, developers had to implement counter expiration, sliding windows, and token buckets for handling race conditions and concurrency-safe code. The practice was tiring and risky to maintain. .NET 10 flattens these jobs.
- Rate limiting was mostly IP-based with no native concept of tenants. If you had to design it for a SaaS multitenant application, you would have to do it manually. In .NET 10, partitioned rate limiters allow each tenant to have an isolated limiter, preventing noisy-neighbor issues by design.
- Scalability of rate limiting demands Redis, distributed locks, and careful atomic operations with prior .NET versions. .NET 10 relieved the pain with its optimized high concurrency ability.
- Custom logic and third-party usage in rate limiting caused extra overhead and performance penalty. .NET 10, with its allocation-efficient and optimized middleware, runs efficiently and fast.
Conclusion
.NET 10 was released in November 2025 and is supported for three years as a long-term support (LTS) release. It brings the latest version of C# with many refinements. In this blog post for our .NET 10 and C# 14 series, we discovered refinements in the rate limiter and throttling middleware. Built-in support and middleware native implementation have improved the maintainability and performance of rate limiters.
Code: https://github.com/elmahio-blog/Net10RateLimiter.git
elmah.io: Error logging and Uptime Monitoring for your web apps
This blog post is brought to you by elmah.io. elmah.io is error logging, uptime monitoring, deployment tracking, and service heartbeats for your .NET and JavaScript applications. Stop relying on your users to notify you when something is wrong or dig through hundreds of megabytes of log files spread across servers. With elmah.io, we store all of your log messages, notify you through popular channels like email, Slack, and Microsoft Teams, and help you fix errors fast.

See how we can help you monitor your website for crashes Monitor your website