
How to implement customized role permissions in ASP.NET Core
You often need to add authentication and authorization when developing an application for a user base. But what are they? Why are they so important? This blog post will define these terms and discuss how to implement custom role permissions in an ASP.NET Core API.
What is Authentication?
Authentication secures the application from users unauthorized parties who can access it. It enables an application to give user rights to only those who are registered to the application.
What is Authorization?
Authorization restricts authentic users from performing only allowed actions based on their permission. With authorization, users are permitted to take only those actions they are allowed to do. It can be considered one step above authentication, categorizing legitimate users on permission levels.
Even though the front end does not allow users to use without login, the backend APIs must be secured only to allow legitimate users to call only allowed APIs. That's why we need authentication and authorization for our ASP.NET Core APIs. In many cases, authorization is more customized to our business logic. Our application contains specific roles, and each has a set of permissions for the actions. Notably, assigning and unassigning those permissions should be dynamic so the admins can change any permission with any role.
Suppose we have an inventory management application where we are going to apply role permissions.
Step 1: Install the required packages
dotnet add package Microsoft.AspNetCore.Authentication
dotnet add package Microsoft.AspNetCore.Authentication.JwtBearer
dotnet add package Microsoft.AspNetCore.Authorization
dotnet add package Microsoft.AspNetCore.Authorization.Policy
dotnet add package Microsoft.AspNetCore.Identity
Step 2: Add configurations in appsettings.json
"Jwt": {
  "Key": "YourOwnsecretKeyForNewWebApi",
  "Issuer": "http://abc.com/",
  "Audience": "*",
  "Subject": "BasewebSubject"
}
Step 3: add JWT authentication in Program.cs and Swagger
builder.Services.AddSwaggerGen(c=>
{
    c.SwaggerDoc("v1", new Microsoft.OpenApi.Models.OpenApiInfo
    {
        Title = "Myy API",
        Version = "v1"
    });

    c.AddSecurityDefinition("Bearer", new OpenApiSecurityScheme
    {
        Description = "Jwt Authorization",
        Name = "Authorization",
        In = ParameterLocation.Header,
        Type = SecuritySchemeType.ApiKey,
        Scheme ="Bearer"
    });

    c.AddSecurityRequirement(new OpenApiSecurityRequirement
    {
        new OpenApiSecurityScheme
        {
            Reference = new OpenApiReference
            {
                Type = ReferenceType.SecurityScheme,
                Id = "Bearer"
            }
        },
        new string[]{}
    }});
});

builder.Services.AddAuthentication(JwtBearerDefaults.AuthenticationScheme)
    .AddJwtBearer(options =>
    {
        options.TokenValidationParameters = new TokenValidationParameters
        {
            ValidateIssuer = true,
            ValidateAudience = true,
            ValidateLifetime = true,
            ValidateIssuerSigningKey = true,
            ValidIssuer = builder.Configuration["Jwt:Issuer"],
            ValidAudience = builder.Configuration["Jwt:Audience"],
            IssuerSigningKey = new SymmetricSecurityKey(Encoding.UTF8.GetBytes(builder.Configuration["Jwt:Key"]))
        };
    });
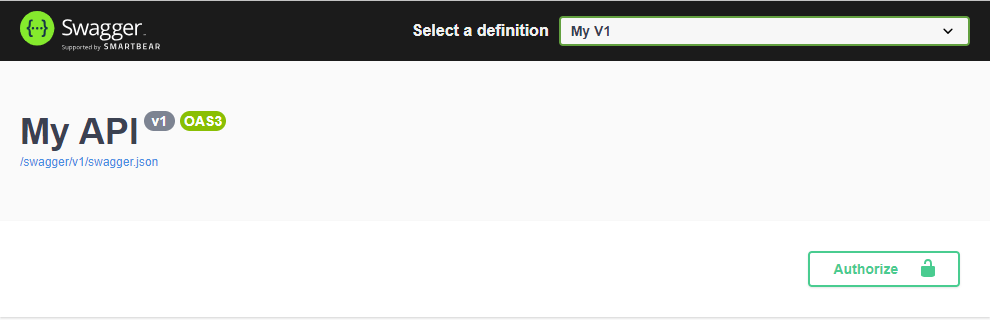
Adding JWT will show Authorization options in Swagger UI:

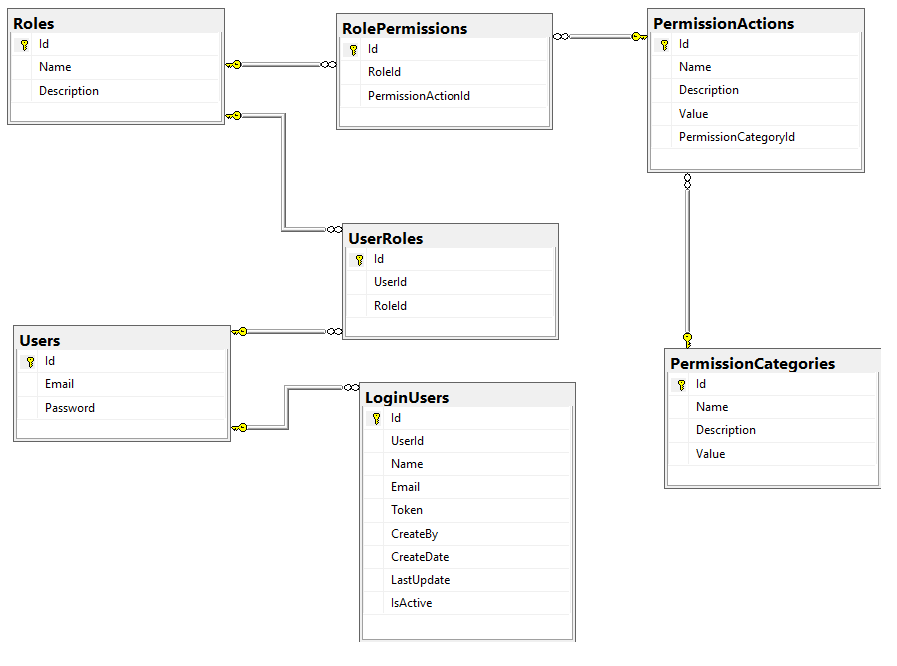
Step 4: Create Necessary tables using EFCore migration
All the permissions are hierarchically designed. Permission is organized into Categories such as User, material, etc. Each of them has an action specifying permission for individual API actions. For example, UserCreate, UserRead, MaterialCreate, MaterialStockUpdate, etc. The complete database design for the tables is:
public class User
{
    public int Id { get; set; } = 0;
    public string Email { get; set; } = string.Empty;
    public string Password { get; set; } = string.Empty;
    public virtual ICollection<UserRole> UserRoles { get; set; } = new List<UserRole>();
}

public class Role
{
    public int Id { get; set; } = 0;
    public string Name { get; set; } = string.Empty;
    public string Description { get; set; } = string.Empty;

    // Navigation properties
    [JsonIgnore]
    public virtual ICollection<UserRole> UserRoles { get; set; } = new List<UserRole>();
    [JsonIgnore]
    public virtual ICollection<RolePermission> RolePermissions { get; set; } = new List<RolePermission>();
}

public class UserRole
{
    public int Id { get; set; }
    public int UserId { get; set; }
    public int RoleId { get; set; }

    [JsonIgnore]
    public virtual Role Role { get; set; }
    [JsonIgnore]
    public virtual User User { get; set; }
}
Let’s define enums for each Permission Category and Action. It also helps to compare when checking if a user has the required permission.
public enum PermissionActionEnum
{
    MaterialRead = 1,
    MaterialCreate = 2,
    MaterialUpdate = 3,
    MaterialStockUpdate = 4,
    MaterialDelete = 5,
    RoleRead = 6,
    RoleCreate = 7,
}

public enum PermissionCategoryEnum
{
    Material = 1,
    Role = 2
}

public partial class RolePermission
{
    public int Id { get; set; }
    public int? RoleId { get; set; }
    public int? PermissionActionId { get; set; }

    [JsonIgnore]
    public virtual PermissionAction? PermissionAction { get; set; } = null!;

    [JsonIgnore]
    public virtual Role.Model.Role Role { get; set; } = null!;
}


public class PermissionCategory
{
    public int Id { get; set; }

    public string Name { get; set; } = null!;

    public string Description { get; set; } = null!;

    public PermissionCategoryEnum Value { get; set; }


    [JsonIgnore]
    public virtual ICollection<PermissionAction> PermissionActions { get; set; } = new List<PermissionAction>();
}

public partial class PermissionAction
{
    public int Id { get; set; }

    public string Name { get; set; } = null!;

    public string Description { get; set; } = null!;

    public PermissionActionEnum Value { get; set; }

    public int? PermissionCategoryId { get; set; }

    [JsonIgnore]
    public virtual PermissionCategory? PermissionCategory { get; set; }

    [JsonIgnore]
    public virtual ICollection<RolePermission> RolePermissions { get; set; } = new List<RolePermission>();
}

public class PermissionActionClaim
{
    public string Name { get; set; }
    public PermissionActionEnum Value { get; set; }
}
The loginUser table will save login logs and return a response when a user logs in.
public class LoginUser
{
    public int Id { get; set; } = 0;
    public int UserId { get; set; } = 0;
    public string Name { get; set; } = string.Empty;
    public string Email { get; set; } = string.Empty;
    public string Token { get; set; } = string.Empty;
    public string CreateBy { get; set; }
    public DateTime CreateDate { get; set; }
    public DateTime LastUpdate { get; set; }
    public bool IsActive { get; set; }
}
Step 5: Prepare the Login method
In the auth service, the following is the login method:
public async Task<LoginUserDto> LoginAsync(LoginUserInp user)
{
    // Validation of the user and encoding of the key goes here. The verified user is fetched in loggedInUser.

    var claims = new List<Claim>
    {
        new Claim(JwtRegisteredClaimNames.Sub, loggedInUser.Email),
        new Claim(JwtRegisteredClaimNames.Jti, Guid.NewGuid().ToString()),
        new Claim("Id", loggedInUser.UserId.ToString()), // Assuming Id is the teammemberId
        new Claim("Email", loggedInUser.Email),
        new Claim("Name", loggedInUser.Name),
    };

    var permissionsClaim =
        await _rolePermissionRepo.GetPermissionClaimsByUserAsync(loggedInUser.UserId);

    // Serialize the hierarchical permissions into a JSON string
    string permissionsJson = JsonConvert.SerializeObject(permissionsClaim);

    //Adding permissions to the claims
    claims.Add(new Claim("Permissions", permissionsJson));

    var token = new JwtSecurityToken(
        issuer: _configuration["Jwt:Issuer"],
        audience: _configuration["Jwt:Audience"],
        claims: claims,
        expires: DateTime.Now.AddDays(3), // Token expiration time
        signingCredentials: creds
    );

    var tokenString = new JwtSecurityTokenHandler().WriteToken(token);
    loggedInUser.Token = tokenString;

    var login = await _loginRepo.LoginAsync(loggedInUser);

    // Although permissions are encoded in the claims. Now returning those claims in the response
    return MapToDto(
        login,
        permissionsClaim
    );
}
Step 6: Create custom Controller attributes for role permission
To implement permission actions with the roles, we need to define our Attribute similar to [Authorize] provided by .NET Core. It involves defining a policy requirement by implementing the IAuthorizationRquirement from Microsoft.AspNetCore.Authorization. Then add a handler that checks for permission in the claims. Finally, Auth Attribute by implementing and setting the value to policy:
public class PermissionRequirement : IAuthorizationRequirement
{
    public string Permission { get; }

    public PermissionRequirement(string permission)
    {
        Permission = permission;
    }
}

public class PermissionAuthorizationHandler : AuthorizationHandler<PermissionRequirement>
{
    protected override Task HandleRequirementAsync(AuthorizationHandlerContext context, PermissionRequirement requirement)
    {
        var user = context.User;
        if (user == null || !user.Identity.IsAuthenticated)
        {
            context.Fail();
            return Task.CompletedTask;
        }

        bool isAuthorized = CheckUserPermission(user, (PermissionActionEnum)Enum.Parse(typeof(PermissionActionEnum), requirement.Permission));
        if (isAuthorized)
        {
            context.Succeed(requirement);
        }
        else
        {
            context.Fail();
        }

        return Task.CompletedTask;
    }

    private bool CheckUserPermission(ClaimsPrincipal user, PermissionActionEnum permissionAction)
    {
        var permissionsString = user.FindFirst("Permissions")?.Value;

        if (string.IsNullOrEmpty(permissionsString))
        {
            return false;
        }

        var permissions = JsonConvert.DeserializeObject<PermissionsClaim>(permissionsString);

        // Now check the hierarchical structure for the specific permission action
        return HasRequiredPermission(permissions, permissionAction);
    }

    private bool HasRequiredPermission(PermissionsClaim permissions, PermissionActionEnum requiredPermission)
    {
        foreach (var category in permissions.Categories)
        {
            if (category.Actions.Any(action => action.Value == requiredPermission))
            {
                return true;
            }
        }

        return false;
    }
}
Attribute code lies below:
public class PermissionAuthAttribute: AuthorizeAttribute
{
    public PermissionAuthAttribute(PermissionActionEnum permissionAction)
    {
        Policy = permissionAction.ToString();
    }
}
Step 7: Applying permissions to the API endpoint actions
[ApiController]
[Route("api/[controller]")]
public class MaterialController:ControllerBase
{
    //...

    [PermissionAuth(PermissionActionEnum.MaterialRead)]
    [HttpGet("GetMaterials")]
    public async Task<IActionResult> GetMaterialsAsync()
    { /* ... */ }

    [PermissionAuth(PermissionActionEnum.MaterialCreate)]
    [HttpPost("CreateMaterial")]
    public async Task<IActionResult> CreateMaterialAsync(MaterialDtoInp material)
    { /* ... */ }

    // ...
}
Similarly, Add in the RoleController:
[ApiController]
[Route("api/[controller]")]
public class RoleController: ControllerBase
{
    [PermissionAuth(PermissionActionEnum.RoleRead)]
    [HttpGet("GetRoles")]
    public async Task<IActionResult> GetRolesAsync()
    { /* ... */ }

    [PermissionAuth(PermissionActionEnum.RoleCreate)]
    [HttpPost("CreateRole")]
    public async Task<IActionResult> CreateRoleAsync(RoleDtoInp role)
    { /* ... */ }

    // ...
}
Step 8: Insert categories and actions into the database tables
Here, we can utilize either seeding or manual querying. As in the RolePermission table, each role is referenced with many permissionActions. That's why we need to have all the data in their respective table. Just to mention, insert the data into PermissionCategory and PermissionAction tables with Value on each representing Enum value.
Step 9: Coding part for RolePermission, Roles, Actions and Categories.
Here, we have to code to create and get the above entities in repos and controllers. I will mention only the logical parts for working methods, skipping interface, and file structure.
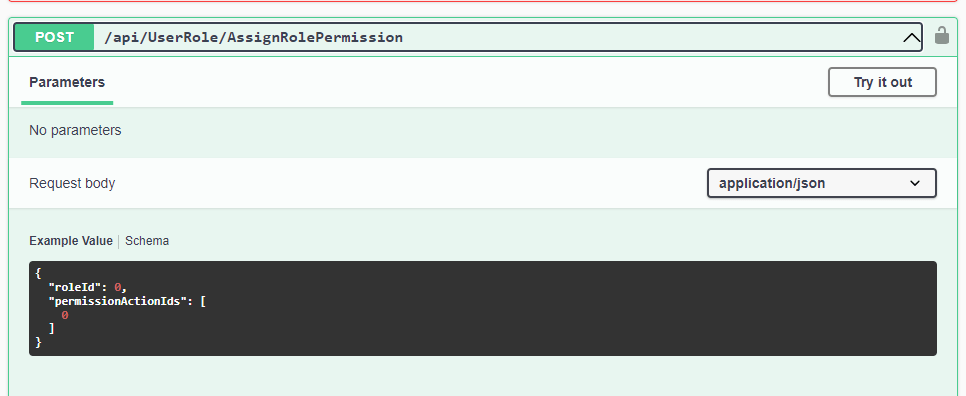
In repo, the following method assigns actions to a role:
public async Task<List<RolePermission>> AssignRolePermissionsAsync(RolePermissionDtoInp permissions)
{
    var featurePermissions = permissions.PermissionActionIds.Select(
        x => new RolePermission()
        {
            RoleId = permissions.RoleId,
            PermissionActionId = x
        }).ToList();

        foreach (var permission in featurePermissions)
        {
            if (await IsRolePermissionExistAsync(permission.RoleId??0, permission.PermissionActionId??0))
                continue;
            _context.RolePermissions.Add(permission);
        }

    await _context.SaveChangesAsync();
    return featurePermissions;
}
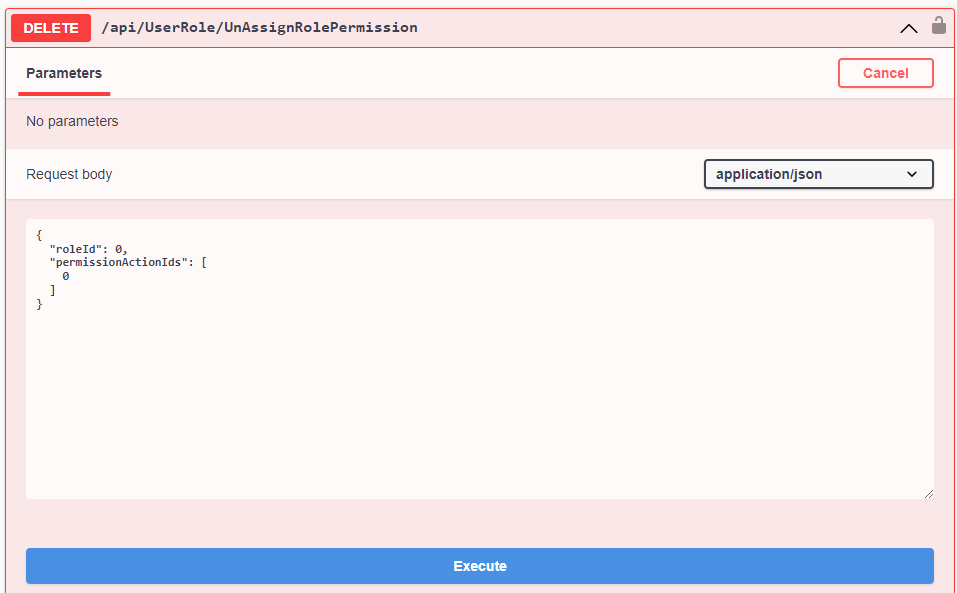
Similarly, a method for unassigning role permission:
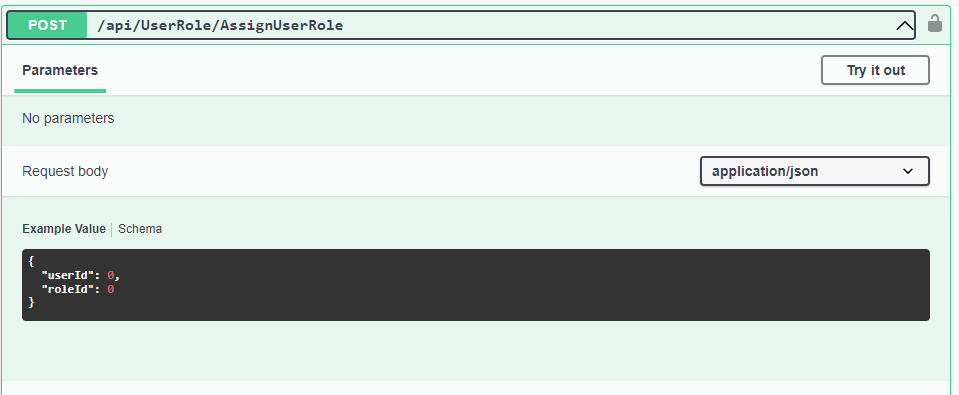
Now, creating a method to assign a role to a user:
public async Task<UserRole> AssignUserRoleAsync(UserRoleInp role)
{
    if (await IsUserRoleExist(role.UserId, role.RoleId))
        throw new CafmException("User already has this role");

    if(await UserHasAnyRole(role.UserId))
        await UnAssignUserRoleAsync(role.UserId);

    var createdUserRole = new UserRole()
    {
        UserId = role.UserId,
        RoleId = role.RoleId,
        CreateDate = DateTime.UtcNow,
        LastUpdate = DateTime.UtcNow,
        CreateBy = "User",
        IsActive = true
    };

    _context.UserRoles.Add(createdUserRole);
    await _context.SaveChangesAsync();
    return createdUserRole;
}
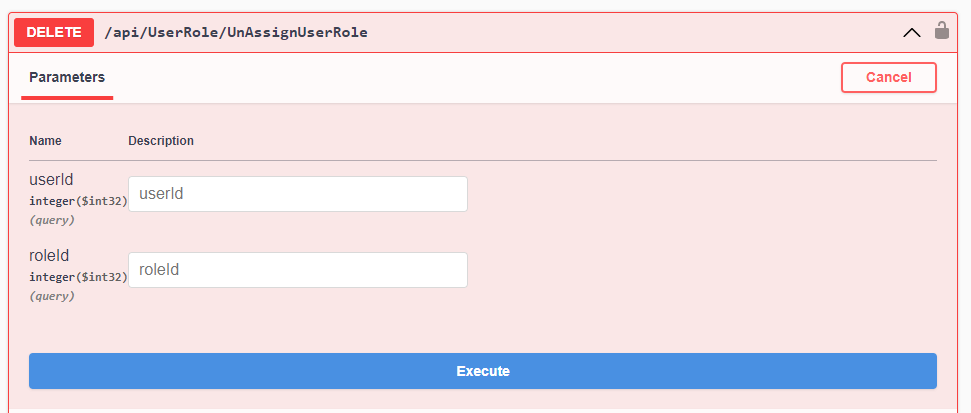
In contrast, we have UnassignUserRole:
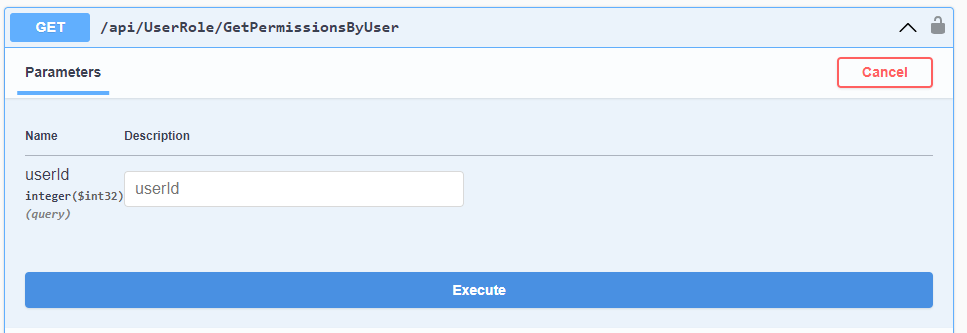
Get methods:

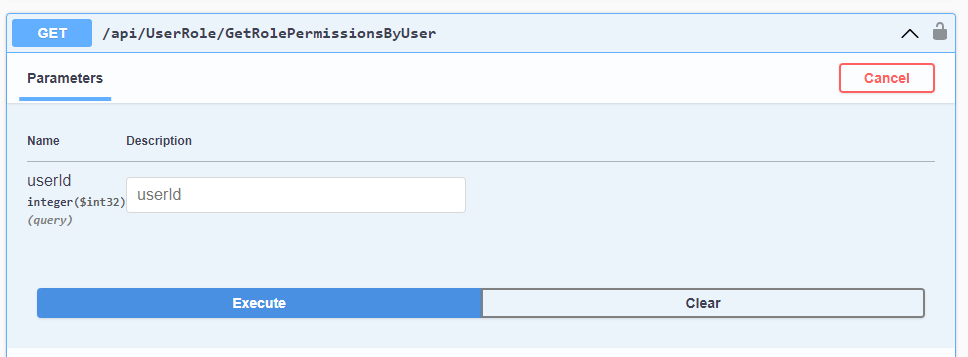
To return role permissions, we can provide two types of methods. One will return permissions in a hierarchy that is usable in claims and login responses. The other is plain data from the RolePermission table. This is usable to show all the permissions seemingly:
// This returns hierarchical data
public async Task<PermissionsClaim> GetPermissionClaimsByUserAsync(int userId)
{
    // Fetch the role for the user
    var roleId = await _context
        .UserRoles
        .Where(ur => ur.UserId == userId)
        .Select(ur => ur.RoleId)
        .FirstOrDefaultAsync();

    if (roleId == default)
    {
        // Handle case where the user does not have an assigned role
        return new PermissionsClaim();
    }

    // Fetch the permissions for the user's role
    var rolePermissions = await _context
        .RolePermissions
        .Where(rp => rp.RoleId == roleId)
        .Include(rp => rp.PermissionAction)
        .ThenInclude(pa => pa.PermissionCategory)
        .ToListAsync();

    var permissionCategories = rolePermissions
        .GroupBy(rp => rp.PermissionAction?.PermissionCategory)
        .Select(categoryGroup => new PermissionCategoryClaim
        {
            Name = categoryGroup.Key?.Name,
            Value = categoryGroup.Key.Value,
            Actions = categoryGroup
                .Select(rp => new PermissionActionClaim
                {
                    Name = rp.PermissionAction.Name,
                    Value = rp.PermissionAction.Value
                })
                .ToList()
        })
        .ToList();

    return new PermissionsClaim()
    {
        Applications = permissionCategories
    };
}
// Method returning plain data
public async Task<List<RolePermissionDto>> GetRolePermissionsByUserAsync(int userId)
=> await _context
    .RolePermissions
    .Where(rfp => rfp.Role.UserRoles.Any(ur => ur.UserId == userId))
    .Select(rfp => new RolePermissionDto
    {
        Id = rfp.Id,
        RoleId = rfp.RoleId,
        PermissionActionId = rfp.PermissionActionId,
        RoleName = rfp.Role.RoleName,
        PermissionActionName = rfp.PermissionAction.Name,
        PermissionActionValue = rfp.PermissionAction.Value
    })
    .ToListAsync();
Step 10: Create a role
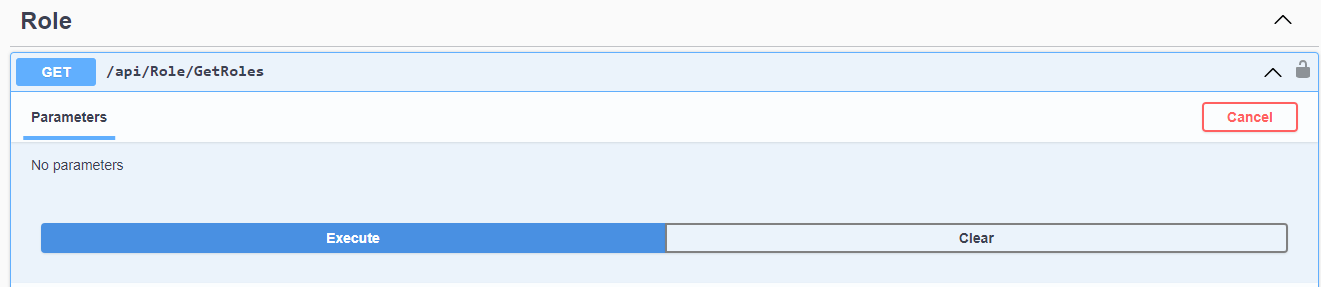
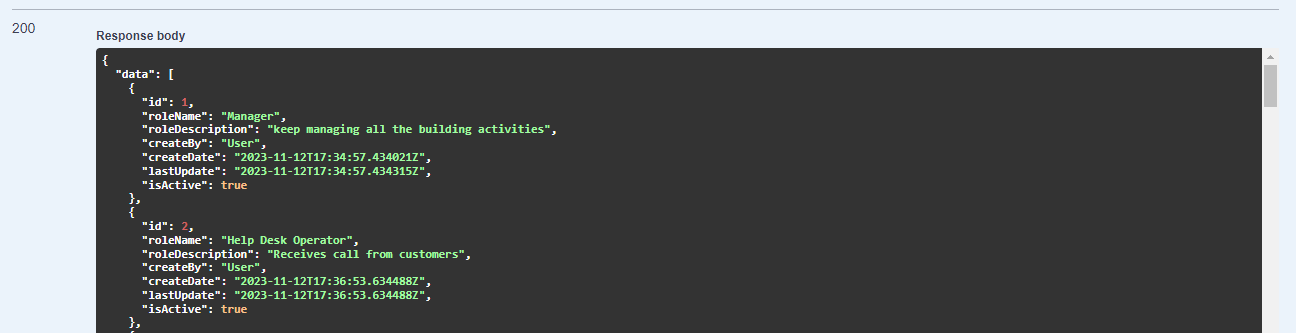
With the role endpoints, I have created two roles. After fetching from the GetRoles, we have:
Step 11: Assign PermissionActions to a role
As we inserted all the permission data in their tables, We exposed endpoints to get those data.
GetPermissionActions returns the following:

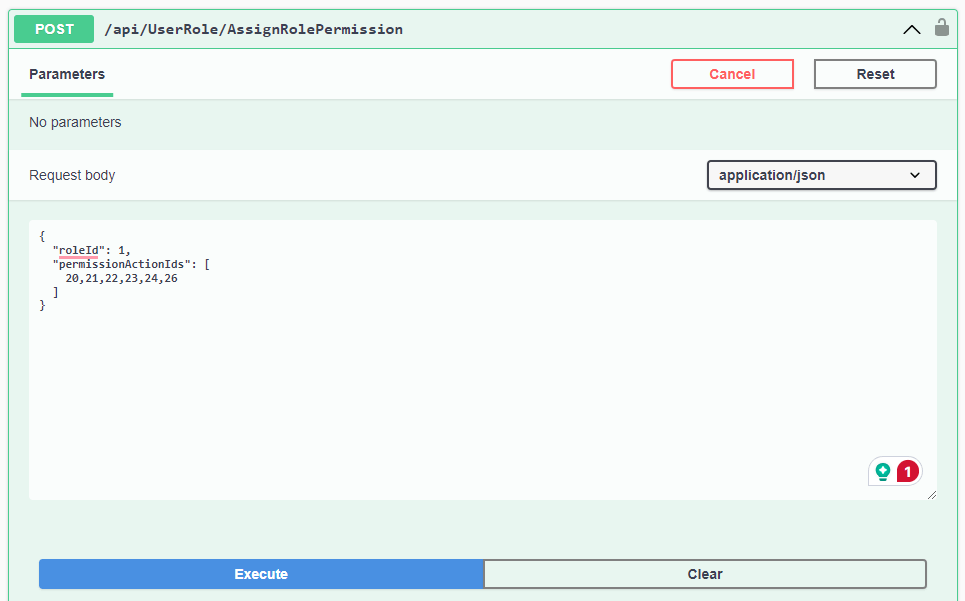
Add permissions to the manager role:
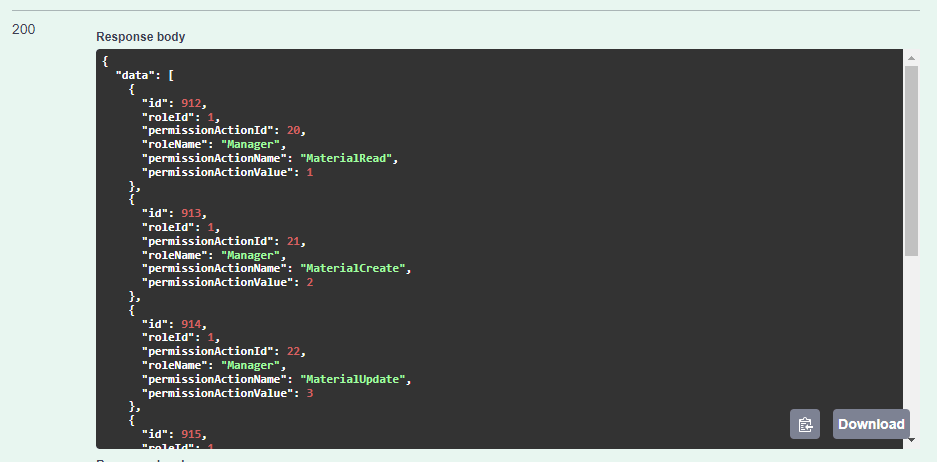
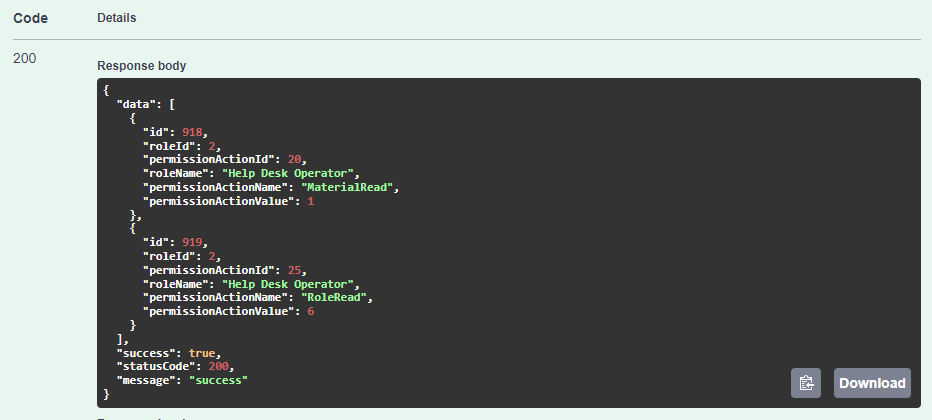
Similarly, Assing permissions to the other role:
Step 12: Assign roles to the users
To be concise, we already have 2 users created:
User 1 - id: 130, email: joe.root@camf.com
User 2 - id: 114, email: adam008@yahoo.com
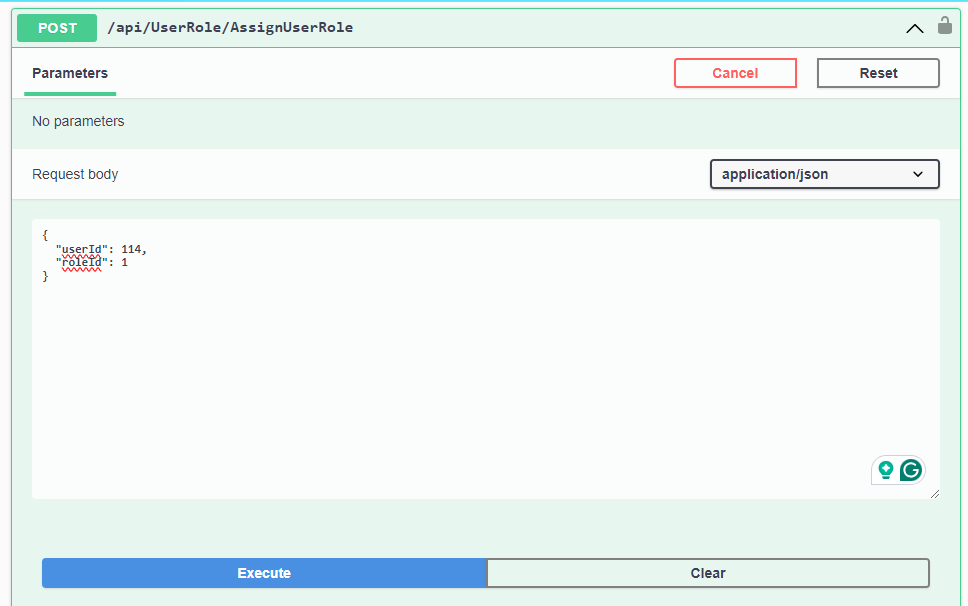
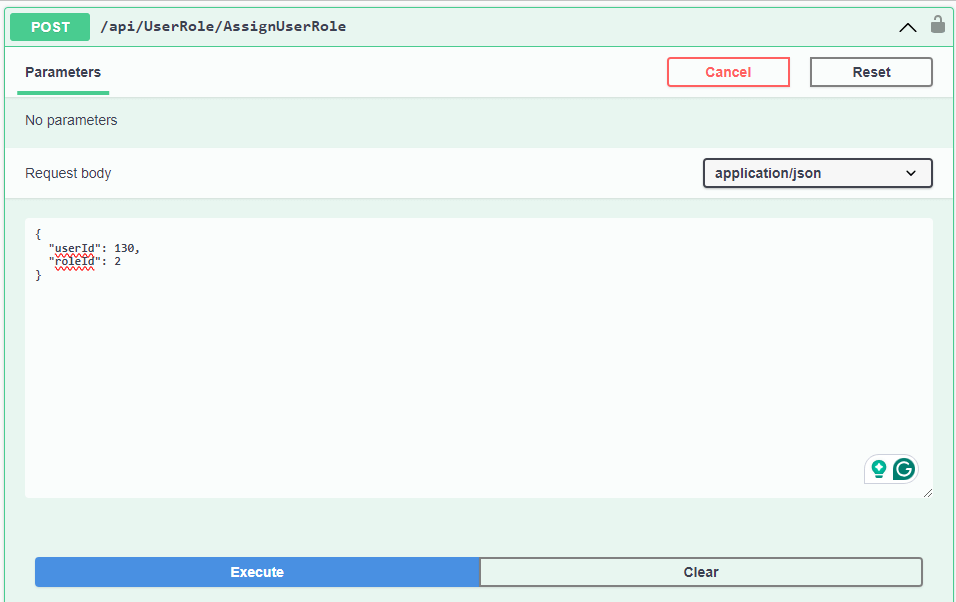
We have successfully assigned roles to those users. Those roles already have a set of permissions.
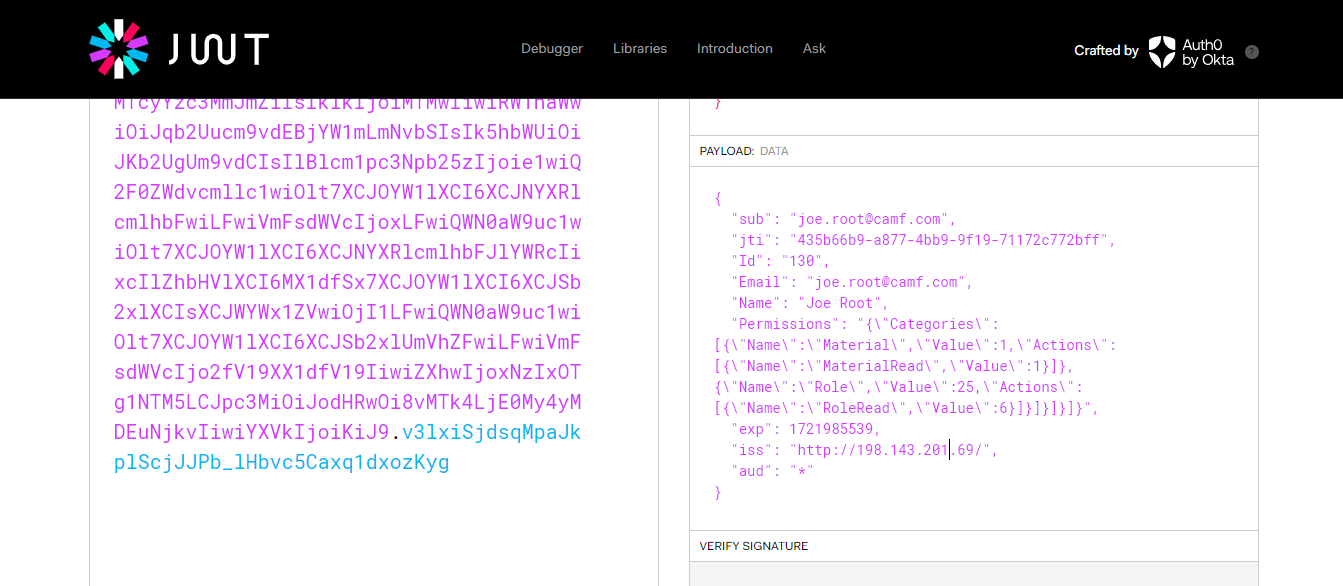
Step 13: Try login
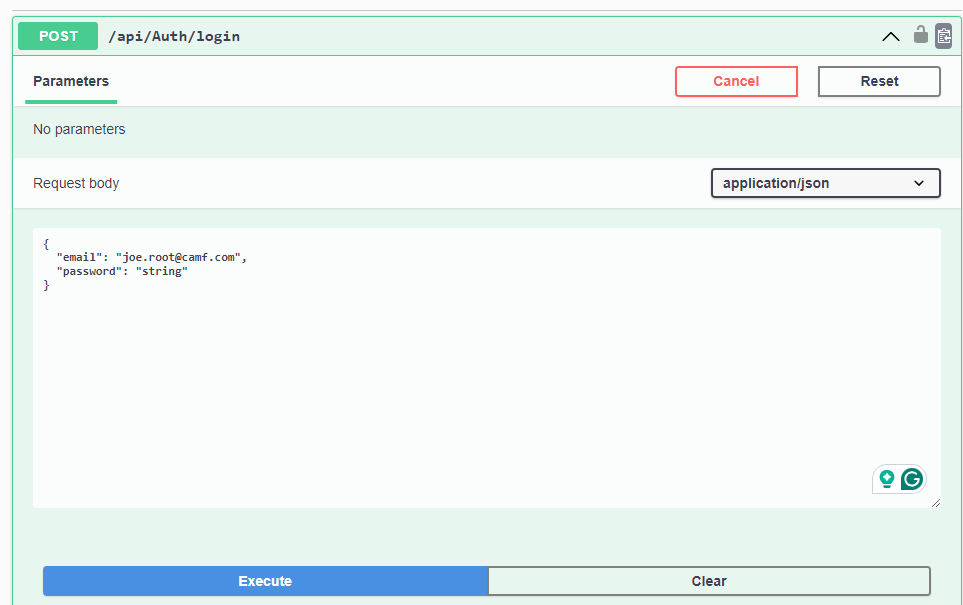
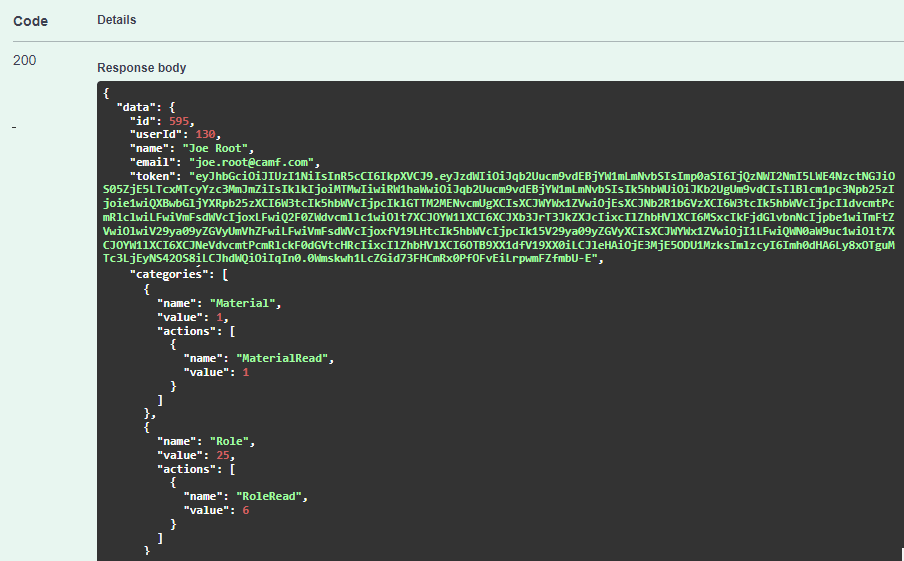
So, we are getting permissions while logging in. The token also encrypts role permissions, which we will use to check the authorization of the logged-in user:
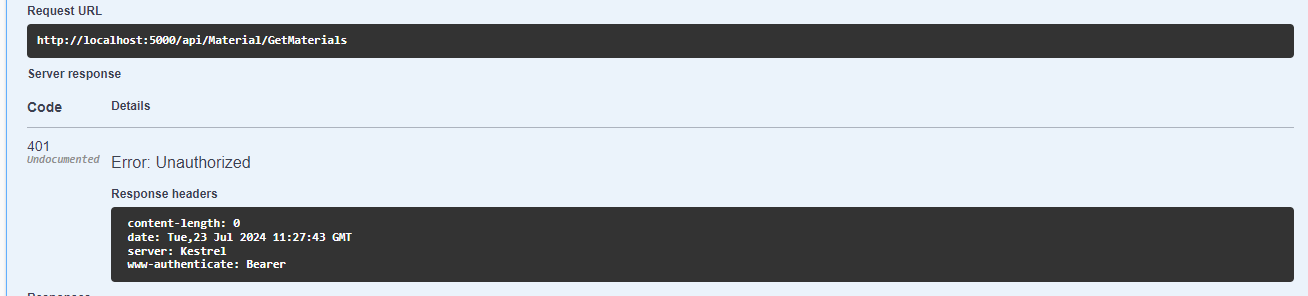
Step 14: Calling the authorized endpoints
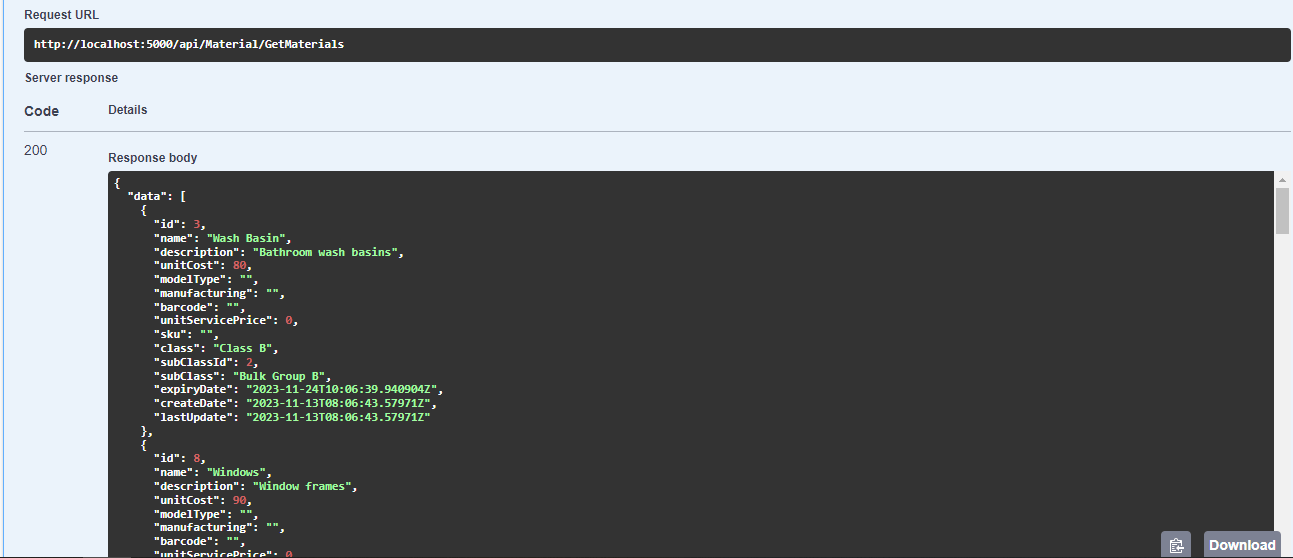
After so many long steps, we are going to test them by calling authorized endpoints. The currently logged-in user has only two permissions: reading the roles and material. Just to mention, without logging in, the API returns a 401 error:
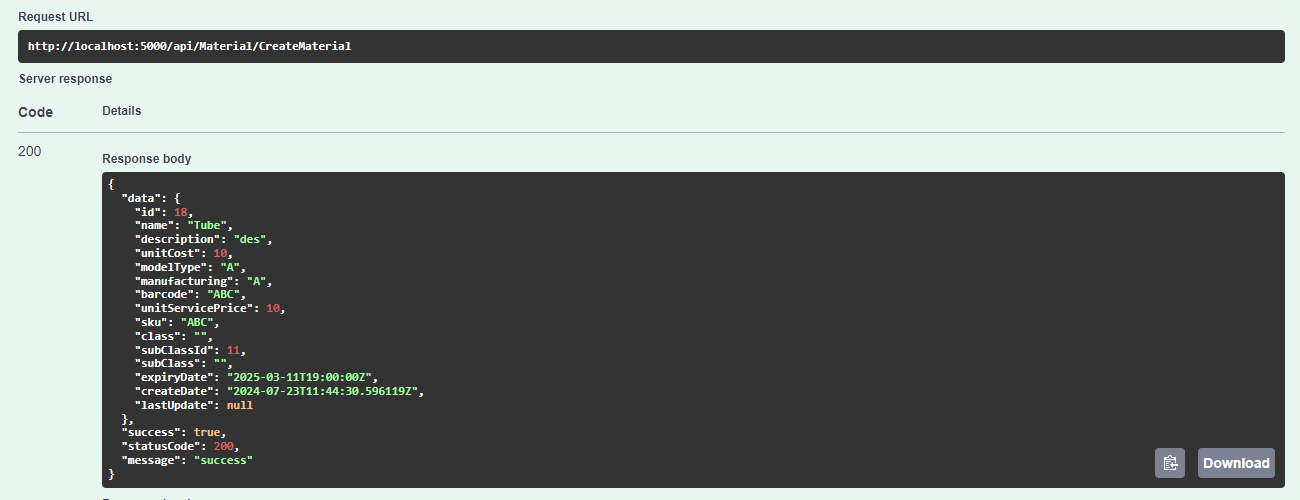
After logging in, we can successfully call the authorized endpoint:
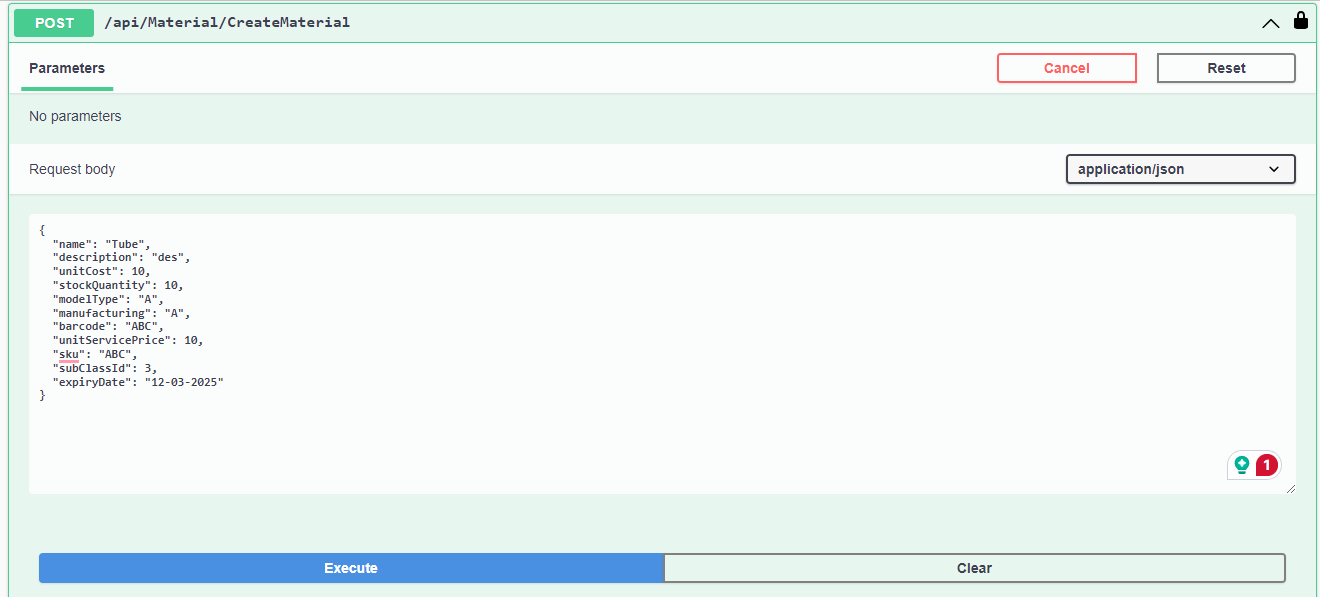
Let's try an endpoint not included in the current users’ permission:
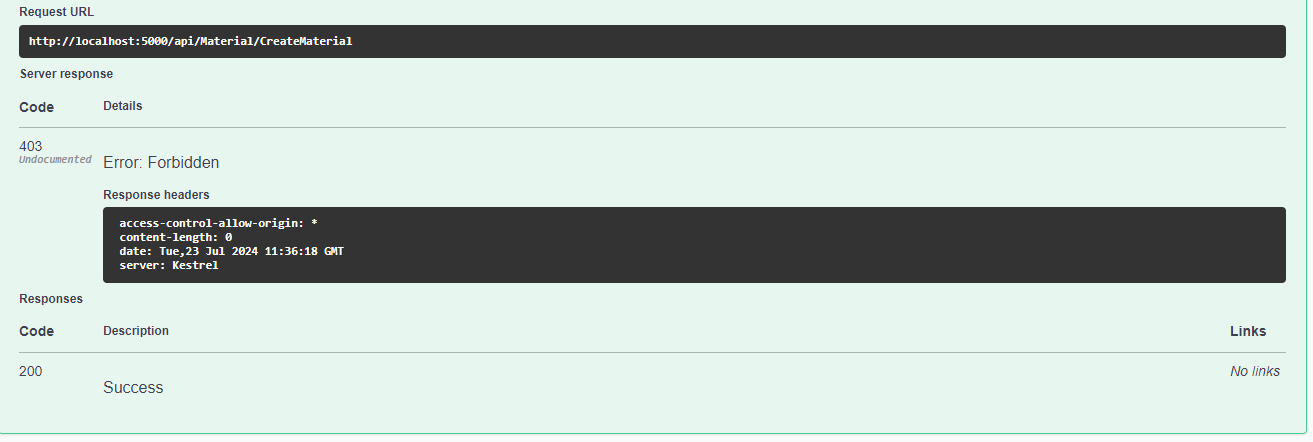
It threw Error 403 forbidden as expected. Now, let's assign this permission to our role:

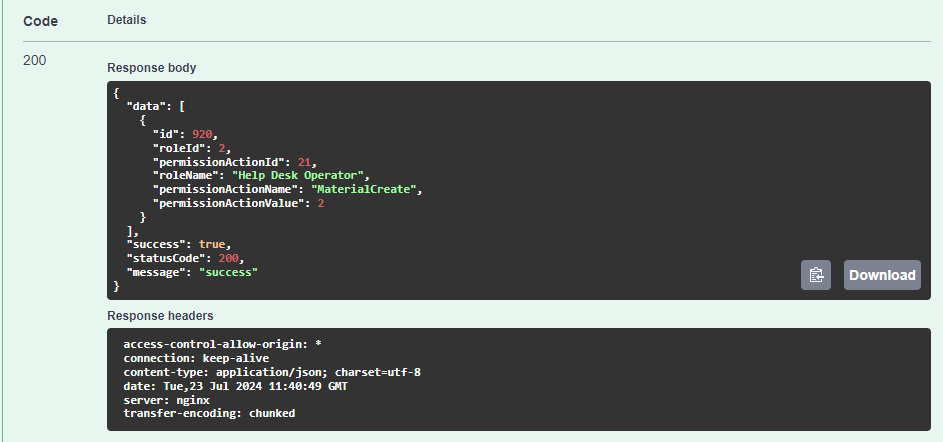
After logging in again, we got a response from the API:
Hurray! We have successfully implemented customized role permission based on our business logic.
Summary
Authentication and Authorization are some of the most critical parts of any application. While AUthenitcation secures sensitive information from external access, authorization ensures the restriction of internal members from accessing any resource which is not allowed to them. In this article, we implemented a customized role permission using .NET Core controller attribute and Identity claims. This blog provides an easy solution to applying personalized permissions to user roles following the application’s business logic.
If you are working with JWT, also make sure to check out our free JWT Decoder.
elmah.io: Error logging and Uptime Monitoring for your web apps
This blog post is brought to you by elmah.io. elmah.io is error logging, uptime monitoring, deployment tracking, and service heartbeats for your .NET and JavaScript applications. Stop relying on your users to notify you when something is wrong or dig through hundreds of megabytes of log files spread across servers. With elmah.io, we store all of your log messages, notify you through popular channels like email, Slack, and Microsoft Teams, and help you fix errors fast.

See how we can help you monitor your website for crashes Monitor your website