How to generate header images for blogs and ASP.NET Core
I have been playing with automatically creating header images for some of our sites (like this blog) lately. While looking through different services, I fell in love with Bannerbear. In this post, I'll show you how to automatically create header images for your blog posts and/or website pages using Bannerbear.

Most bloggers know that providing a header image alongside their posts will make them stand out when shared on social media. Here's a quick example of how elmah.io's posts look when shared on Twitter:
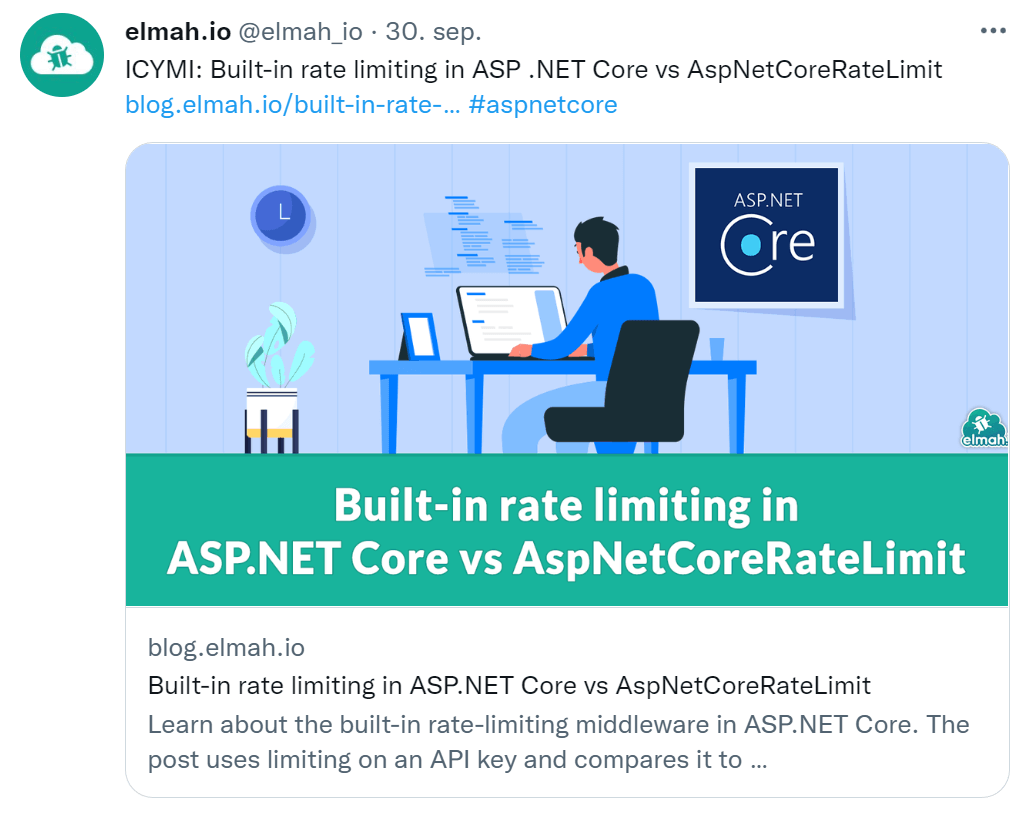
A reference to the big picture is served as part of the HTML making up our page. This is not a blog post about how to create the markup (I will write one if anyone is interested), but here are the lines specific to Twitter:
<meta name="twitter:card" content="summary_large_image" />
<meta name="twitter:title" content="Built-in rate limiting in ASP.NET Core vs AspNetCoreRateLimit" />
<meta name="twitter:description" content="Learn about the built-in rate-limiting middleware in ASP.NET Core. The post uses limiting on an API key and compares it to AspNetCoreRateLimit." />
<meta name="twitter:url" content="https://blog.elmah.io/built-in-rate-limiting-in-asp-net-core-vs-aspnetcoreratelimit/" />
<meta name="twitter:image" content="https://blog.elmah.io/content/images/2022/09/built-in-rate-limiting-in-asp.net-core-vs-aspnetcoreratelimit-1.png" />
<meta name="twitter:label1" content="Written by" />
<meta name="twitter:data1" content="Thomas Ardal" />
<meta name="twitter:site" content="@elmah_io" />
<meta name="twitter:creator" content="@thomasardal" />
The blog post header is referenced in the twitter:image meta tag. The remaining elements are all there to make the post look good when shared, but I will leave those for another post.
The image in the Twitter screenshot above is created manually. So, for the rest of this post, I'll show you how to automate it using a service named Bannerbear. Bannerbear can do a lot of things in terms of social media visuals but the feature I want to feature here is to generate header images like the one above.
Start by signing up for a trial. You will have 30 free image generations to play with. After signing up you will need to create a new Project. Projects are wrappers or boxes for Templates. And Templates are pieces of graphics that will generate header images. When creating a new template, Bannerbear will automatically create a Welcome Template:
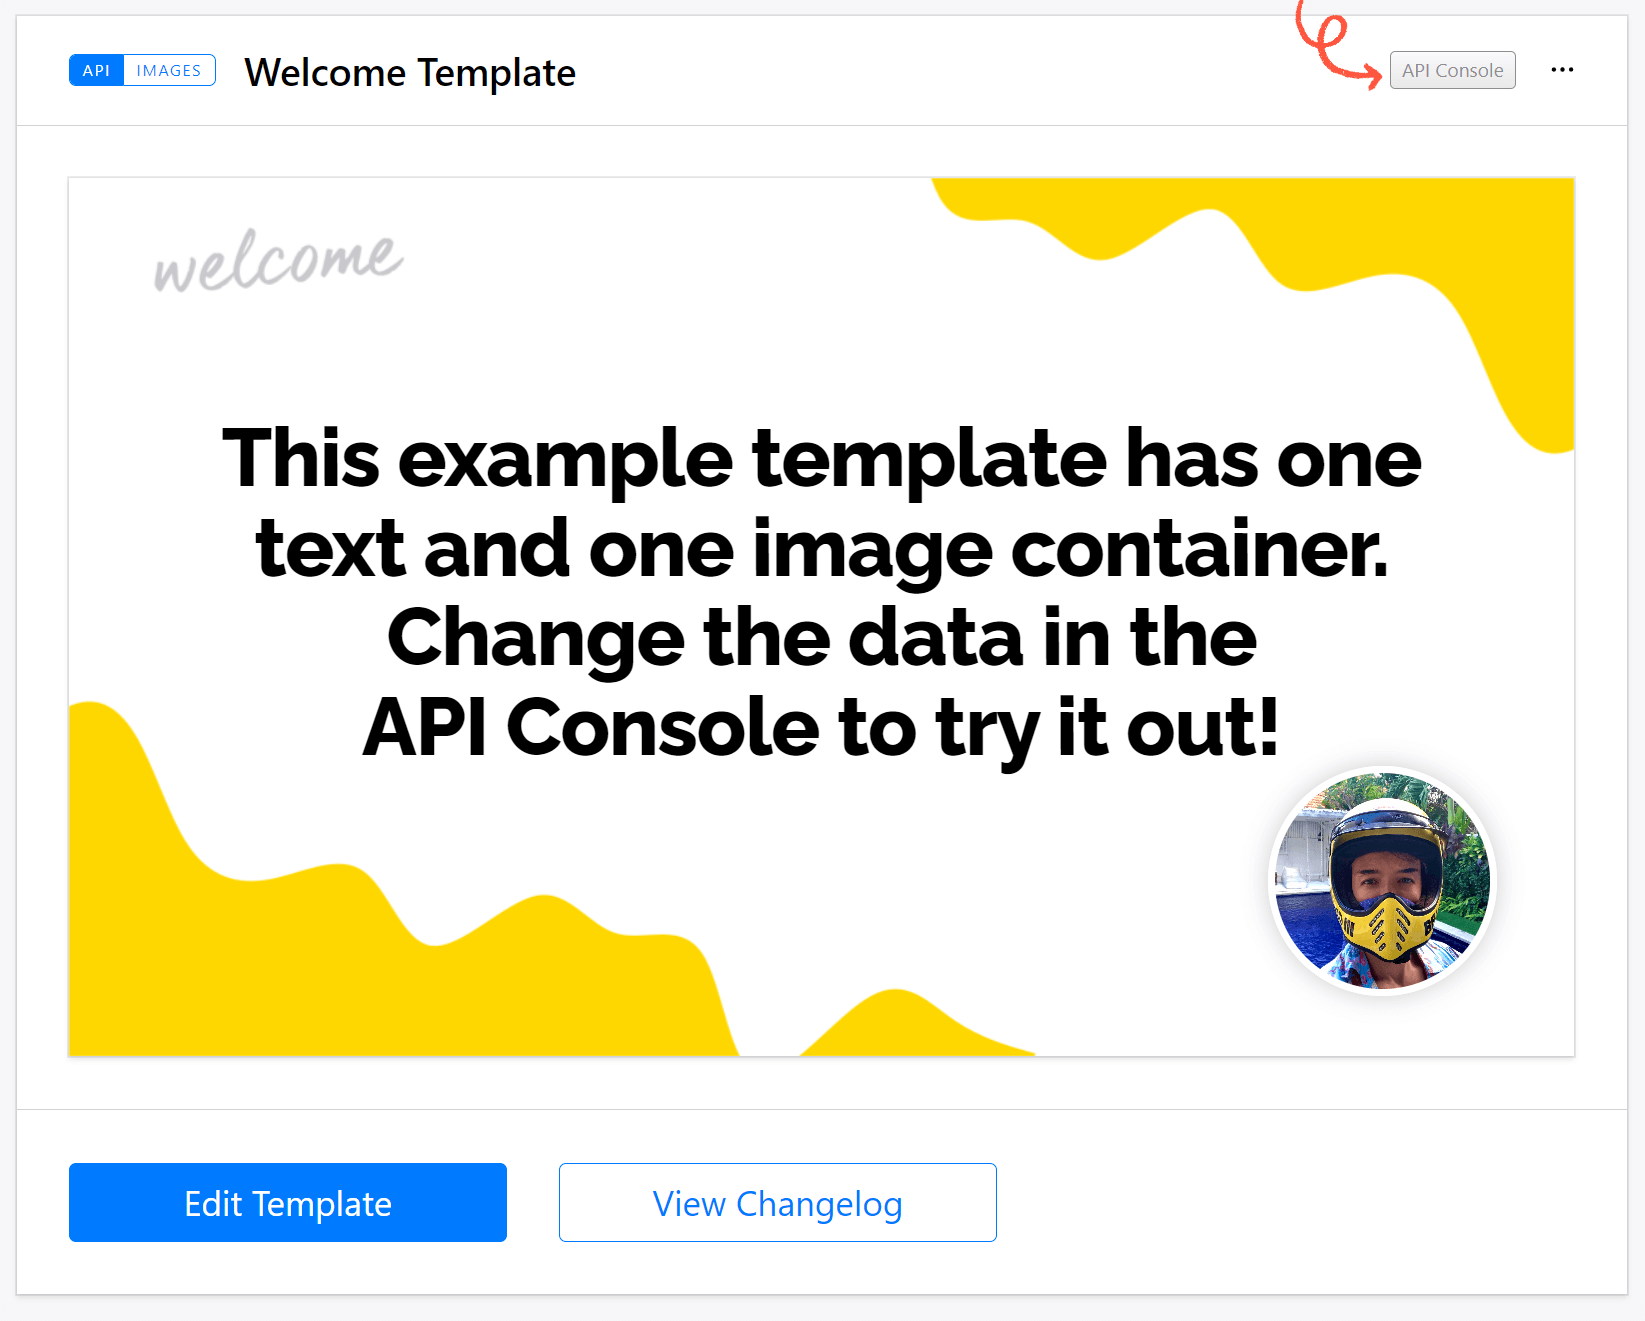
Let's click the Edit Template button to start the tailoring process. This will open the template editor:
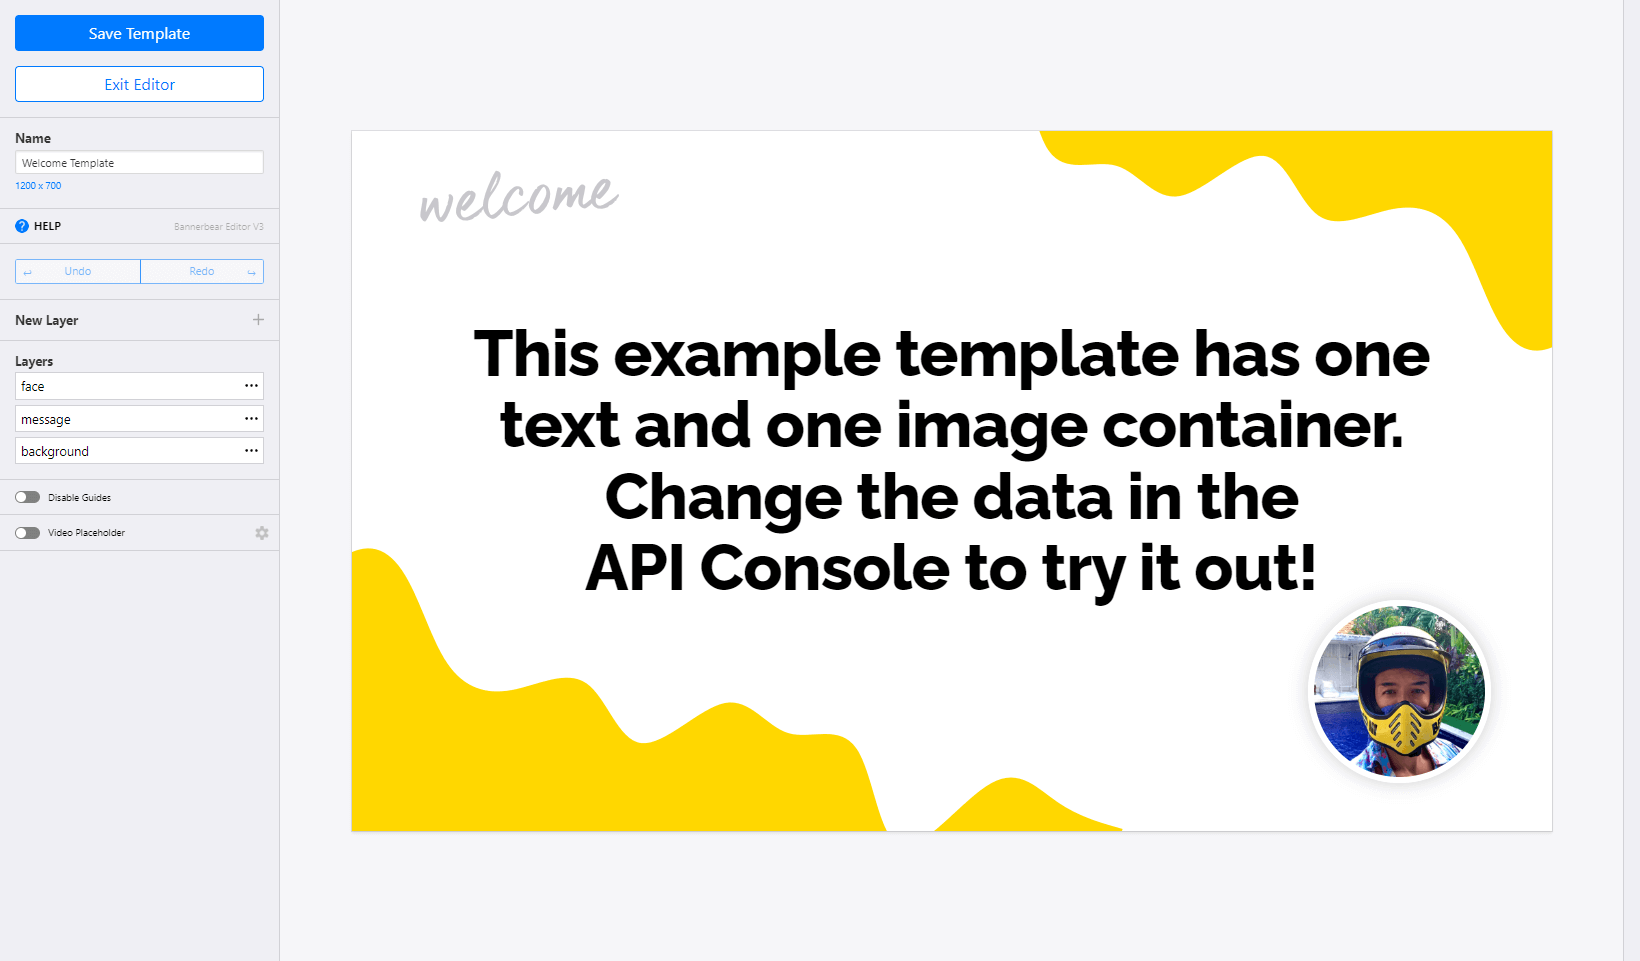
Start by giving the template a better name and adjust the dimensions (below the Name input field) if you want this to target a specific platform like Twitter. Next, click somewhere on the background image and upload a new background image. I'll use this one from the example at the beginning of this post but without any text on it:
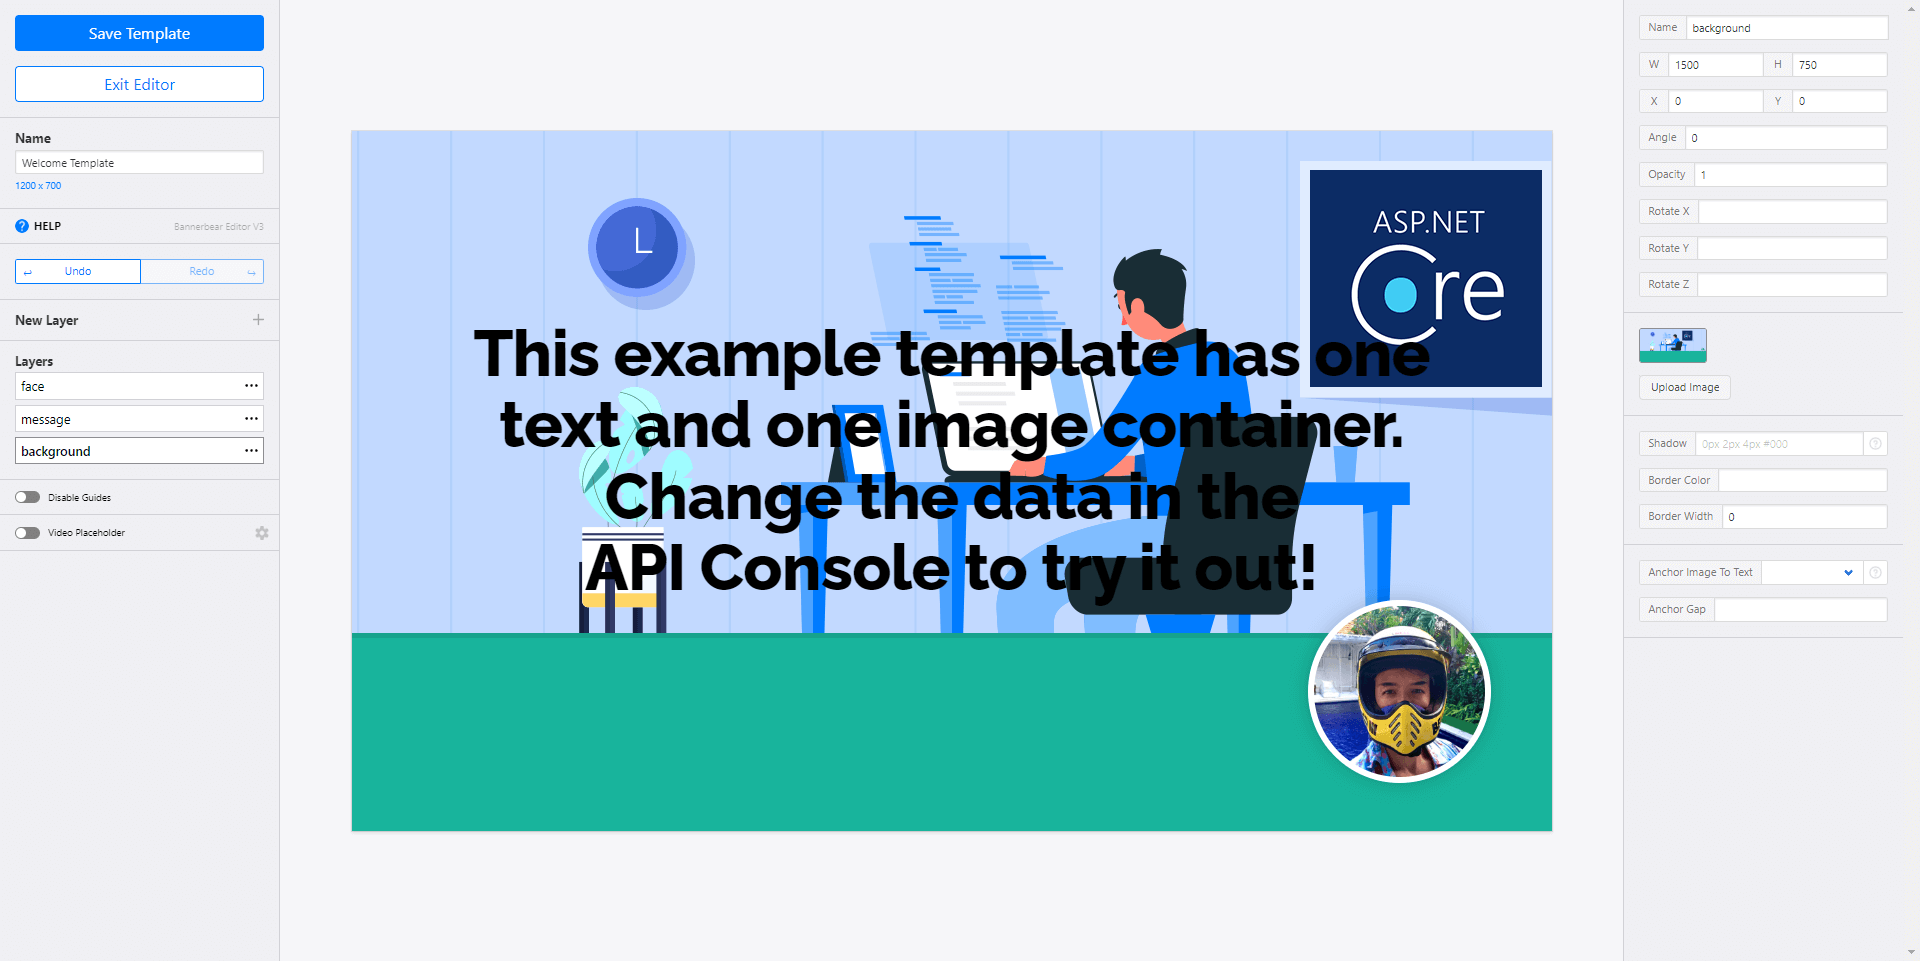
Then remove the profile photo and move the text to the bottom (I also changed the font color to white):
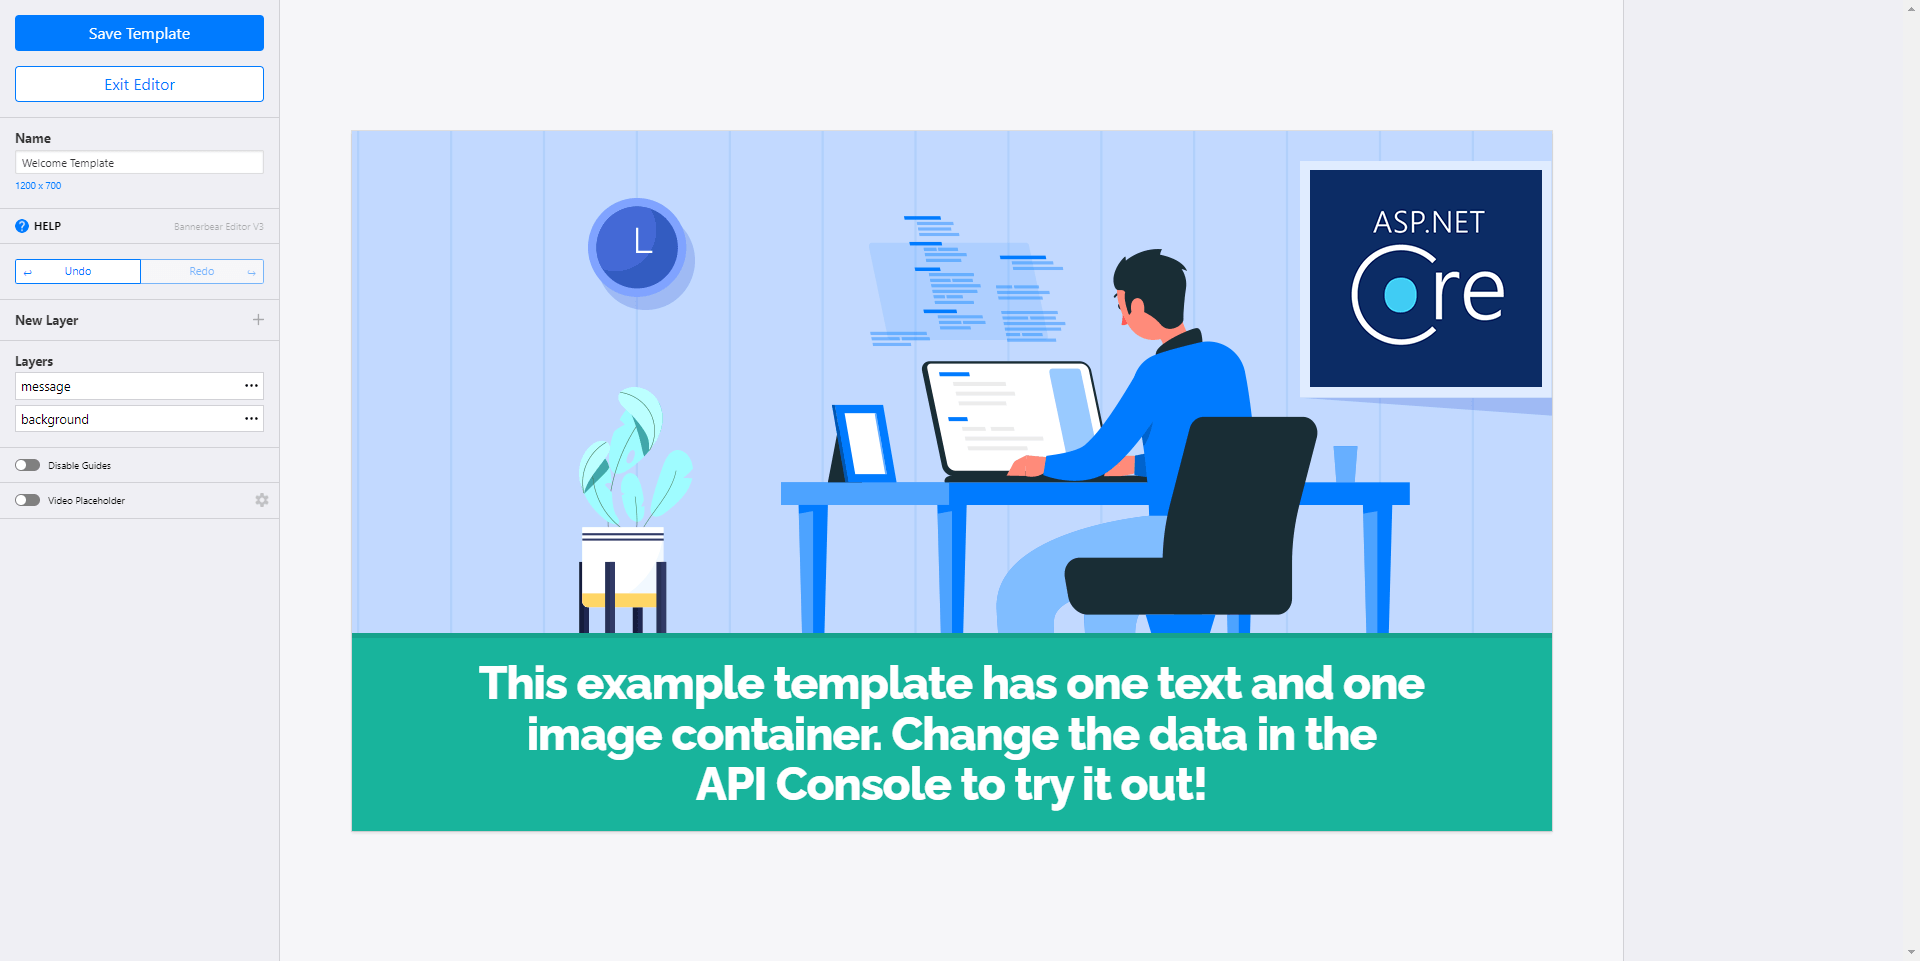
This is the finished template. As seen on the screenshot, the text contains some dummy text that we will replace in just a second. Notice the Layers section to the left and the layer named message. This is the key that we will use to replace the text dynamically.
There are many ways of generating real header images from templates. I'll dig down into a couple of options in this post but make sure to check Bannerbear's documentation for details. First, let's test it using the API Console available on the Bannerbear app:
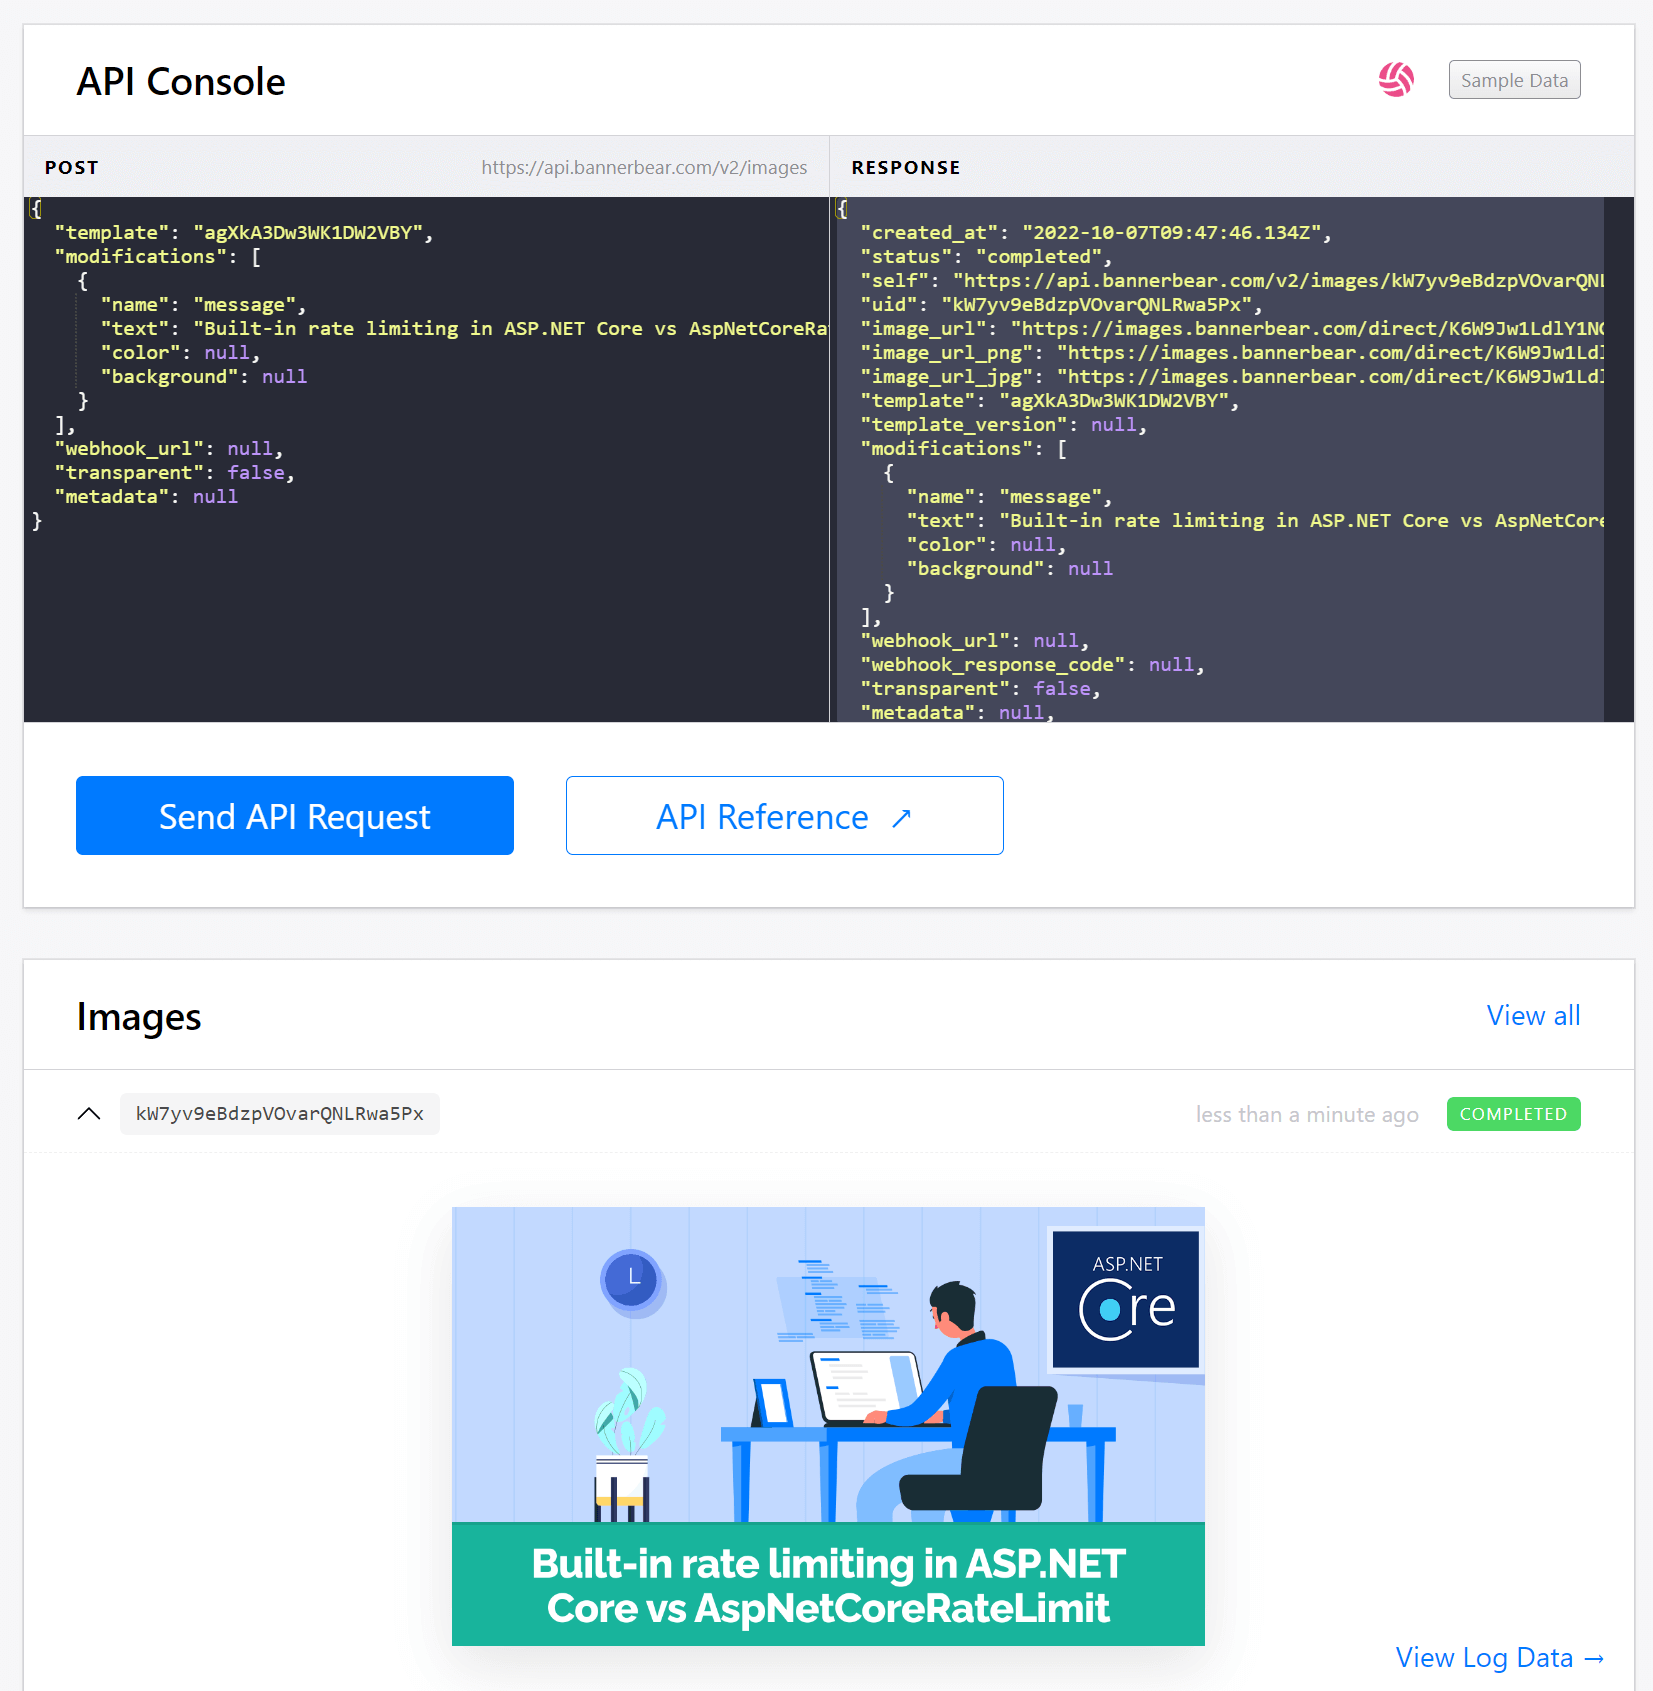
Notice how the JSON to the left contains the message variable that I mentioned previously. By setting a custom text in the text field and clicking the Send API Request button, an image with the custom text, based on the template we just created is generated.
So far so good. We can now generate custom images by creating a simple POST request. You can choose to do this manually for all of your posts or you can use another integration point offered by Bannerbear named Simple URLs. Simple URLs offer generation based on an URL that you can insert directly into your metadata like this:
<meta name="twitter:image" content="https://ondemand.bannerbear.com/simpleurl/agXkA3Dw3WK1DW2VBY/image/message/text/Built-in%20rate%20limiting%20in%20ASP.NET%20Core%20vs%20AspNetCoreRateLimit" />
When receiving this request, Bannerbear will automatically generate an image looking exactly like the one generated through the API Console. As seen in the markup, you insert the dynamic text directly in the URL. To do this, you must instruct your blog theme to insert the blog post title dynamically, depending on which software you use.
Another approach is to have a build server like Azure DevOps or GitHub Actions to generate images as part of the build. For the rest of this post, I'll generate header images dynamically in an ASP.NET Core website. If you haven't already, create a new ASP.NET Core website. I'm choosing Razor Pages for this sample, but the code should run on anything on top of ASP.NET Core.
The first step is to insert the meta-data in the _Layout.cshtml file:
<head>
    <!-- ... -->
    <meta name="twitter:url" content="@(Context.Request.Path)/banner.png?title=@ViewData["Title"]" />
</head>
Notice how I'm using the current path and postfixing with /banner.png. I also included the current page title as a query parameter which will come in handy in just a few seconds.
Next, create a new file named BannerbearMiddleware.cs and include the skeleton for an ASP.NET Core middleware class:
public class BannerbearMiddleware
{
    private readonly RequestDelegate _next;
    private readonly HttpClient _bannerbearClient;
    private readonly ILogger<BannerbearMiddleware> _logger;

    public BannerbearMiddleware(RequestDelegate next, HttpClient bannerbearClient, ILogger<BannerbearMiddleware> logger)
    {
        _next = next;
        _bannerbearClient = bannerbearClient;
        _logger = logger;
    }

    public async Task Invoke(HttpContext context)
    {
        try
        {
        }
        catch (Exception e)
        {
            _logger.LogError(e, "Error during image generation");
        }
    }
}
The class gets the usual RequestDelegate injected alongside a HttpClient and an ILogger to log any errors (to elmah.io maybe?). This piece of middleware will run for all requests why we need to ignore anything else than requests for /banner.png:
var path = context.Request.Path;
var queryParameter = context.Request.Query["title"];
if (!path.HasValue || !path.Value.EndsWith("/banner.png") || string.IsNullOrWhiteSpace(queryParameter))
{
    await _next(context);
    return;
}
Great. If we continue after the if statement we know need to return an autogenerated image. Start by requesting Bannerbear to generate the image. This code corresponds to the API request we did from the API Console inside Bannerbear:
var body = new
{
    template = "agXkA3Dw3WK1DW2VBY",
    modifications = new[]
    {
        new
        {
            name = "message",
            text = queryParameter.First()
        }
    }
};

var request = new HttpRequestMessage
{
    Method = HttpMethod.Post,
    Content = new StringContent(JsonSerializer.Serialize(body), Encoding.UTF8, "application/json"),
    RequestUri = new Uri("https://sync.api.bannerbear.com/v2/images"),
};
request.Headers.Authorization = new System.Net.Http.Headers.AuthenticationHeaderValue("Bearer", "YOUR_API_KEY");

var result = await _bannerbearClient.SendAsync(request);
var response = await result.Content.ReadFromJsonAsync<JsonObject>();

var imageUrl = (string)response["image_url"];
I'm sure you know a better way of making an HTTP request. The idea here is to showcase a POST request made to the Bannerbear API with your template id and the title as the dynamic parameter named message.
The last step is to fetch the generated image file and return it from the middleware:
var imageResponse = await _bannerbearClient.GetAsync(imageUrl);
var imageBytes = await imageResponse.Content.ReadAsByteArrayAsync();

context.Response.ContentType = "image/png";
context.Response.StatusCode = 200;
await context.Response.Body.WriteAsync(imageBytes);
The code re-uses the injected HttpClient to fetch the content of the image generated by Bannerbear and return it from your web app. Finally, the HttpClient and middleware needs to be added in the Program.cs or Startup.cs file:
builder.Services.AddHttpClient();
// ...
app.UseMiddleware<BannerbearMiddleware>();
When launching the web application and navigating to a page, the generated HTML looks like this:
<!DOCTYPE html>
<html lang="en">
<head>
    <meta charset="utf-8" />
    <meta name="viewport" content="width=device-width, initial-scale=1.0" />
    <title>Privacy Policy - BannerGeneratingWebsite</title>
    <meta name="twitter:url" content="/Privacy/banner.png?title=Privacy Policy" />
    <link rel="stylesheet" href="/lib/bootstrap/dist/css/bootstrap.min.css" />
    <!-- ... -->
When someone shares your page on Twitter, Twitter will automatically request the URL /Privacy/banner.png?title=Privacy Policy and your middleware will generate the following result:

Yay. All of your pages now automatically generate header images for Twitter, and supporting different social media is easy using Bannerbear. You probably want to optimize the middleware code provided in this post, since I didn't spend too much time checking for errors, etc. Also, the middleware will create two external HTTP requests per request to a header image on your website. Using output caching or storing the generated image for future requests is a must.
A finishing disclaimer. Bannerbear is a commercial service that requires a paid subscription. There's a free trial, so it is possible to check out the features before deciding on that product versus another. This post is not sponsored by Bannerbear, I don't know anyone working there, or anything else like that. I just like the product 😊
elmah.io: Error logging and Uptime Monitoring for your web apps
This blog post is brought to you by elmah.io. elmah.io is error logging, uptime monitoring, deployment tracking, and service heartbeats for your .NET and JavaScript applications. Stop relying on your users to notify you when something is wrong or dig through hundreds of megabytes of log files spread across servers. With elmah.io, we store all of your log messages, notify you through popular channels like email, Slack, and Microsoft Teams, and help you fix errors fast.

See how we can help you monitor your website for crashes Monitor your website