
Building a command-line tool with progress bar in .NET Core
Command-line tools can be a great utility for automation of repetitive tasks, which makes it a powerful tool for the super-user. Enhancements like a progress bar make it more user friendly and gives the user an insight into what’s happening. A second enhancement or rather a choice is to build command-line tools in .NET Core, which ensures every user can use it, no matter whether they use Mac, Linux or Windows. This blog post will show how to set up a command-line tool which accepts arguments and show how to implement the ShellProgressBar-package that enables the use of progress bars.
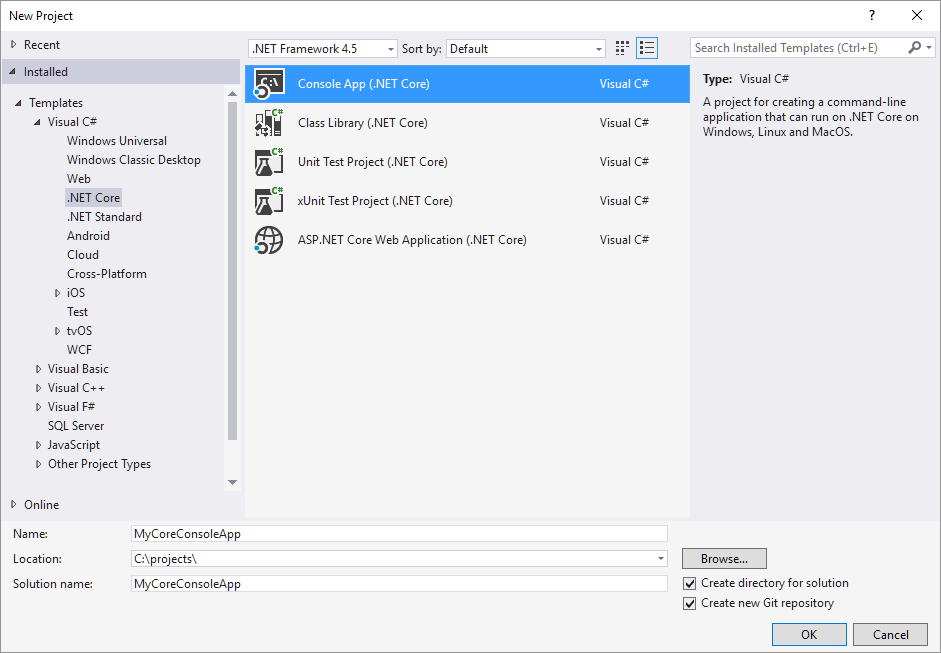
You first need a Console App for .NET Core. You can create a new one in Visual Studio with ease and you will then be ready to get started.
You need two packages for the project which both can be added via NuGet. The first one is Microsoft.Extensions.CommandlineUtils. It enables the application to handle the arguments given to it, which will be elaborated on further below. The second package is ShellProgressBar, which is created by Mpdreamz. This gives us an easy tool for displaying a progress bar.
We have created a fictional task, which is to create a group of files containing hash codes for some strings, to guide you through the different types of options. To start, we go to our program's main method that gets the arguments on start. We then initialize a new CommandLineApplication object and set its description, etc.
var app = new CommandLineApplication();

app.Description =
    "Creates files with the names of given strings and containing the coresponding hashcode.";
app.HelpOption("-?|-h|--help");
app.ExtendedHelpText =
    "Following argument is required -strings and options are case sensitive.";
The HelpOption sets the syntax wanted for the standard help command and the ExtendedHelpText method is shown at the start of the help response and should contain information about the options which will be added below.
To be able to parse our strings to our program, we need to add an option. The type of Option is MultipleValue which accepts a string but can be used multiple times. It’s made by using the Option-method from our app object, which requires a string defining the syntax much the same way as the HelpOption-method does, as well as a description of the option for the help menu and lastly, an Integer describing the option type. The integer is in this example given with the enum CommandOptionType.
var stringsOpt = app.Option(
    "-add|--add <string>",
    "Defines one of the strings you wish to create a file for. Ex \" -add hello \"",
    CommandOptionType.MultipleValue);
We then want to add an option to choose a path for the files, which will be done by choosing the SingleValue-option.
var pathOpt = app.Option(
    "-path|--path <path>",
    "Defines the path of the files to write to. Ex \" -path C:\\myDirectory\\\". Defaults to the relative directory",
    CommandOptionType.SingleValue);
Finally, we also wish to add an option for adding the current timestamp to the names of the files, which is made easy by using the NoValue option. It conveniently does not accept a value and simple returns “on” if the option is used. This makes it easy to translate it to a boolean later.
var enableTimestampOpt = app.Option(
    "-timestamp|--timestamp",
    "Option for the filenames to be extended by the current timestamp",
    CommandOptionType.NoValue);
We have now defined our options and are ready to begin to handle what happens when the application is executed. We need to give the function OnExecute a delegate of a function or shorthand by just using a lambda expression with a body, which will run when the Execute function gets called. Since the OnExecute function has int as return type, you must return some integer at the end. We will later pass this integer as the exit code for some debug insight, but for now we will just return 0 at the end.
app.OnExecute(() =>
{
    return 0;
});
We now want to check the options which have been used and inform the user if the required -strings option were not used.
app.OnExecute(() =>
{
    if (!stringsOpt.HasValue())
    {
        Console.WriteLine(
            "The -strings options is required. Please use the --help option for more info.");
        return 0;
    }
    else
    {
        List<String> strings = stringsOpt.Values;

        String path = "";
        if (pathOpt.HasValue()) path = pathOpt.Value();

        if (enableTimestampOpt.HasValue())
            path += DateTime.Today.ToString("yyyy-MM-dd-hh-mm-ss ");

        CreateHashFiles(strings, path);
        return 1;
    }
});
After parsing the options to more conventional types, we send them to our method CreateHashFiles, which will be specified in a bit. Now that we have made the handler for the execute command, we just need to execute it. It’s recommended that this is done in a try-catch statement since the program will throw an exception if the user inputs invalid arguments.
try
{
    int result = app.Execute(args);
    Environment.Exit(result);
}
catch (Exception ex)
{
    Console.WriteLine(
        "Couldn't pass your command. Try using the option --help to find out more.");
    Console.WriteLine(ex.Message);
}
The Execute function is given the args variable, which is the parameter specified in the main method. The execution of the application is saved in an integer and we pass this to the Exit command, which accepts an exit code. This can then be seen in the Output window when the program closes, while you debug. The catch part of the statement generalizes to Exceptions of any kind, but if you want to catch the exception of the invalid arguments individually, then that can be done by cathing a CommandParsingException before the general exception catch.
try
{
    ...
}
catch (CommandParsingException ex)
{
    Console.WriteLine(
        "Couldn't pass your command. Please use the --help option for more info.");
    Console.WriteLine(ex.Message);
}
catch (Exception ex)
{
    Console.WriteLine("An unexpected error occured. Please use the --help option for more info.");
    Console.WriteLine(ex.Message);
}
We are ready to parse options to the application with the part that we have done until now. Below are examples of options to use when calling the application. Because it is written in .NET Core it compiles to a dll, so it’s important to run the app using dotnet. The following examples are on how to use the options and run the library in Windows:
Dotnet MyCoreConsoleApp.dll -add someHashableString
Dotnet MyCoreConsoleApp.dll -add someHashableString -add someOtherHashableString
Dotnet MyCoreConsoleApp.dll -add someHashableString -path C:\hashfiles\
Dotnet MyCoreConsoleApp.dll -add someHashableString -path C:\hashfiles\ -timestamp
We are now ready to get to the CreateHashFiles-method, which will write to the files and show the progress using the ShellProgressBar package.
We first must initialize a new ProgressBarOptions object where we specify the colour scheme and other details for our progress bar.
private static void CreateHashFiles(List<String> strings, String path)
{
    var options = new ProgressBarOptions
    {
        ProgressCharacter = '#',
        ProgressBarOnBottom = false,
        ForegroundColorDone = ConsoleColor.Green,
        ForegroundColor = ConsoleColor.White
    };
}
We then create a new instance of a ProgressBar in a using-block which ensures that it auto disposes if the program should throw an exception while the progress bar is active. The ProgressBar constructor takes three parameters. The first one is an integer setting the number of steps in the progress, secondly a string that will be displayed while the process is running and lastly, the options object we created before.
using(var pbar = new ProgressBar(strings.Count, "Writing hashes to files", options))
{
    ...
}
We can now use the Tick-method on our progress bar inside the block. Below is shown how that is done within the loop of our loop over the strings.
using (var pbar = new ProgressBar(strings.Count, "Writing hashes to files", options))
{
    foreach (String s in strings)
    {
        String filename = path + s + ".txt";
        if (File.Exists(filename)) File.Delete(filename);
        using (StreamWriter writer = File.AppendText(filename))
        {
            pbar.Tick("Writing file for string \"" + s + "\"");
            writer.WriteLine(s.GetHashCode());
        }
    }
}
The application is now ready. This specific application might not be that useful, but it could be a strong tool, by tweaking the code just a bit. For example, adding a call to an API, calling a separate program in the loop or generally just doing bigger tasks than hashing a string.
An example of this could be the new elmah.io CLI. This tool accepts a variety of commands and options. One of the commands calls the elmah.io API through the Elmah.Io.Client package and streams the specified logs to a local file. The user gets a better idea of how far the program is in the process by using the progress bar.
This is the full code which is also available on this git repository.
elmah.io: Error logging and Uptime Monitoring for your web apps
This blog post is brought to you by elmah.io. elmah.io is error logging, uptime monitoring, deployment tracking, and service heartbeats for your .NET and JavaScript applications. Stop relying on your users to notify you when something is wrong or dig through hundreds of megabytes of log files spread across servers. With elmah.io, we store all of your log messages, notify you through popular channels like email, Slack, and Microsoft Teams, and help you fix errors fast.

See how we can help you monitor your website for crashes Monitor your website