How to send push notifications to a browser in ASP.NET Core
Progressive Web Apps (PWAs) enables a website to make make a lot of interactions that are app-like. Among these are Push Notifications. This is a functionality that enables you to make native notifications for many different devices and to invoke these notifications even when the browser is not active. A lot of websites like the Twitter web app use this functionality with its original intent, but there are of cause also sites who use it maliciously. In this article, we will show how you can subscribe to Push Notifications using ASP.NET Core and how you can send Push Notifications from .NET as well.
Setting up a minimal PWA
Before we can get started we need to set up a minimal Service Worker and Manifest to meet the minimum requirements for a PWA (Progressive Web App) since this we need a PWA for using the Notification API.
We first create the manifest by making a JSON file called manifest.json which we will place in the wwwroot folder.
{
    "name": "PWA Push Notification",
    "short_name": "Push",
    "icons": [
        {
            "src": "/images/icon-48x48.png",
            "sizes": "48x48",
            "type": "image/png"
        },
        {
            "src": "/images/icon-512x512.png",
            "sizes": "512x512",
            "type": "image/png"
        },
        {
            "src": "/images/icon-192x192.png",
            "sizes": "192x192",
            "type": "image/png"
        }
    ],
    "start_url": "/",
    "display": "standalone",
    "background_color": "#959595",
    "theme_color": "#FFFFFF"
}
Here we define the name for the app, the name that will be displayed in the app, if installed on a device, icons for the app in a variety of sizes, the front page URL of the site if the website can be installed as a standalone app, and at the end theme colors. We add a reference to the manifest in the head of our layout file which is used in all our views <link rel="manifest" href="/manifest.json">.
We then need to add a Service Worker. We make the minimal Service Worker by creating a JavaScript file ServiceWorker.js, also in the wwwroot folder with the following content.
self.addEventListener('fetch', function (event) { });
We reference the service worker by inserting the following script either in a script tag element in your layout file or directly in your main js file if you have such one.
if ('serviceWorker' in navigator) {
    window.addEventListener("load", () => {
        navigator.serviceWorker.register("/ServiceWorker.js");
    });
}
This code simply checks if your browser supports Service Workers and registers your Service Worker if it does so. Now we have a working Manifest and Service Worker.
Subscription and push flow
There are 3 primary actors in the subscription/push flow. The web page (includes Service Worker), the push service, and the server. This flow uses a pair of keys, a private and public from a standard called VAPID (Voluntary Application Server Identification). There are other ways to secure the communication e.g. FCM (Firebase Cloud Messaging), but VAPID doesn't require you to use any specific platform so we use that. To start we need to make a key pair and save this in our app settings. It's an open standard that uses elliptic curve cryptography and there are a lot of implementations that generate these pairs like the python library py-vapid, the node module web-push or the online tool tools.reactpwa.com/vapid. We will generate a pair and add it to appsettings.json.
{
    "VAPID": {
        "subject": "mailto:mail@example.com",
        "publicKey": "BPTnFPVQFAhlIFSWqAjFPtQeEz ... udykg",
        "privateKey":  "4jO3OrjQY2ilE ... yuhZWho47Q"
    }
}
The private key is never used in other places than on the server and should be kept a secret. The public key is distributed to the web page and the push service to validate messages. We will send the public key in the next part and the webpage will distribute it to the push service when subscribing. The public key is used when subscribing so that the push messages from the server can be authenticated because they are signed using the private key. When the web page subscribes to the push service it gets back an endpoint which the server will use to send its push message and the two variables p256dh and auth will be used to identify the subscription since they are used when constructing the message.
Subscribe to Push Notifications
We now want to make a view where we go through a few steps to subscribe to Push Notifications. We separate this into 3 states. First, we have a part that we will display if the user has not decided if they will allow Notifications. Then we have a part that we will display either if the browser does not support Notifications or if the user has blocked Notifications. Last, we have a form that we will use to submit an identifier for the user, the endpoint, and the two subscription identification variables p256dh and auth.
<h1>Subscribe to Push Notifications</h1>
<div id="GiveAccess" style="display:none;">
    Give access to making notifications:
    <button id="PromptForAccessBtn">Prompt</button>
</div>
<div id="NoSupport" style="display:none;">
    Your browser does not support Push Notifications or you have blocked notifications
</div>
<form asp-action="Index" id="form" style="display:none;">
    <label for="client">Your name: </label>
    <input id="client" name="client" /><br />

    <input id="endpoint" name="endpoint" hidden />
    <input id="p256dh" name="p256dh" hidden />
    <input id="auth" name="auth" hidden />

    <button type="submit">Subscribe</button>
</form>
We will write a bit JavaScript to control when these different parts are shown and to get the hidden fields for the form.
@section Scripts {
    <script>
        if ('serviceWorker' in navigator) {
            window.addEventListener("load", () => {
                navigator.serviceWorker.register("/ServiceWorker.js")
                    .then((reg) => {
                        if (Notification.permission === "granted") {
                            $("#form").show();
                            getSubscription(reg);
                        } else if (Notification.permission === "blocked") {
                            $("#NoSupport").show();
                        } else {
                            $("#GiveAccess").show();
                            $("#PromptForAccessBtn").click(() => requestNotificationAccess(reg));
                        }
                    });
            });
        } else {
            $("#NoSupport").show();
        }

        function requestNotificationAccess(reg) {
            Notification.requestPermission(function (status) {
                $("#GiveAccess").hide();
                if (status == "granted") {
                    $("#form").show();
                    getSubscription(reg);
                } else {
                    $("#NoSupport").show();
                }
            });
        }

        function getSubscription(reg) {
            reg.pushManager.getSubscription().then(function (sub) {
                if (sub === null) {
                    reg.pushManager.subscribe({
                        userVisibleOnly: true,
                        applicationServerKey: "@ViewBag.applicationServerKey"
                    }).then(function (sub) {
                        fillSubscribeFields(sub);
                    }).catch(function (e) {
                        console.error("Unable to subscribe to push", e);
                    });
                } else {
                    fillSubscribeFields(sub);
                }
            });
        }

        function fillSubscribeFields(sub) {
            $("#endpoint").val(sub.endpoint);
            $("#p256dh").val(arrayBufferToBase64(sub.getKey("p256dh")));
            $("#auth").val(arrayBufferToBase64(sub.getKey("auth")));
        }

        function arrayBufferToBase64(buffer) {
            var binary = '';
            var bytes = new Uint8Array(buffer);
            var len = bytes.byteLength;
            for (var i = 0; i < len; i++) {
                binary += String.fromCharCode(bytes[i]);
            }
            return window.btoa(binary);
        }
    </script>
}
There are quite a lot of functions in this script block. Let's go through them one at a time.
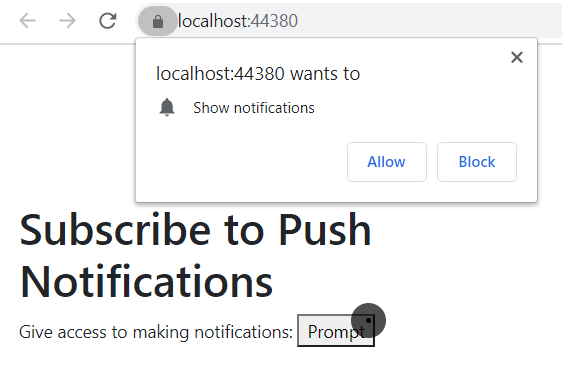
First, we register our Service worker again. We do this both to check if it can be registered. If it can't then we display the appropriate UI part. We also do it to get the Registration object for the Service Worker. We then check if the user has given access to make Notifications. If they granted access then we show the form and call the getSubscription function which also fills out the hidden fields in the form. If they have blocked notifications then we show the no-support UI part. The third scenario is that the user has not decided yet in which case we will show the UI part for requesting access to make notifications. We also subscribe to the click event for the PromptForAccessBtn in which case we will invoke the requestNotificationAccess function. The following is how it looks when the prompt is invoked in Chrome on desktop.
The requestNotificationAccess function simply requests permission for making notifications and reacts to the result of the prompt. If they granted the permission then we show the form and call the getSubscription function once again and if they block we show the no-support UI part.
In the getSubscription function we want to get a subscription object from the Service Worker. We first try to get it by calling reg.pushManager.getSubscription. This method returns a subscription object if there already exists one. If it did return a subscription then we parse that to the fillSubscribeFields function. If there was no subscription then we try to make one by calling reg.pushManager.subscribe. We parse the public key to this function using the razor ViewBag. To parse this from the controller we simply add the following to our controller and action for this view. In my small example, I just use the HomeController since this is a small example.
public class HomeController : Controller
{
    private readonly IConfiguration configuration;

    public HomeController(IConfiguration configuration)
    {
        this.configuration = configuration;
    }
    public IActionResult Index()
    {
        ViewBag.applicationServerKey = configuration["VAPID:publicKey"];
        return View();
    }
}
Note that we inject IConfiguration into the controller, but that we have not added it in the startup.cs file. This can be done because IConfiguration is automatically dependency injected in ASP.NET. If reg.pushManager.subscribe returns a subscription then we simply use that to call fillSubscribeFields now. If something goes wrong and we do not get a subscription then we have no other option than to log an error. This error could occur if the public key is not generated correctly.
The fillSubscribeFields function fills out the hidden inputs in the form. The endpoint is available as a field in the subscription object. The p256dh and auth variables are available through the getKey function on the object but they are returned as Array Buffers. So we use a function we have made called arrayBufferToBase64 which converts Array Buffers to a base 64 string.
Saving the subscription
We have made a form that posts the subscription information. We need to define the action that receives this post and save it somehow. We create a new action in our controller.
[HttpPost]
public IActionResult Index(string client, string endpoint, string p256dh, string auth)
{
    if (client == null)
    {
        return BadRequest("No Client Name parsed.");
    }
    if (PersistentStorage.GetClientNames().Contains(client))
    {
        return BadRequest("Client Name already used.");
    }
    var subscription = new PushSubscription(endpoint, p256dh, auth);
    PersistentStorage.SaveSubscription(client, subscription);
    return View("Notify", PersistentStorage.GetClientNames());
}
We define that this action handles a post by setting the attribute [HttpPost]. The action takes the same arguments as we have parsed to it from the form. The goal of this action to save the given parameters so that they can be used later. We use a placeholder for any kind of persistent storage which we call PersistentStorage. This could be any kind of database or even Azure Blob Storage. In the body, we first check if the submitted client name is null in which case we return BadRequest. This should probably be handled with an error screen of some sort if this was a real scenario. We also check if the client's name is already used in which case we also return BadRequest. Then if things are looking good we make a new PushSubscription object which takes all the subscription details as arguments. The PushSubscription class is from the package WebPush-NetCore which handles how to send a notification for us. We then save the PushSubscription object in our persistent storage. If this were to be saved in a database then there would probably be needed some serialization/deserialization process for this or as an alternative just save each field individually. In the end, we return a new view in which we can make the push notification. We will let anyone have access to this page for demonstration purposes, but this page should probably only be available for administrators in most cases. We will make this action and view after the next section.
Event listeners in Service Worker
Now, we have made it so that the server has the endpoint and the keys it needs to make a push notification. But before we push a notification we need to make the listeners that handle when a notification is pushed. These are defined in our Service Worker. First, we make the listener for a new push message by adding the following to ServiceWorker.js.
self.addEventListener('push', function (e) {
    var body;

    if (e.data) {
        body = e.data.text();
    } else {
        body = "Standard Message";
    }

    var options = {
        body: body,
        icon: "images/icon-512x512.png",
        vibrate: [100, 50, 100],
        data: {
            dateOfArrival: Date.now()
        },
        actions: [
            {
                action: "explore", title: "Go interact with this!",
                icon: "images/checkmark.png"
            },
            {
                action: "close", title: "Ignore",
                icon: "images/red_x.png"
            },
        ]
    };
    e.waitUntil(
        self.registration.showNotification("Push Notification", options)
    );
});
The event listener receives a package containing some data. The data is in our case just plain text which we retrieve by calling .text(). It could have been a JSON object in which case we would call .json() instead. If it's an empty message then we just default to some standard message. Then comes the primary part of this function, the options object. This defines what text will be displayed in the notification, the icon that will be shown, how the notification will vibrate (only available on phones), and extra data that some operating systems might use when showing the notification. We can also define different actions in the options object. We have made two actions. One which indicates that something will happen and another which closes the notification. We have defined an ID, the text for the action, and an icon for the action for each action. The icon is optional We use the options object as an argument to the showNotification which makes the actual notification. A title for the notification is also defined in this function and would normally be the same as the name of your web app as this will be shown with your logo at the top of the notification on most platforms. We have defined two actions, but we have not yet defined what happens when they are used. For this, we define another event listener in the Service Worker.
self.addEventListener('notificationclick', function (e) {
    var notification = e.notification;
    var action = e.action;

    if (action === 'close') {
        notification.close();
    } else {
        // Some actions
        clients.openWindow('http://www.example.com');
        notification.close();
    }
});
This listener gets a package that contains a reference to the notification and an action field that contains the ID for the action that was selected. We then close the notification if they press the close action and do what we want to do else. In this case, we direct the user to a website, but we could also run any other JavaScript code. We could have called an action in our controller and log the action if we interested in seeing how many users clicked/closed the notifications.
Pushing the notification
Now, we have made it to the last part: Actually sending the push notification. First, we make a new view in which we will pick a client that we will push a message. This is the Notify view that we have referenced earlier.
@model List<string>

<h1>Send Push Notifications</h1>
@if (Model.Count() == 0)
{
    <p>There are no active subscribers</p>
}
else
{
    <form asp-action="Notify">
        <label for="message">Message: </label>
        <input id="message" name="message" /><br />
        @foreach (string client in Model)
        {
            <input type="radio" id="@(client)_identifier" name="client" value="@client">
            <label for="@(client)_identifier">@client</label><br>
        }
        <button type="submit">Push</button>
    </form>
}
The following picture shows the result of this picture.
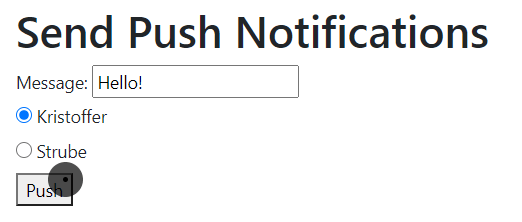
The view uses a list of strings as its model. Each string will represent a client. We parse this list to the view from our action.
public IActionResult Notify()
{
    return View(PersistentStorage.GetClientNames());
}
We first check if there are no strings in the list and display a fitting message if so. If there are strings in the list, then we are ready to go. We make a form that will post to an action which we also call Notify. In the form, we first make an input for a message that we will send. After that, we make a radio button for each of the clients in the list with corresponding labels. Now we just need to make an action for the post.
[HttpPost]
public IActionResult Notify(string message, string client)
{
    if (client == null)
    {
        return BadRequest("No Client Name parsed.");
    }
    PushSubscription subscription = PersistentStorage.GetSubscription(client);
    if (subscription == null)
    {
        return BadRequest("Client was not found");
    }

    var subject = configuration["VAPID:subject"];
    var publicKey = configuration["VAPID:publicKey"];
    var privateKey = configuration["VAPID:privateKey"];

    var vapidDetails = new VapidDetails(subject, publicKey, privateKey);

    var webPushClient = new WebPushClient();
    try
    {
        webPushClient.SendNotification(subscription, message, vapidDetails);
    }
    catch (Exception exception)
    {
        // Log error
    }

    return View(PersistentStorage.GetClientNames());
}
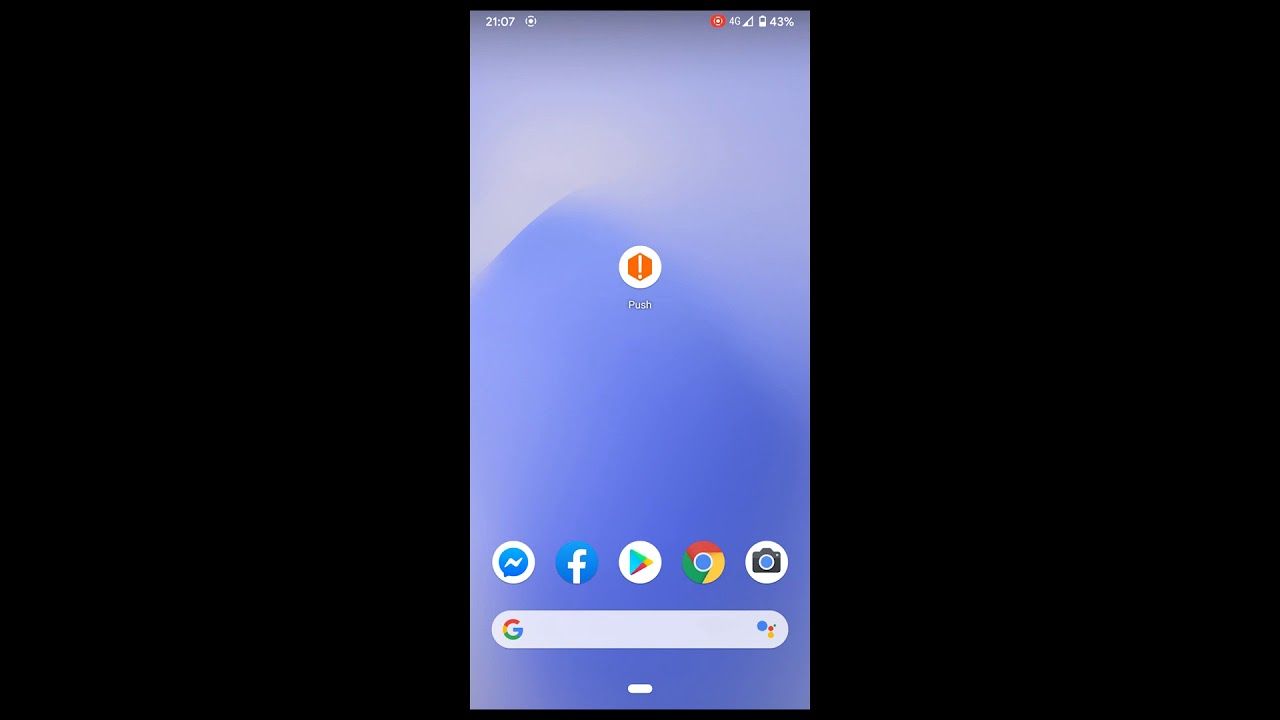
In the action, we first check if a client was selected and if the client exists. Then we extract the public key, private key, and our email from our previously injected IConfiguration. These are passed to the constructor of a new VapidDetails which is also from the WebPush-NetCore package. Then a WebPushClient is created which can send the Push Notification. The SendNotification method is called in a try-catch block. This is done because there are a couple of different errors that occur e.g. if the user has unsubscribed from notification or if the service worker has been updated without re-subscribing. In the end, the Notify view is returned again so that a new notification can be pushed. The following video shows the result of this process.
Conclusion
Now we have set up at minimal Service Worker and Manifest. We have made a view that enables the user to allow notifications and to subscribe to Push Notifications. We have made event listeners in the Service Worker which handles when notifications are pushed. In the end, we have pushed a notification from the server using the WebPush-NetCore package. There are multiple places where this example could be improved with regards to security and aesthetics, but it still encapsulates the main functionality of Push Notifications and how it works together with ASP.NET Core.
elmah.io: Error logging and Uptime Monitoring for your web apps
This blog post is brought to you by elmah.io. elmah.io is error logging, uptime monitoring, deployment tracking, and service heartbeats for your .NET and JavaScript applications. Stop relying on your users to notify you when something is wrong or dig through hundreds of megabytes of log files spread across servers. With elmah.io, we store all of your log messages, notify you through popular channels like email, Slack, and Microsoft Teams, and help you fix errors fast.

See how we can help you monitor your website for crashes Monitor your website